1/48th scale HPH Concorde
Re: 1/48th scale HPH Concorde
![]() by Cap'n Wannabe » Tue Oct 06, 2015 6:17 am
by Cap'n Wannabe » Tue Oct 06, 2015 6:17 am
Bloody awesome!
Pretending to do it TAC style with the big boys since 1987
Also, we don't need no steenkin' VLATs!
Also, we don't need no steenkin' VLATs!
- Cap'n Wannabe
- Posts: 1380
- Joined: Mon Apr 14, 2014 6:00 pm
- Location: Craigieburn, Victoria
Re: 1/48th scale HPH Concorde
![]() by Ericg » Mon Oct 12, 2015 5:33 pm
by Ericg » Mon Oct 12, 2015 5:33 pm
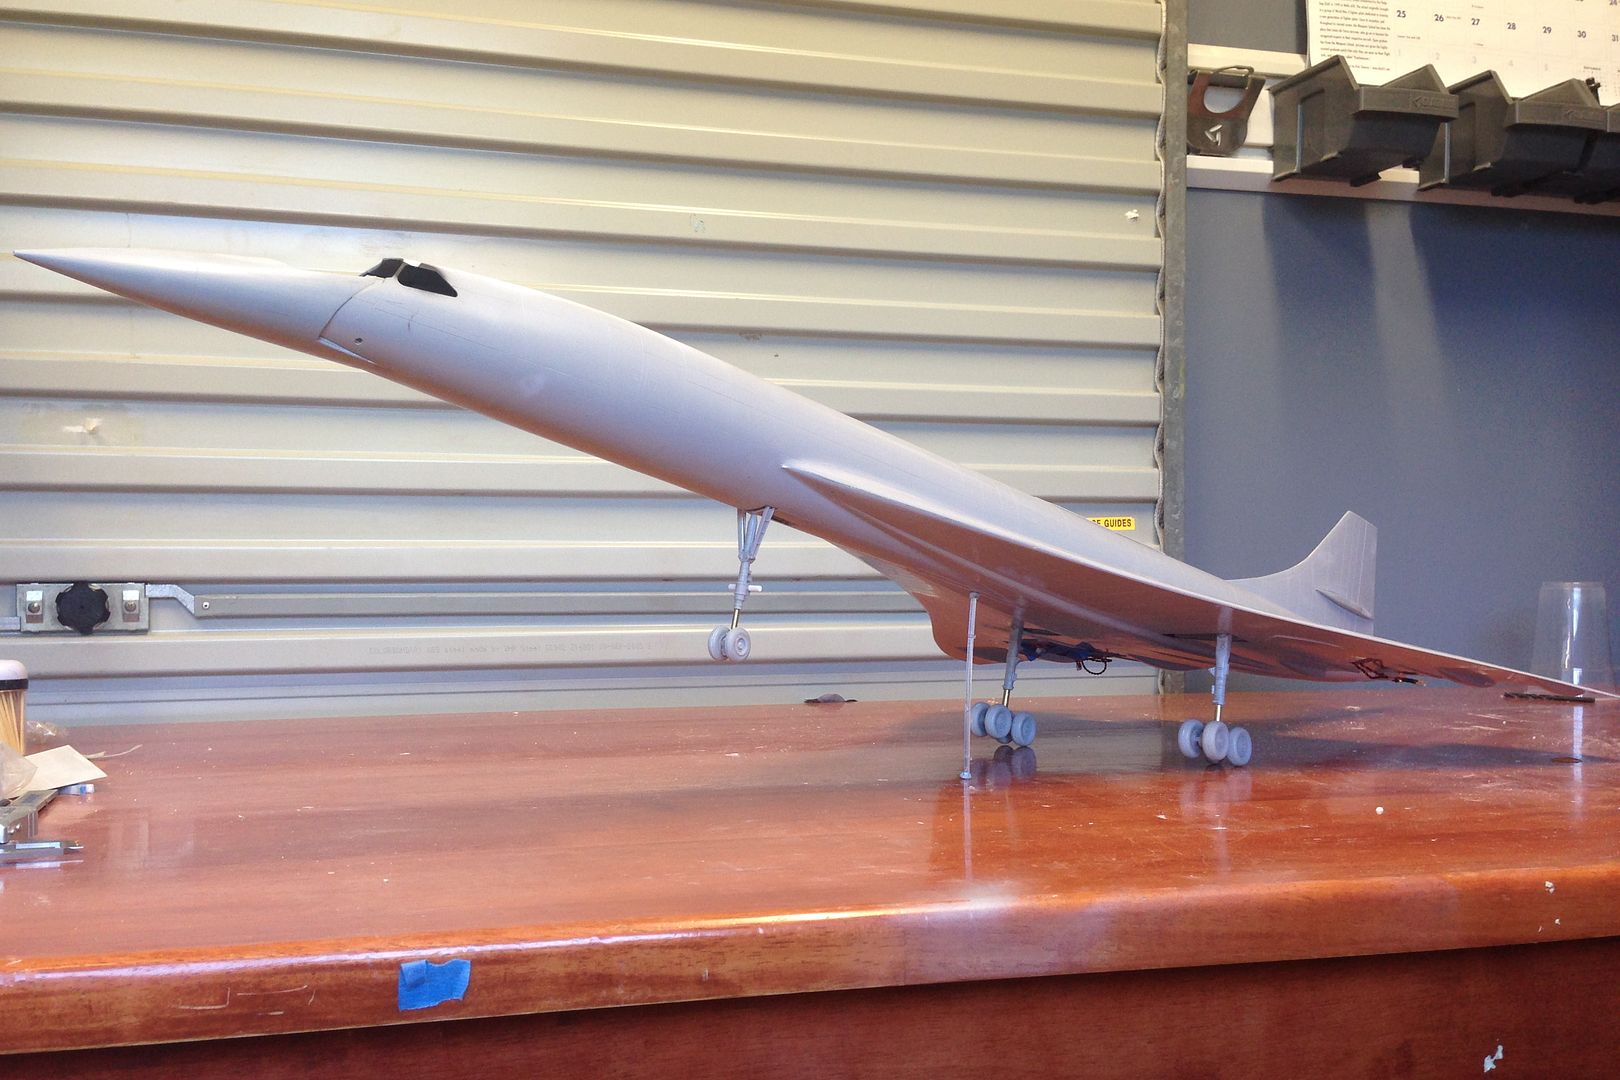
Some more progress.
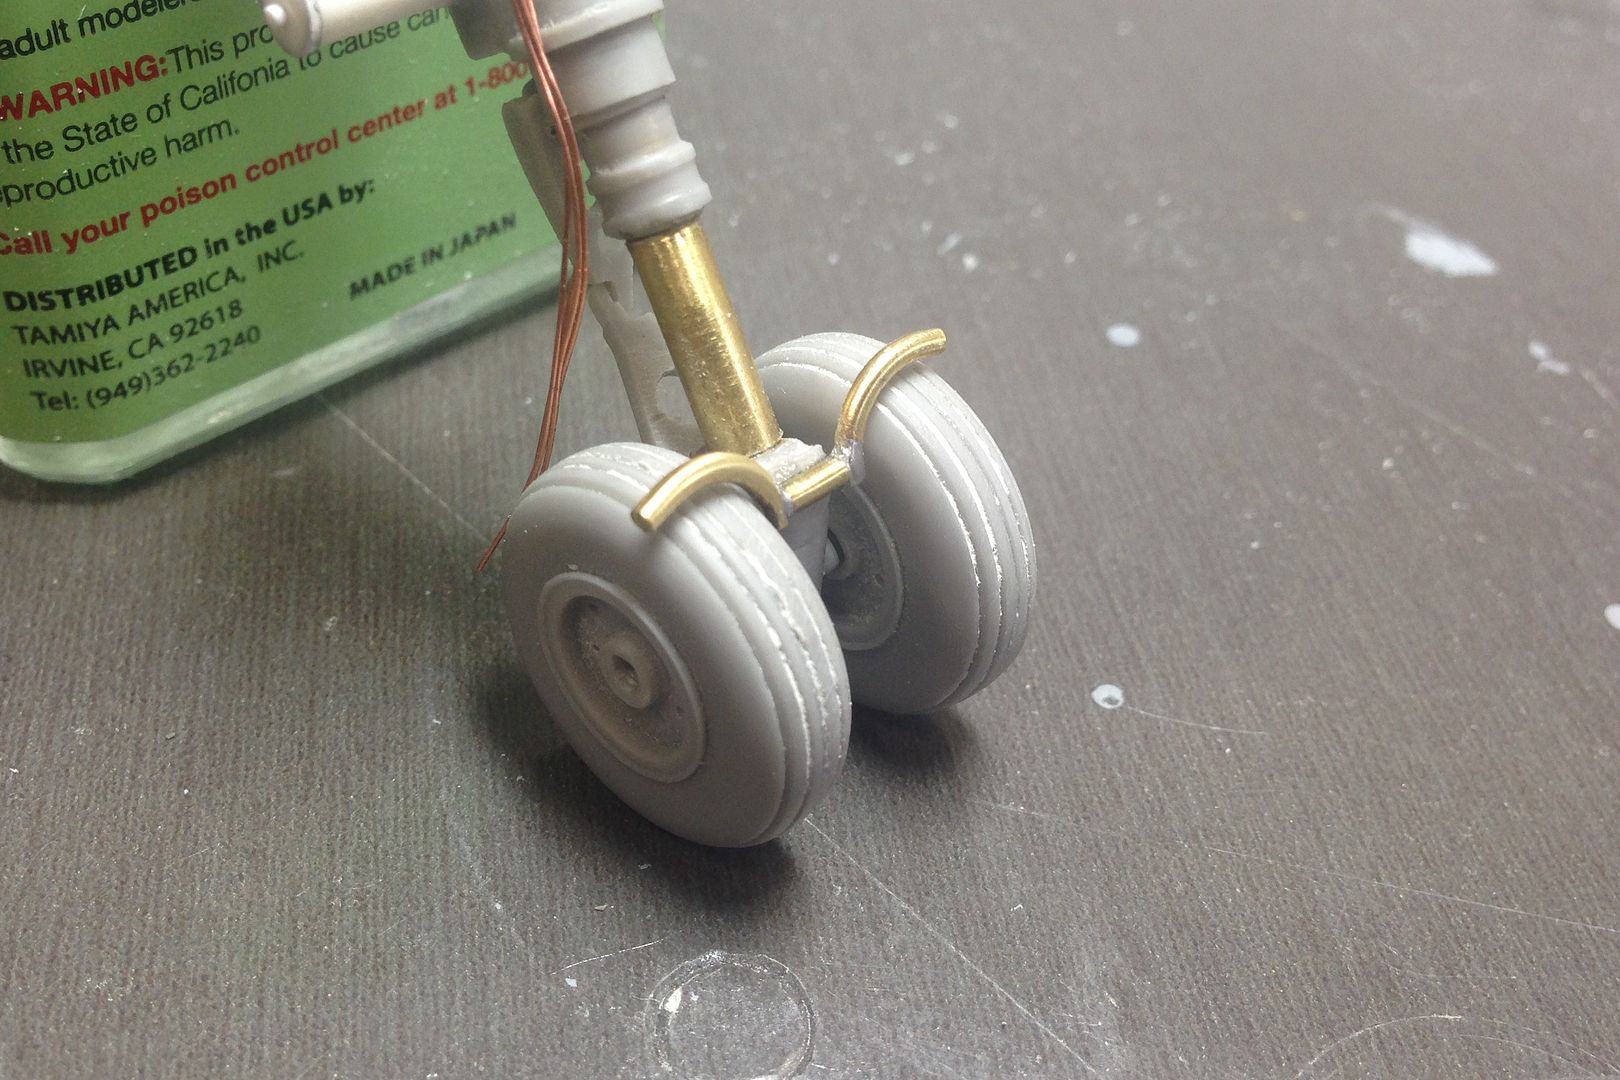
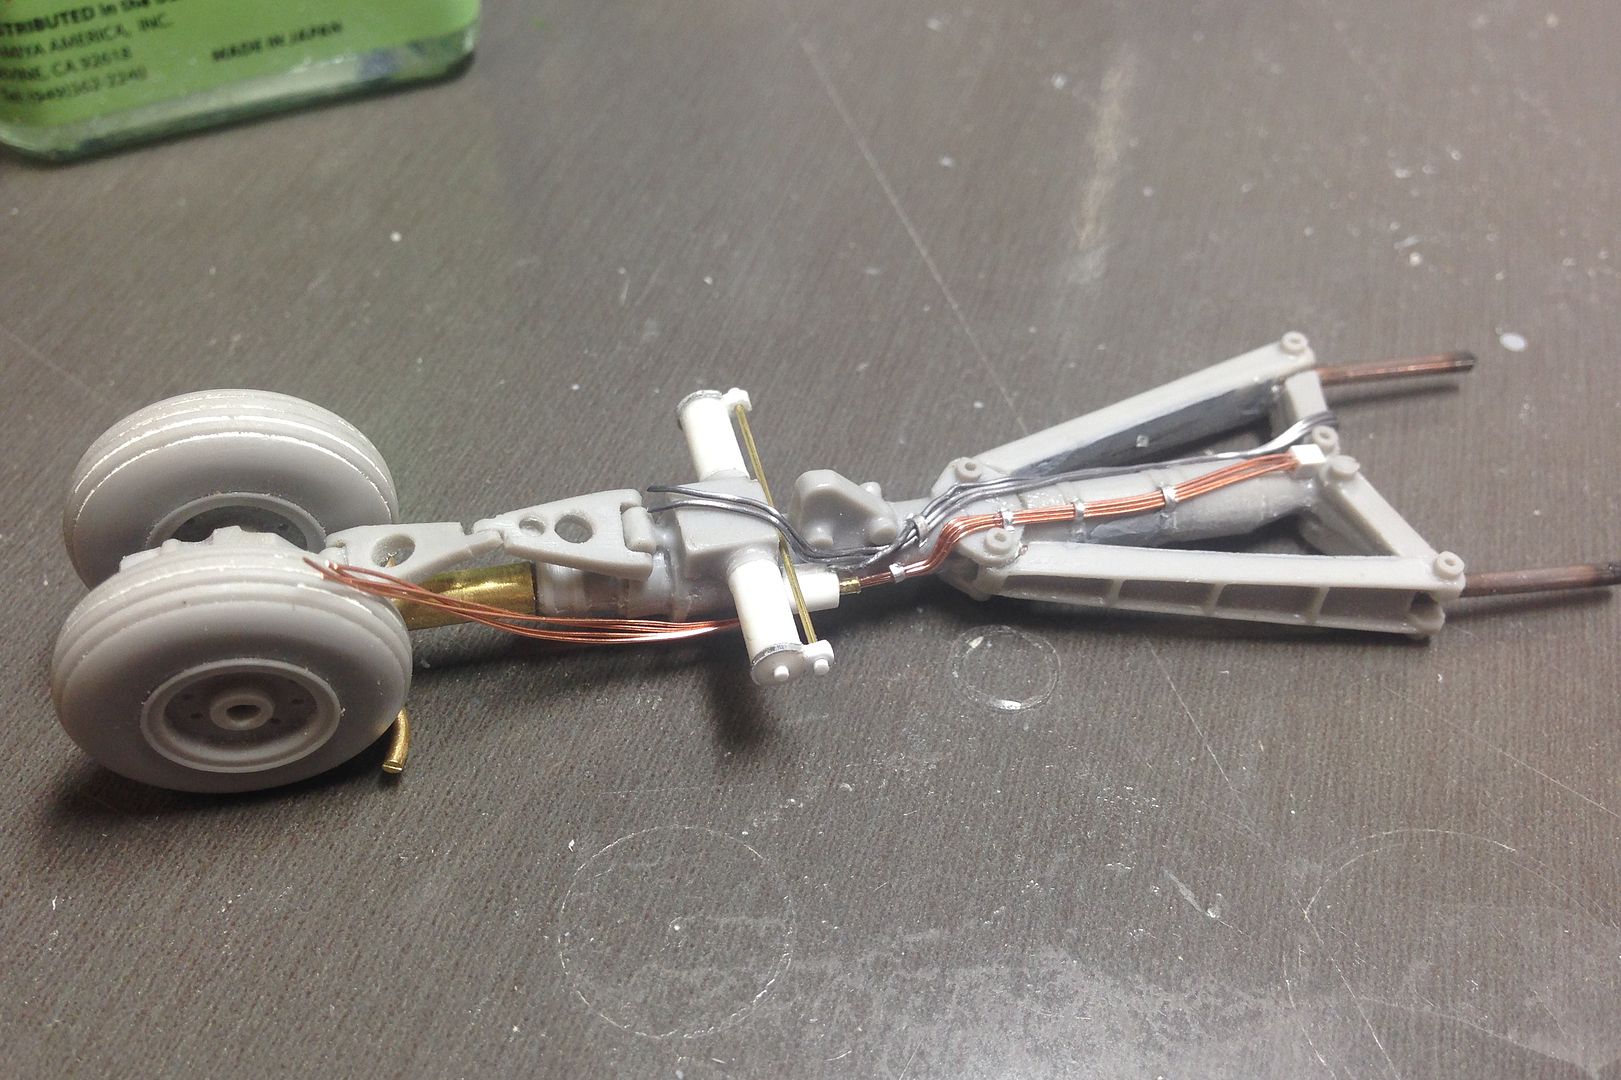
In deciding that I wanted this model in a dynamic pose, I fully accepted that there would need to be some other changes that had to be made to depict the model in the way I wanted. Displaying the model in the fully rotated position with the wheels just on the ground wasn't just a matter of tilting the model towards its tail and hoping for the best. As per the changes to the nose gear leg, the main undercarriage legs have received some attention as well. From reviewing lots of footage and photos, I determined that I wanted the model to be `weight off wheels', that is, the moment where the wings accept the responsibility for the aircraft and carry upward the trust that the pilot has emplaced in them. Basically, the main undercarriage oleos needed to be extended.
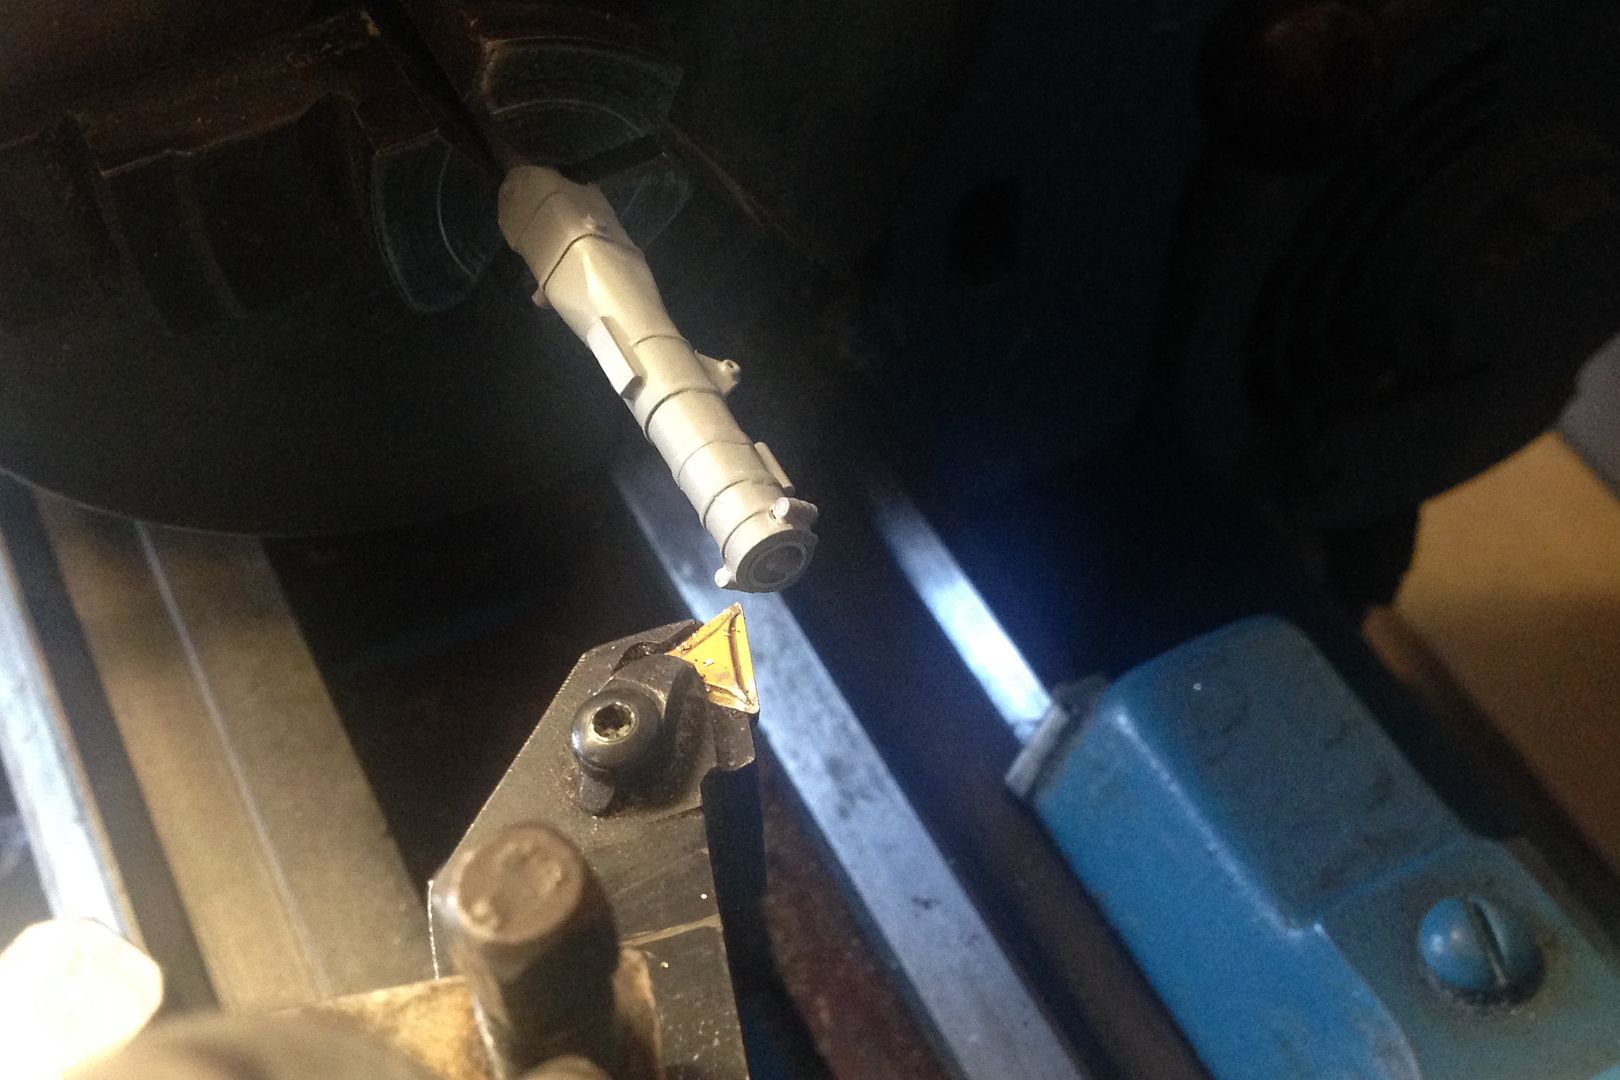
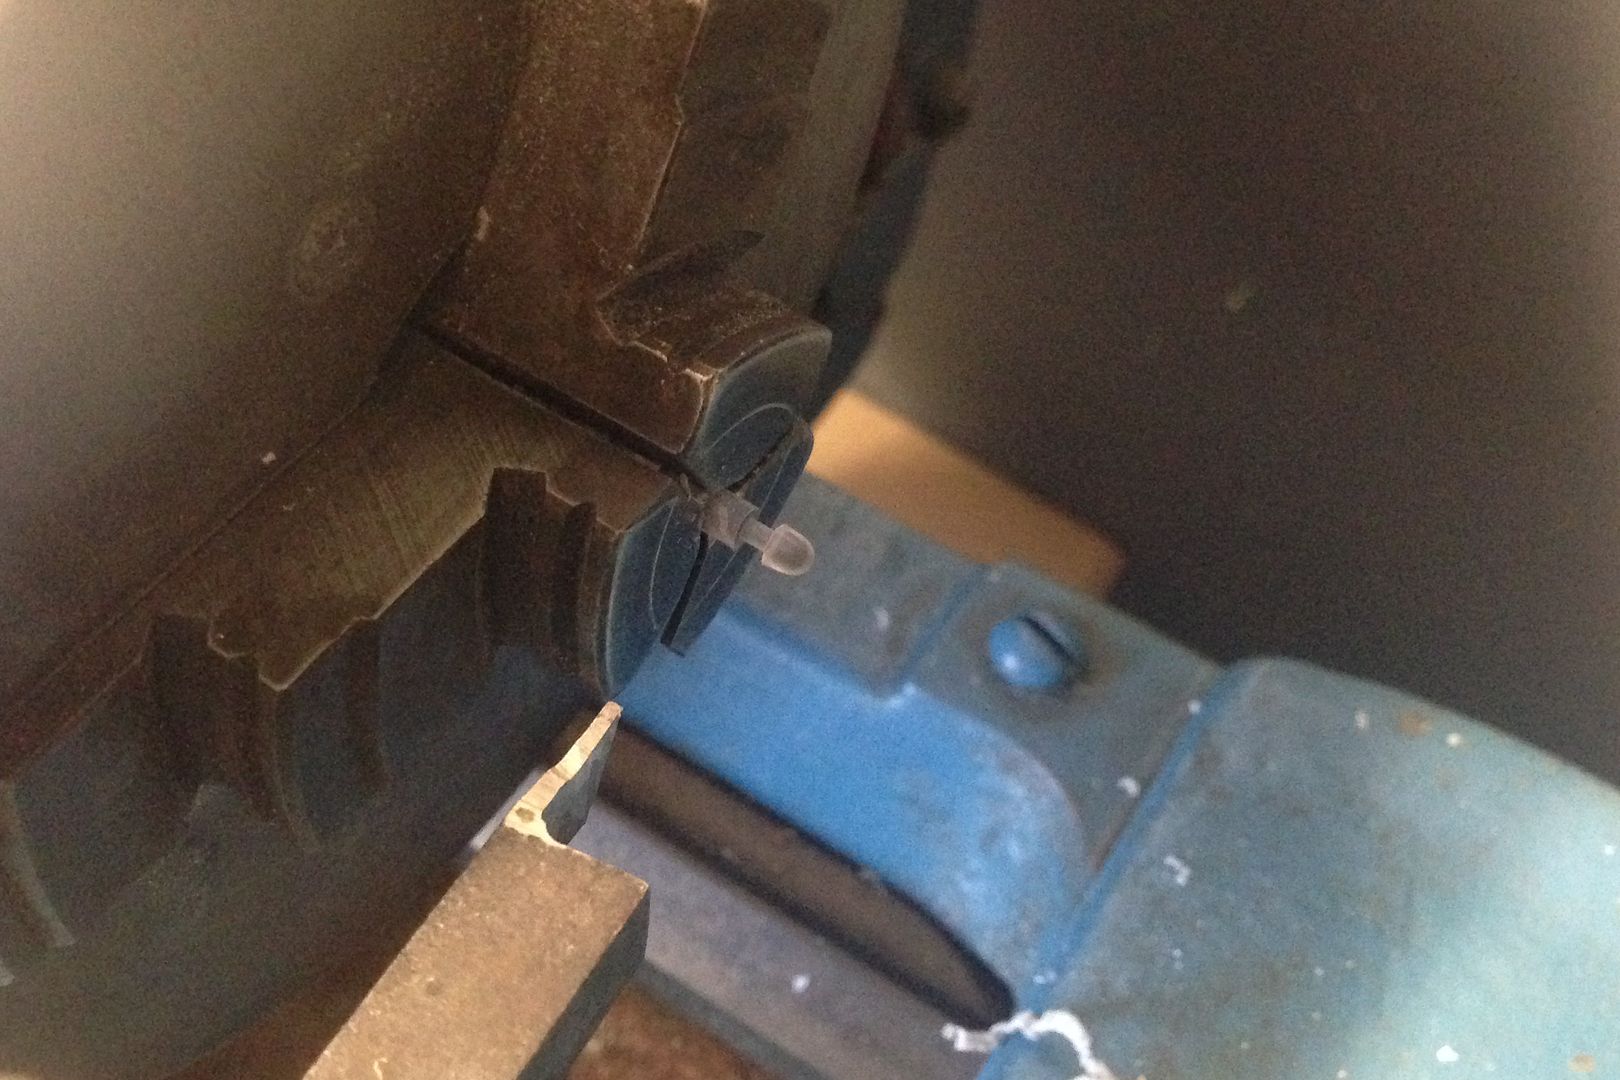
Now, taking a razor saw to the point at which the entire model is to be passed through is no small matter. I had determined that if anything was to work, it was to be metal or nothing. Using my lathe, I parted off the oleos from the kit Resin/metal legs.
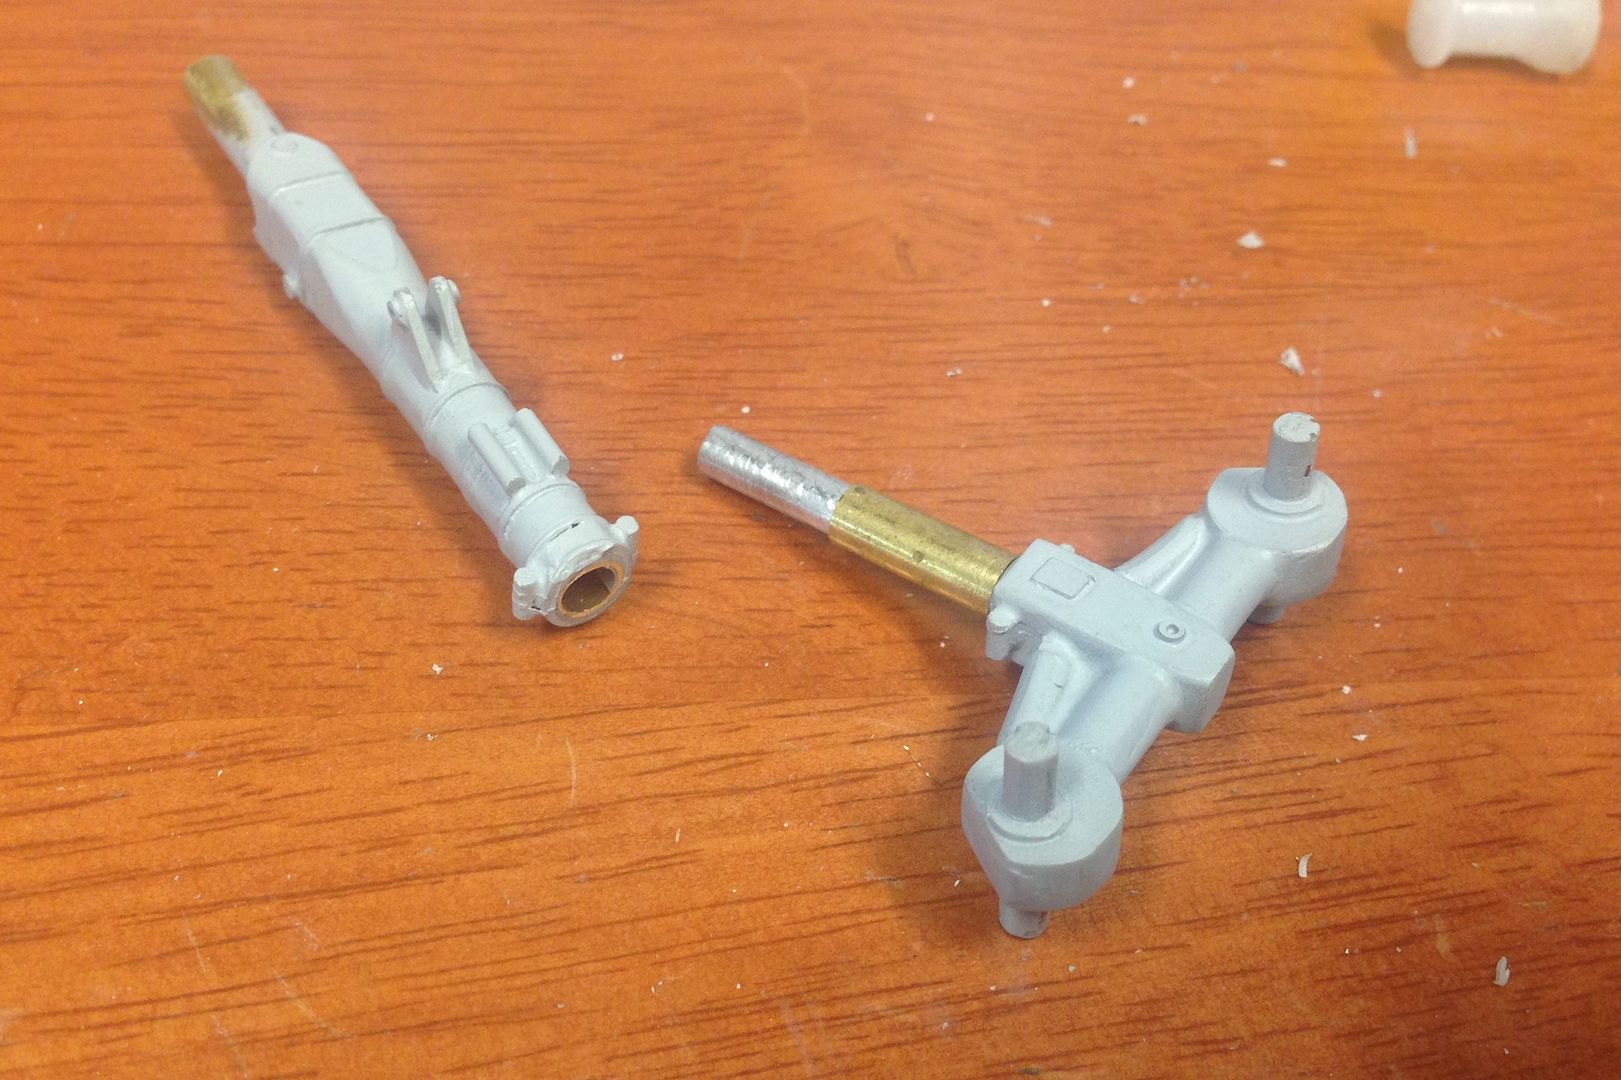
Using a combination of different diameter metal tubing I was able to cut lengths to suit the new oleo. Each part is a press fit, meaning that it is very strong.
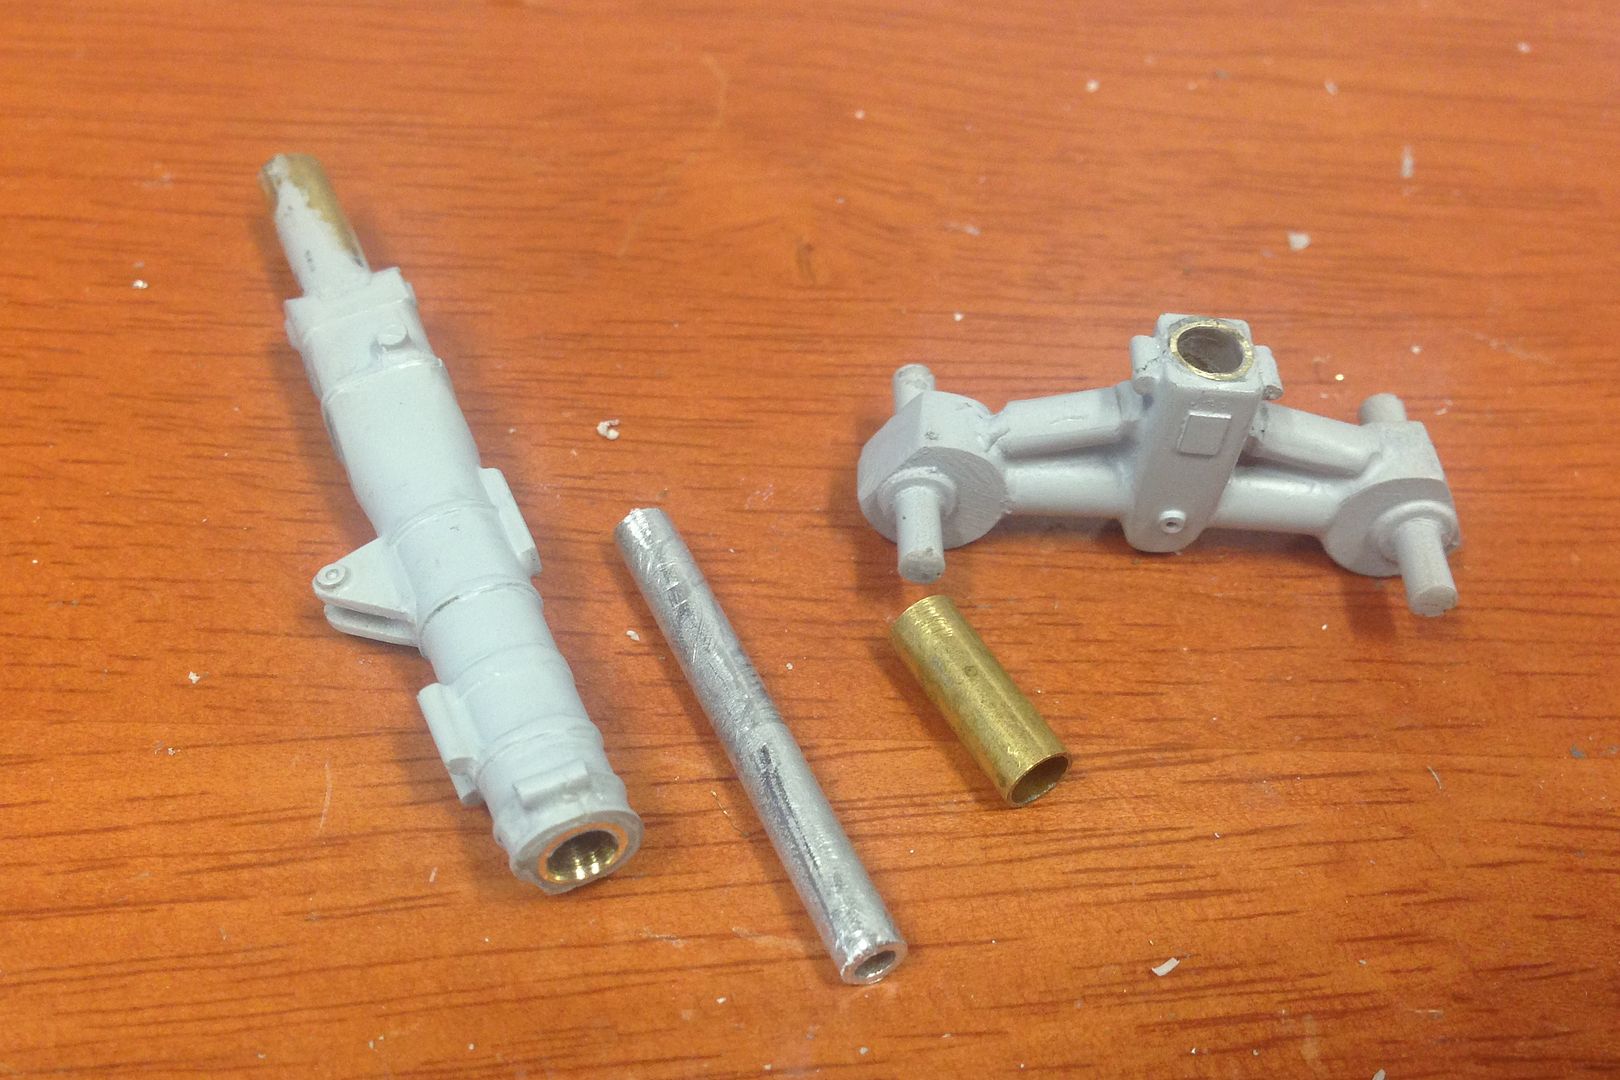
By using an outer sleeve of brass tubing I am able to precisely control the length of each oleo to ensure that both sides are equal.
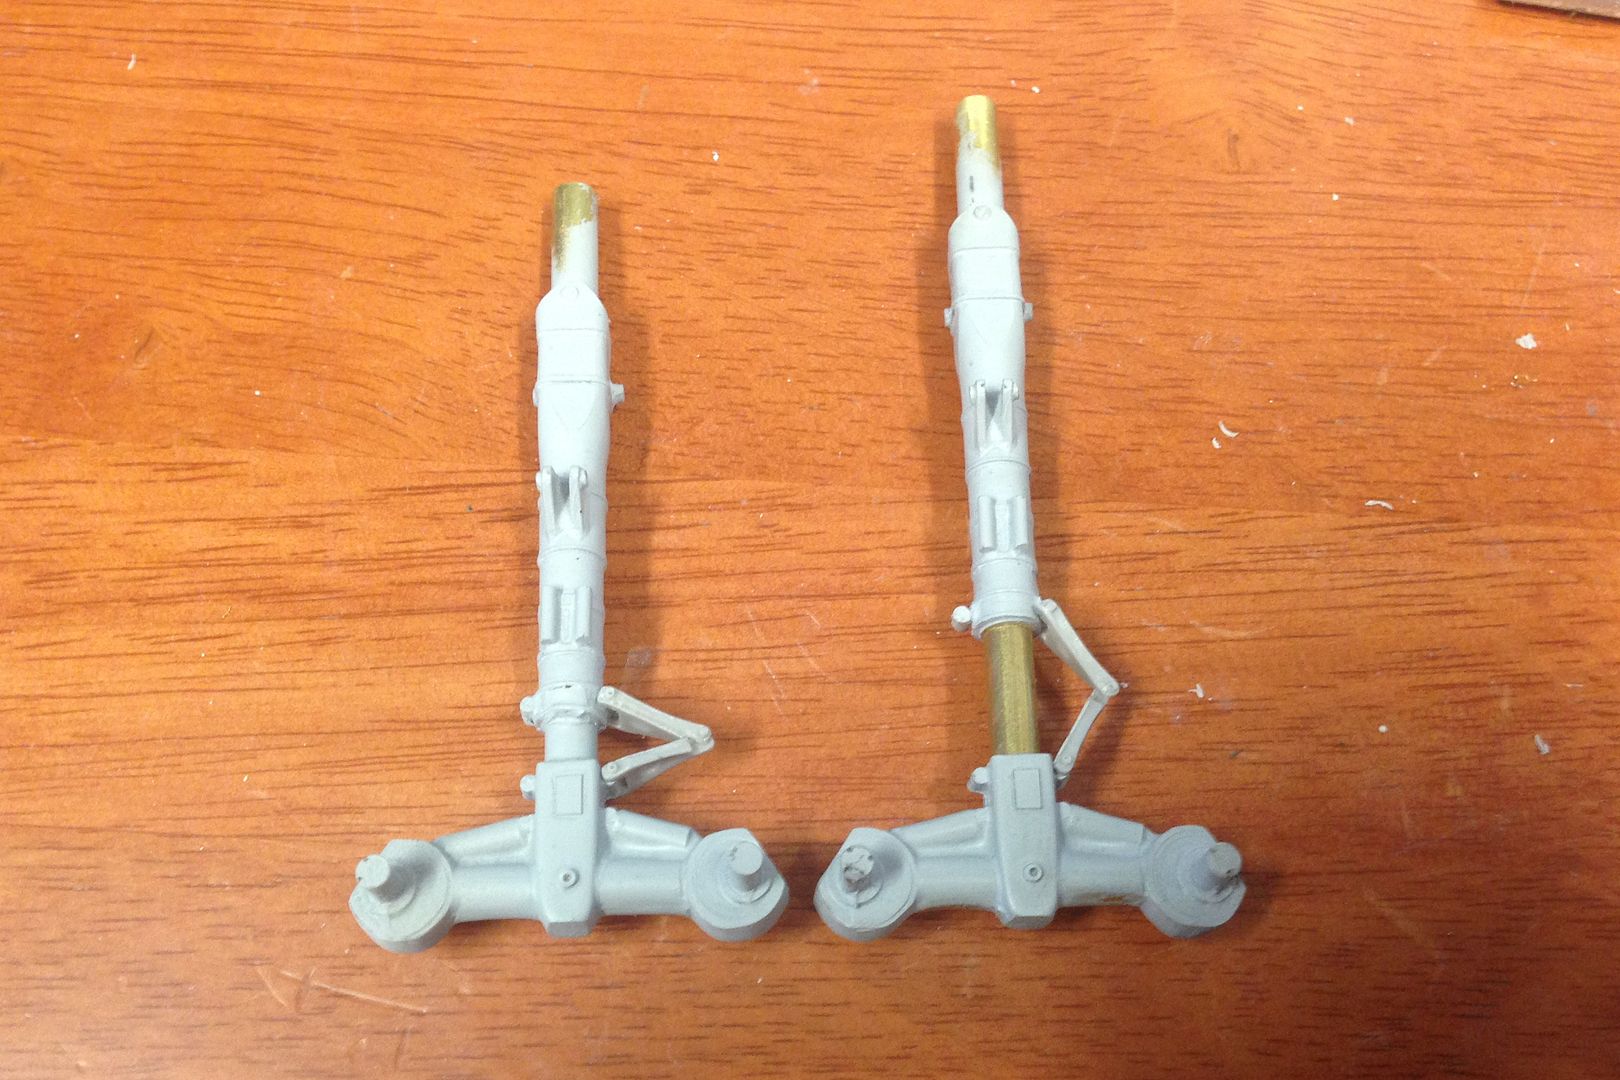
Here is the difference between a kit leg and a modified leg. I have installed one side of the torque links to demonstrate loaded vs unloaded oleo.
Getting closer.....
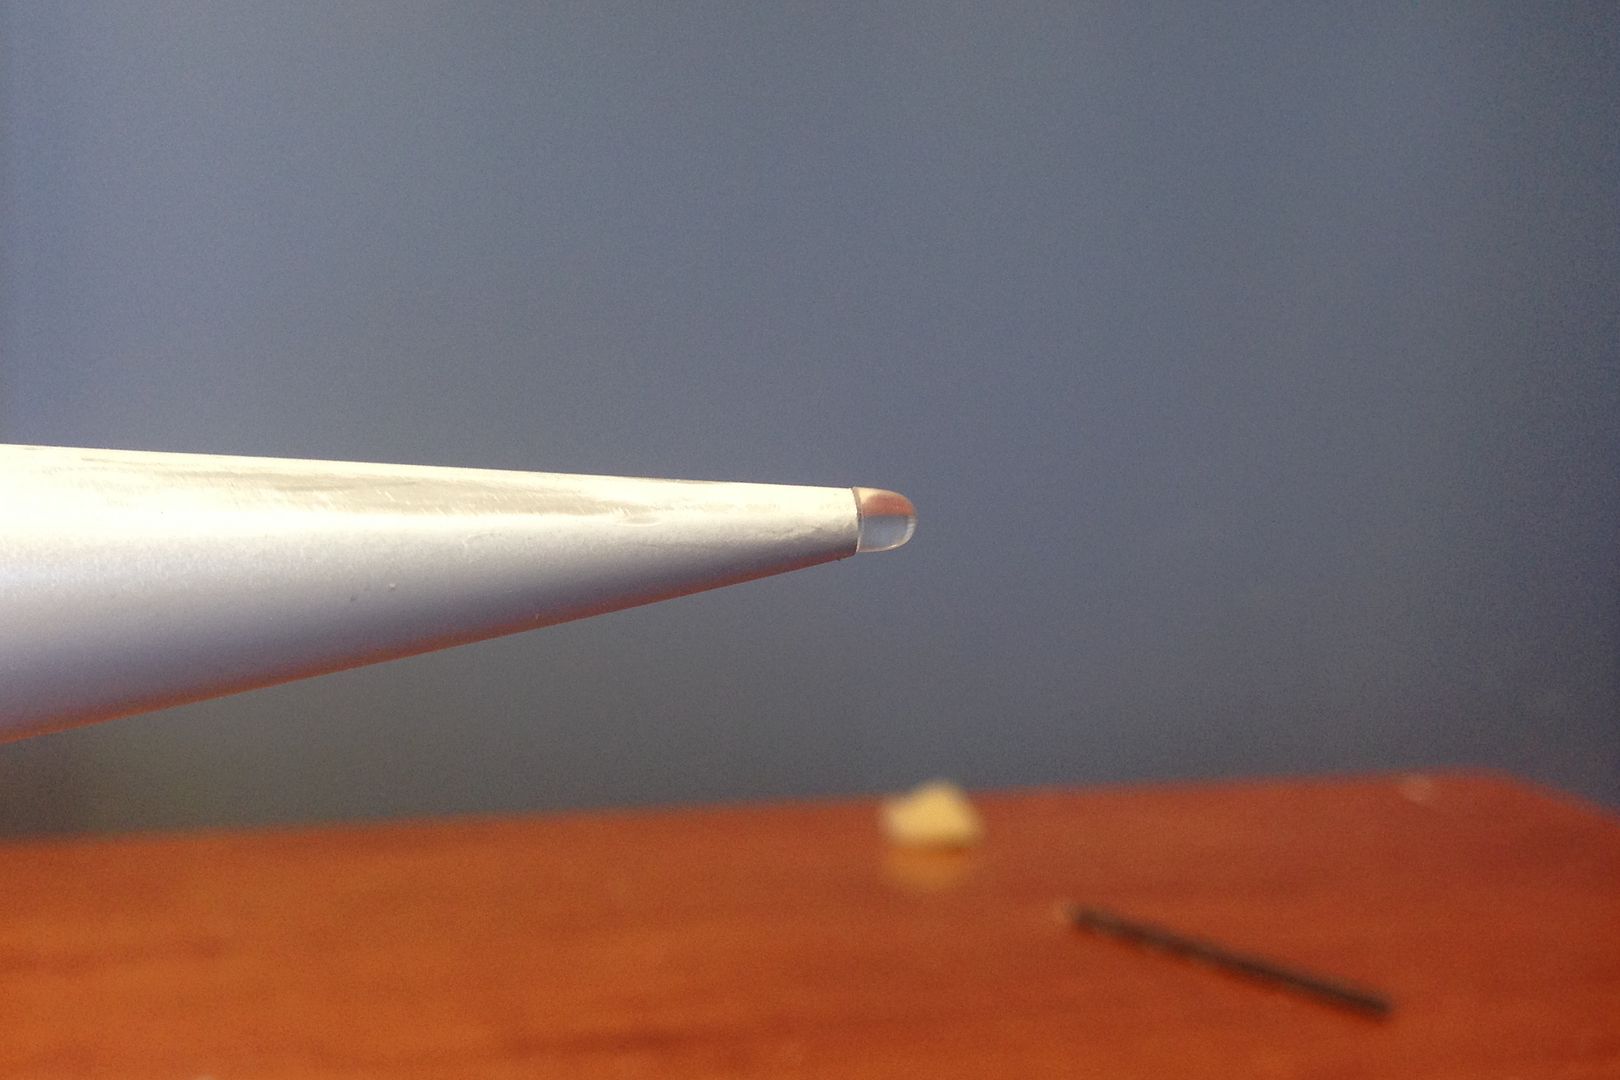
Whilst I had the lathe in action, I machined up a small piece of clear sprue.
To make this part...
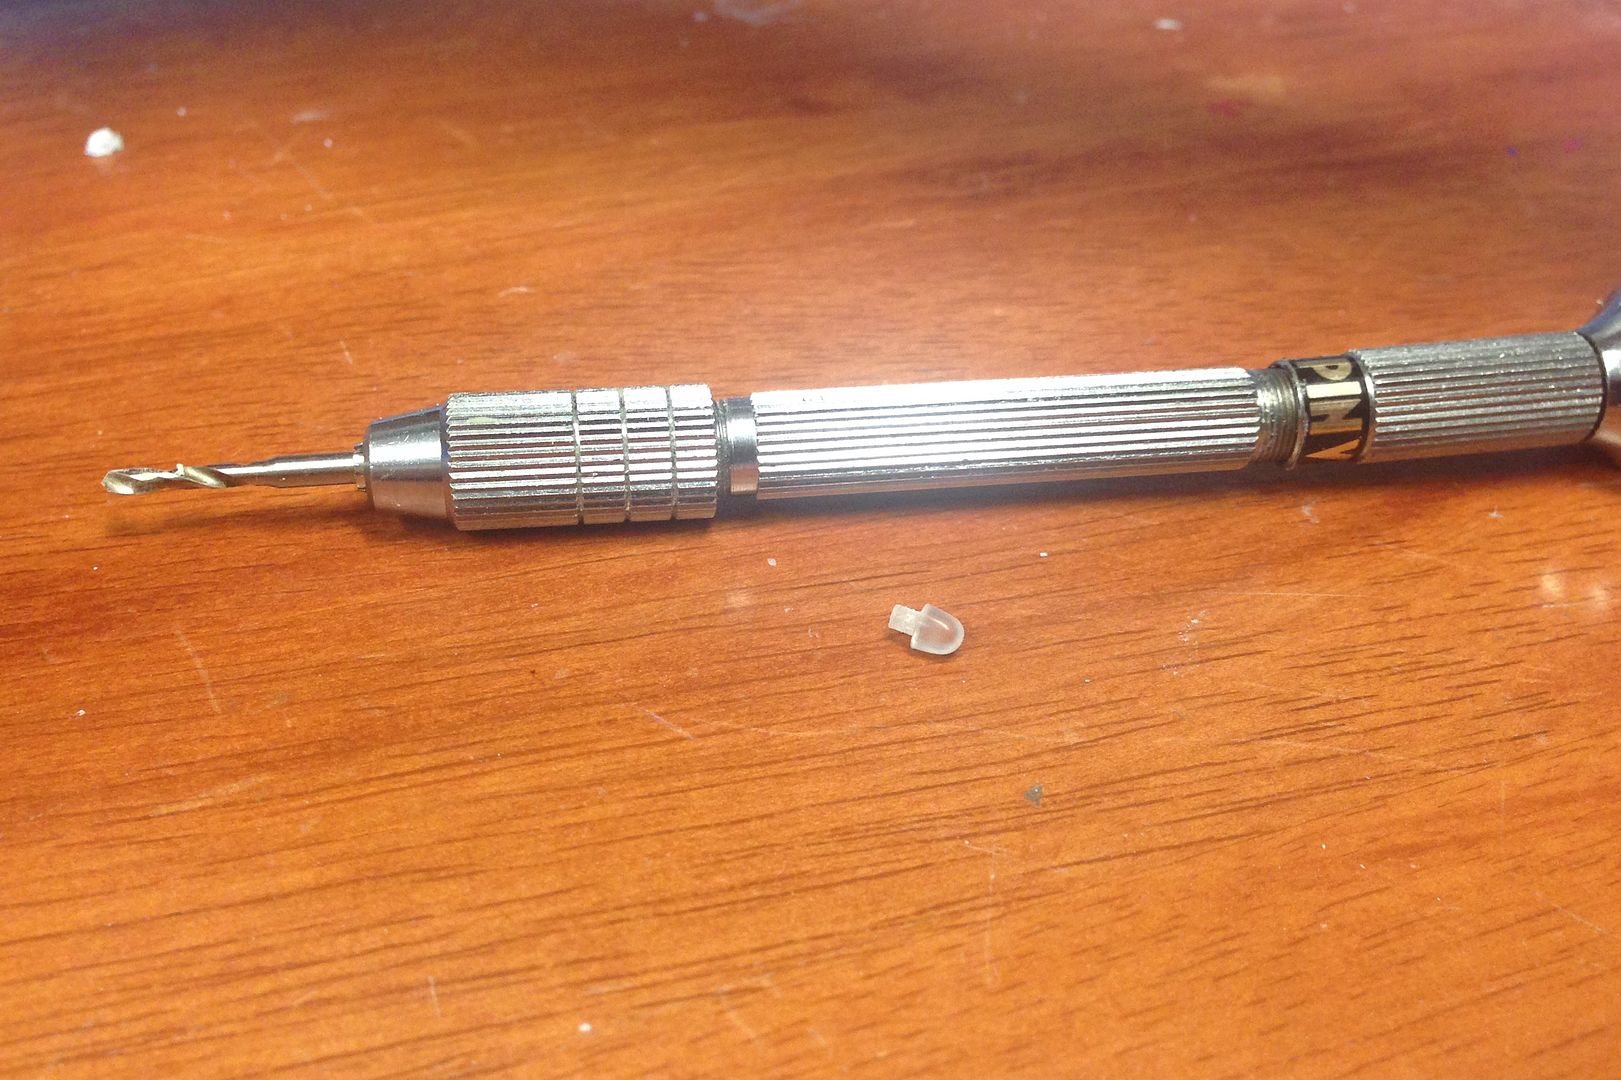
This small part makes a big difference to the kit. Hph have this part of the model devoid of detail and just tapering down to a fiberglass point with no provision for anything in the instructions.
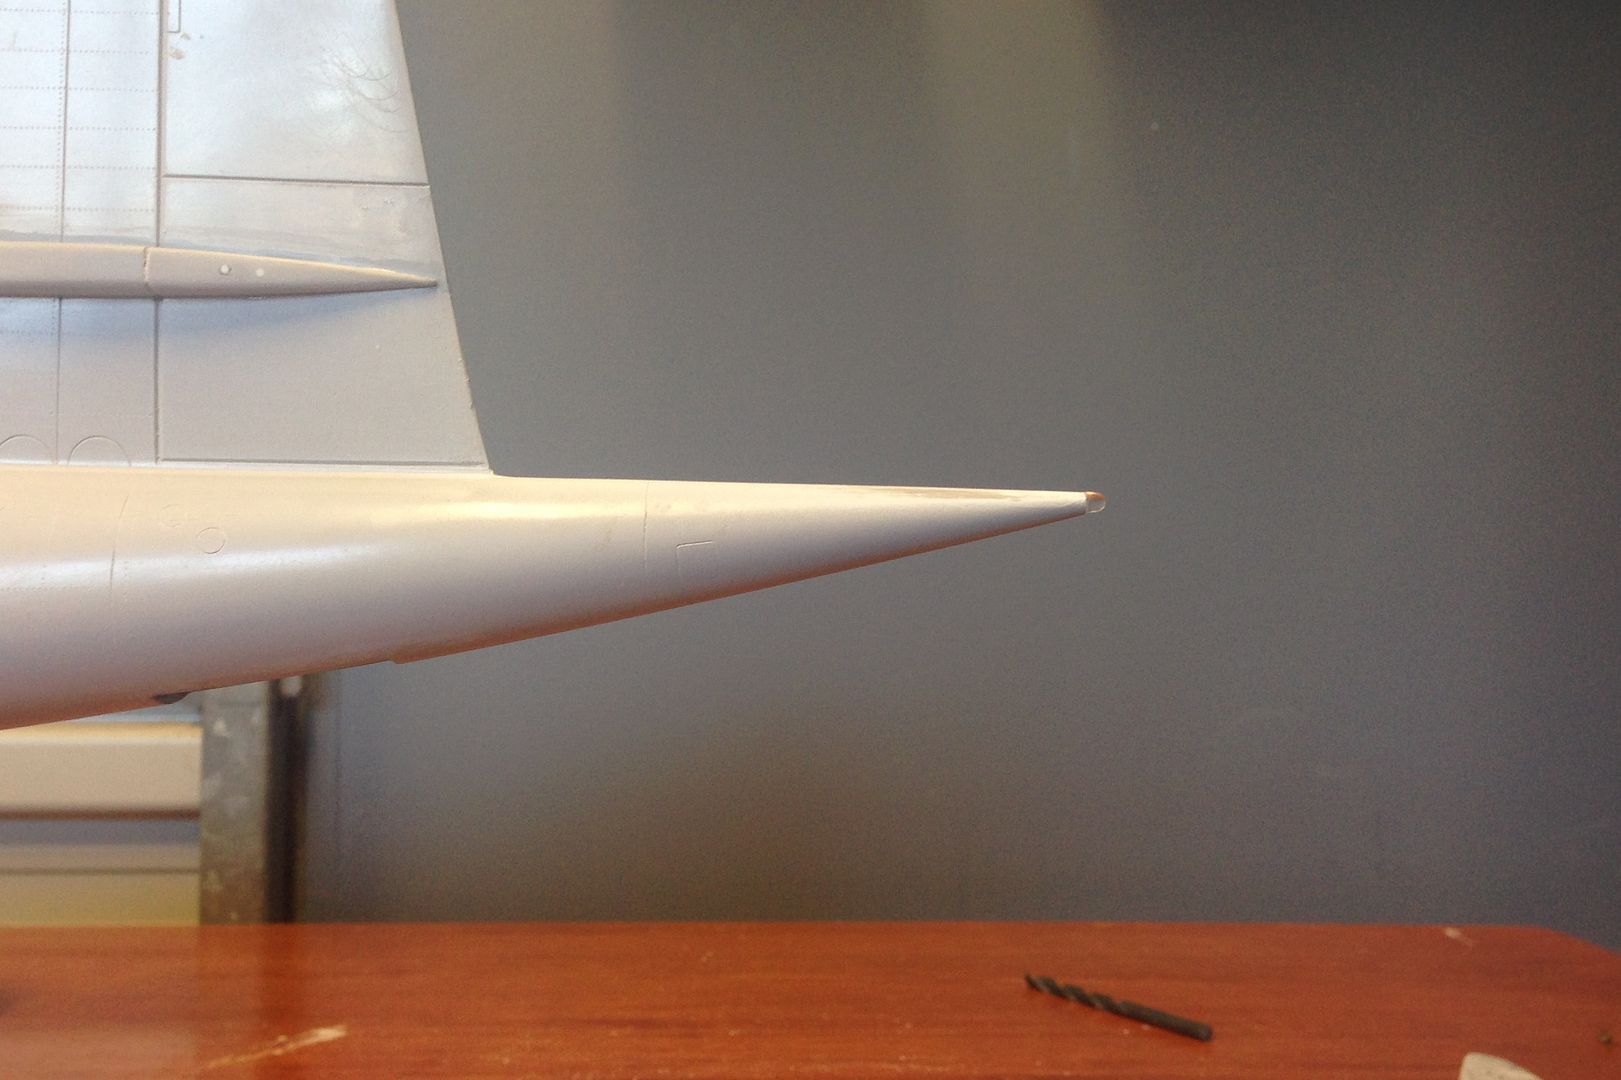
With a bit more blending this will work out OK.
A quick mod to the cockpit in the form of a change to the control column to make it appear a bit less chunky.
In deciding that I wanted this model in a dynamic pose, I fully accepted that there would need to be some other changes that had to be made to depict the model in the way I wanted. Displaying the model in the fully rotated position with the wheels just on the ground wasn't just a matter of tilting the model towards its tail and hoping for the best. As per the changes to the nose gear leg, the main undercarriage legs have received some attention as well. From reviewing lots of footage and photos, I determined that I wanted the model to be `weight off wheels', that is, the moment where the wings accept the responsibility for the aircraft and carry upward the trust that the pilot has emplaced in them. Basically, the main undercarriage oleos needed to be extended.
Now, taking a razor saw to the point at which the entire model is to be passed through is no small matter. I had determined that if anything was to work, it was to be metal or nothing. Using my lathe, I parted off the oleos from the kit Resin/metal legs.

Using a combination of different diameter metal tubing I was able to cut lengths to suit the new oleo. Each part is a press fit, meaning that it is very strong.

By using an outer sleeve of brass tubing I am able to precisely control the length of each oleo to ensure that both sides are equal.

Here is the difference between a kit leg and a modified leg. I have installed one side of the torque links to demonstrate loaded vs unloaded oleo.

Getting closer.....

Whilst I had the lathe in action, I machined up a small piece of clear sprue.

To make this part...

This small part makes a big difference to the kit. Hph have this part of the model devoid of detail and just tapering down to a fiberglass point with no provision for anything in the instructions.

With a bit more blending this will work out OK.

A quick mod to the cockpit in the form of a change to the control column to make it appear a bit less chunky.

- Ericg
- Posts: 214
- Joined: Mon Apr 14, 2014 7:30 pm
Re: 1/48th scale HPH Concorde
![]() by DesTROYer » Mon Oct 12, 2015 7:00 pm
by DesTROYer » Mon Oct 12, 2015 7:00 pm
Nicely done. I was going to say "shouldn't the wheel bogey be tilted forward at the front?", but then I looked at some photos of the Concorde landing and see that as usual, you've got it right. I am surprised they didn't though.

-

DesTROYer - Posts: 778
- Joined: Tue Jun 24, 2014 9:49 pm
- Location: 37.8136° S, 144.9631° E
Re: 1/48th scale HPH Concorde
![]() by Ericg » Mon Oct 12, 2015 8:03 pm
by Ericg » Mon Oct 12, 2015 8:03 pm
Hi Troy,
HpH did get it right mate, they just didn't think of a guy like me that would modify the crap out of their model, that's all.
HpH did get it right mate, they just didn't think of a guy like me that would modify the crap out of their model, that's all.
- Ericg
- Posts: 214
- Joined: Mon Apr 14, 2014 7:30 pm
Re: 1/48th scale HPH Concorde
![]() by Ericg » Mon Oct 12, 2015 8:29 pm
by Ericg » Mon Oct 12, 2015 8:29 pm
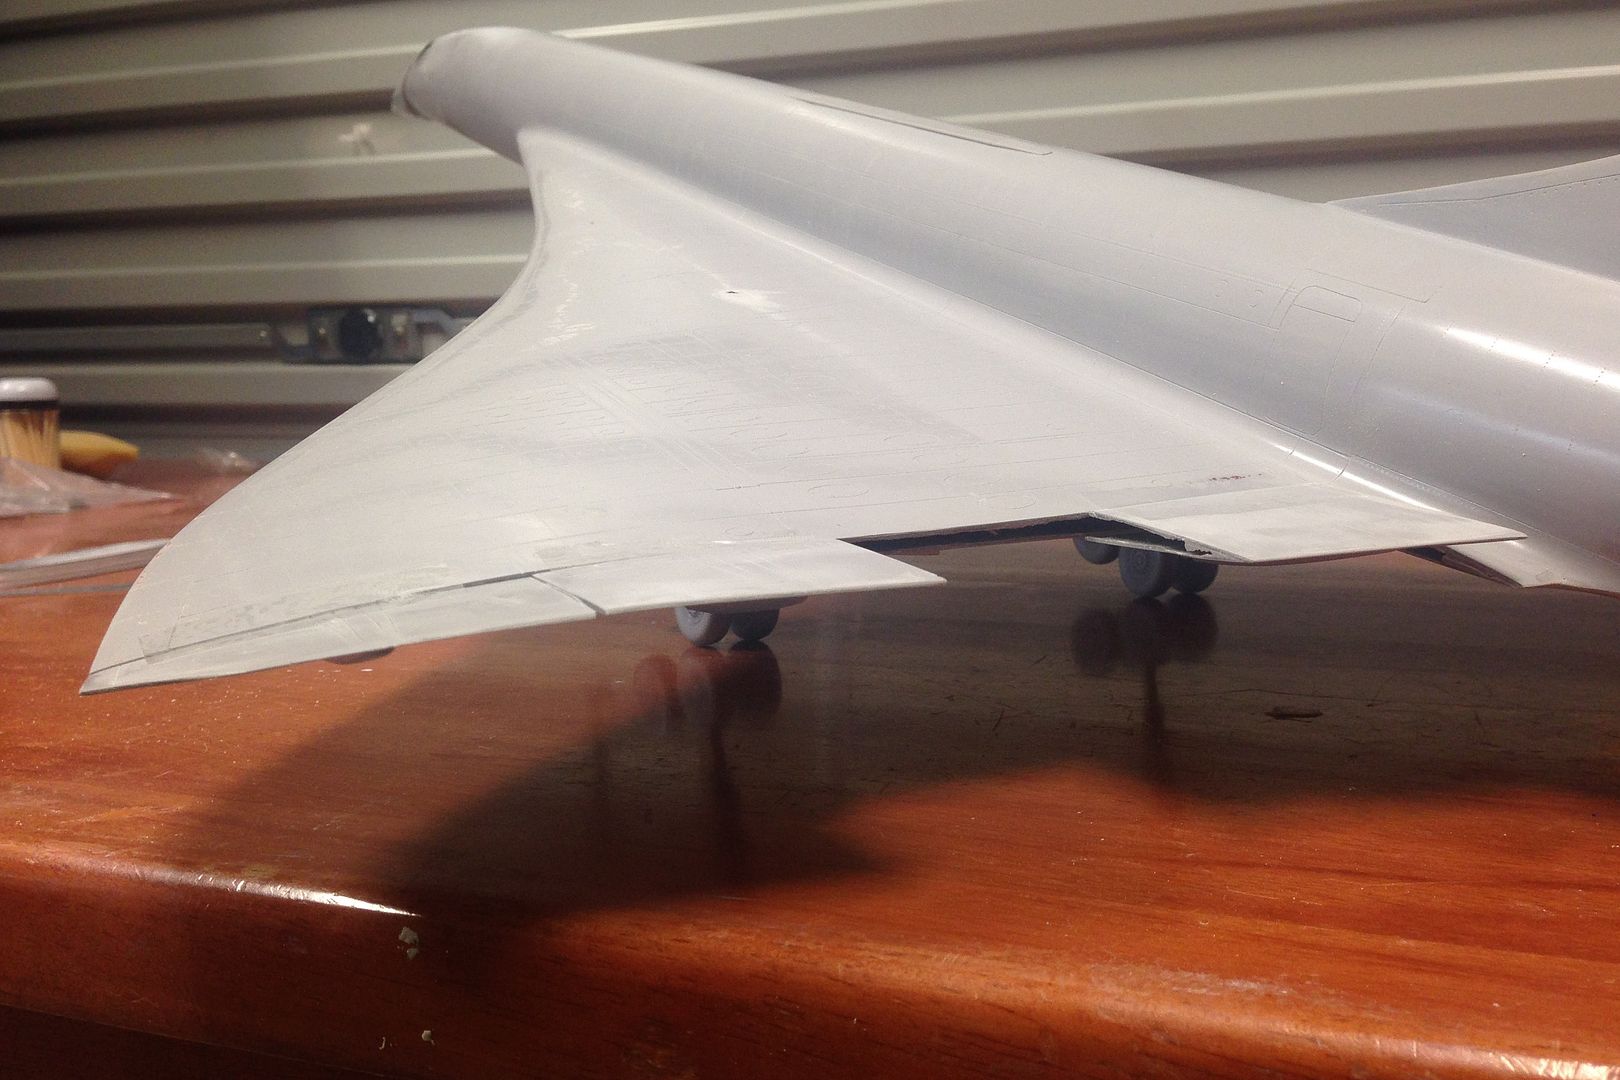
So even though some of the stuff that I have done so far is pretty crazy, there is always room for things to get crazier..... In my workshop I have a saying which goes `cut now and beg for forgiveness later' (as well as the banning of the saying `cant be done'). Here is another mod that is required for the pose that I wish for this model.
I wish to set the elevons in the up position reflecting the amount required to rotate the aircraft. Another session with the razor saw has relieved the model of most of its control surfaces in a fairly risky move as by doing so, some structural integrity is lost.
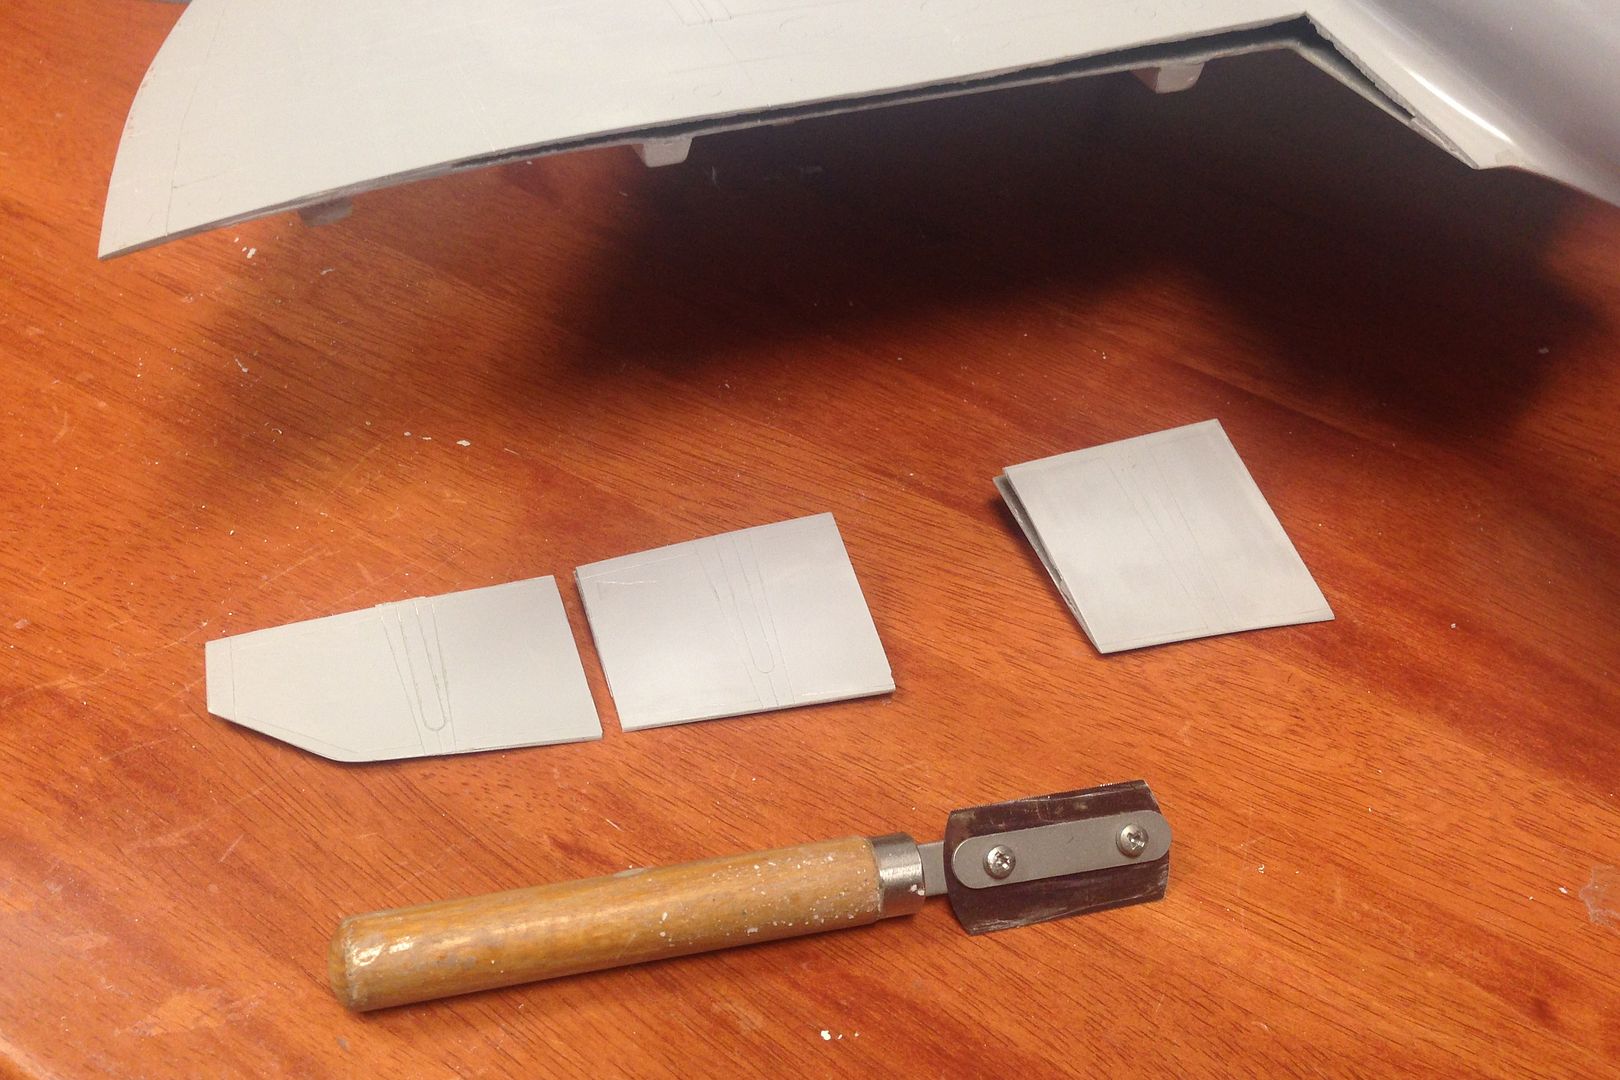
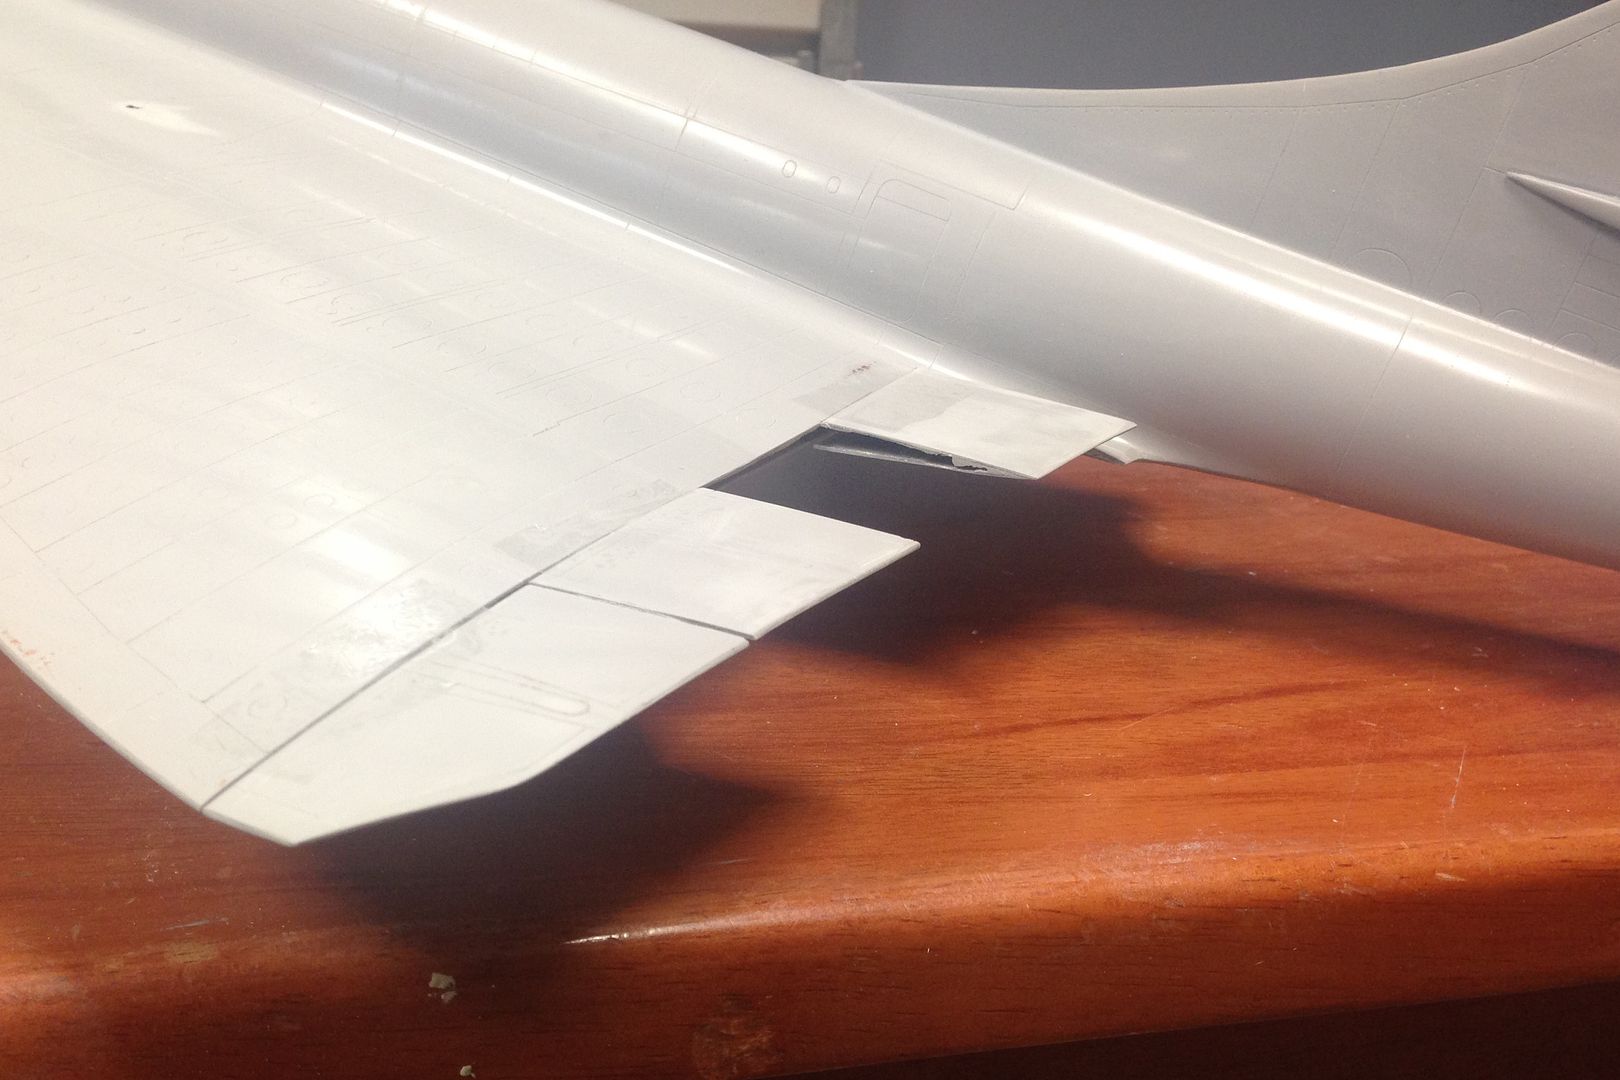
Here they are taped in position. Further research will dictate exactly how far they will need to be deflected.
I wish to set the elevons in the up position reflecting the amount required to rotate the aircraft. Another session with the razor saw has relieved the model of most of its control surfaces in a fairly risky move as by doing so, some structural integrity is lost.

Here they are taped in position. Further research will dictate exactly how far they will need to be deflected.


- Ericg
- Posts: 214
- Joined: Mon Apr 14, 2014 7:30 pm
Re: 1/48th scale HPH Concorde
![]() by tor lives » Mon Oct 12, 2015 9:00 pm
by tor lives » Mon Oct 12, 2015 9:00 pm
Very cool Capt Eric.....she is coming along beautifully.
Speaking of research.....now that I have done quiet a bit myself for my own project, I can't believe how much difference there is between the prototype and production standard Concordes. They really are two completely different aircraft.
TOR
Speaking of research.....now that I have done quiet a bit myself for my own project, I can't believe how much difference there is between the prototype and production standard Concordes. They really are two completely different aircraft.
TOR
- tor lives
- Posts: 4260
- Joined: Mon Apr 14, 2014 11:01 am
Re: 1/48th scale HPH Concorde
![]() by Adam the Akrodude » Tue Oct 13, 2015 8:36 am
by Adam the Akrodude » Tue Oct 13, 2015 8:36 am
In the last photo above taken from the rear, it sure shows off the epic beauty of the Concorde wing. Still wondering how you will mount this beauty?????
- Adam the Akrodude
- Posts: 2819
- Joined: Mon Apr 14, 2014 1:02 pm
- Location: 100,124,672,897 Bifrost Rd, Valhalla, Asgard
Re: 1/48th scale HPH Concorde
![]() by Ericg » Fri Oct 16, 2015 2:03 pm
by Ericg » Fri Oct 16, 2015 2:03 pm
Adam the Akrodude wrote:In the last photo above taken from the rear, it sure shows off the epic beauty of the Concorde wing. Still wondering how you will mount this beauty?????
A very devious plan may have this thing hovering a few mm above the runway with no visible means of support mate, but more on that later.
Part of the fun of posting builds online such as this is having folks spot details that you may have missed and offering their knowledge of the subject that you may have not known.
Here is one such example (thanks Mike!)
The Concorde has a flat panel upon which the windows are mounted into the fuselage that runs 3/4 of the way along its length. Upon first glance, the fuselage appears round but looking further, there is a very subtle flat spot that HpH missed. I am led to believe that all other kits of the Concorde have also missed this. Once I saw the detail, it couldn't be unseen, so I just had to do it! I thought through a few different options and decided that I would execute the slightly more difficult option to flatten the fuselage but would be easier to fix should things start to go pear shape. In the back of my mind was the fact that this is a hugely expensive kit and that I would only really get one shot to get it right. Like another of my recent projects (1/32 DH-88) it was many small changes that I made (the 1 % 's ) that combined to give me the result that I had with that model. This is the same thing.
The fuselage looks nice and round (which it is). There is 2 panel lines that mark the panel that should be flat. Interestingly, there a small divots where the windows should be on one side of the fuselage only, plus a very small amount of windows windows are scribed almost as if there was some thought to depicting the windows as something other that mask/paint combination but it was abandoned mid project.

Notice the door panel lines give the best hint as to the roundness of the fuselage

Using rigid straight edged sanders and files, I very carefully removed the Gel-coat on the panel down to the fiberglass, ensuring that the angle of the flat panel was constant along it whole length.

 \
\Here is the result which can be seen on the same door. There is now a constant flat spot along most of the length of the fuselage around the windows. The wavy edge can be attributed to the different depth of the gel coat vs the fiberglass shell. As I have already done the other side and primed it, rest assured it is dead straight.

- Ericg
- Posts: 214
- Joined: Mon Apr 14, 2014 7:30 pm
Re: 1/48th scale HPH Concorde
![]() by Adam the Akrodude » Fri Oct 16, 2015 4:59 pm
by Adam the Akrodude » Fri Oct 16, 2015 4:59 pm
Holy Fruit Tingles Batman!
That is one serious correction. Fuse made flat in that section as I guess the windows themselves are flat huh? How will you do the windows themselves - decal, paint them? I guess you have to re-scribe them all now too? This is making your typical Trumpeter offering look easy! Still, I'm spending a lot of time on mine making it look "normal" and not "Trumpeterish" if you know what I mean.
That is one serious correction. Fuse made flat in that section as I guess the windows themselves are flat huh? How will you do the windows themselves - decal, paint them? I guess you have to re-scribe them all now too? This is making your typical Trumpeter offering look easy! Still, I'm spending a lot of time on mine making it look "normal" and not "Trumpeterish" if you know what I mean.
- Adam the Akrodude
- Posts: 2819
- Joined: Mon Apr 14, 2014 1:02 pm
- Location: 100,124,672,897 Bifrost Rd, Valhalla, Asgard
Re: 1/48th scale HPH Concorde
![]() by Ericg » Sun Oct 18, 2015 9:18 pm
by Ericg » Sun Oct 18, 2015 9:18 pm
I know exactly what you mean mate.
I was going to try and not do too much with this kit as far as putting extra detail into it, but I thought I might trick it up a bit.
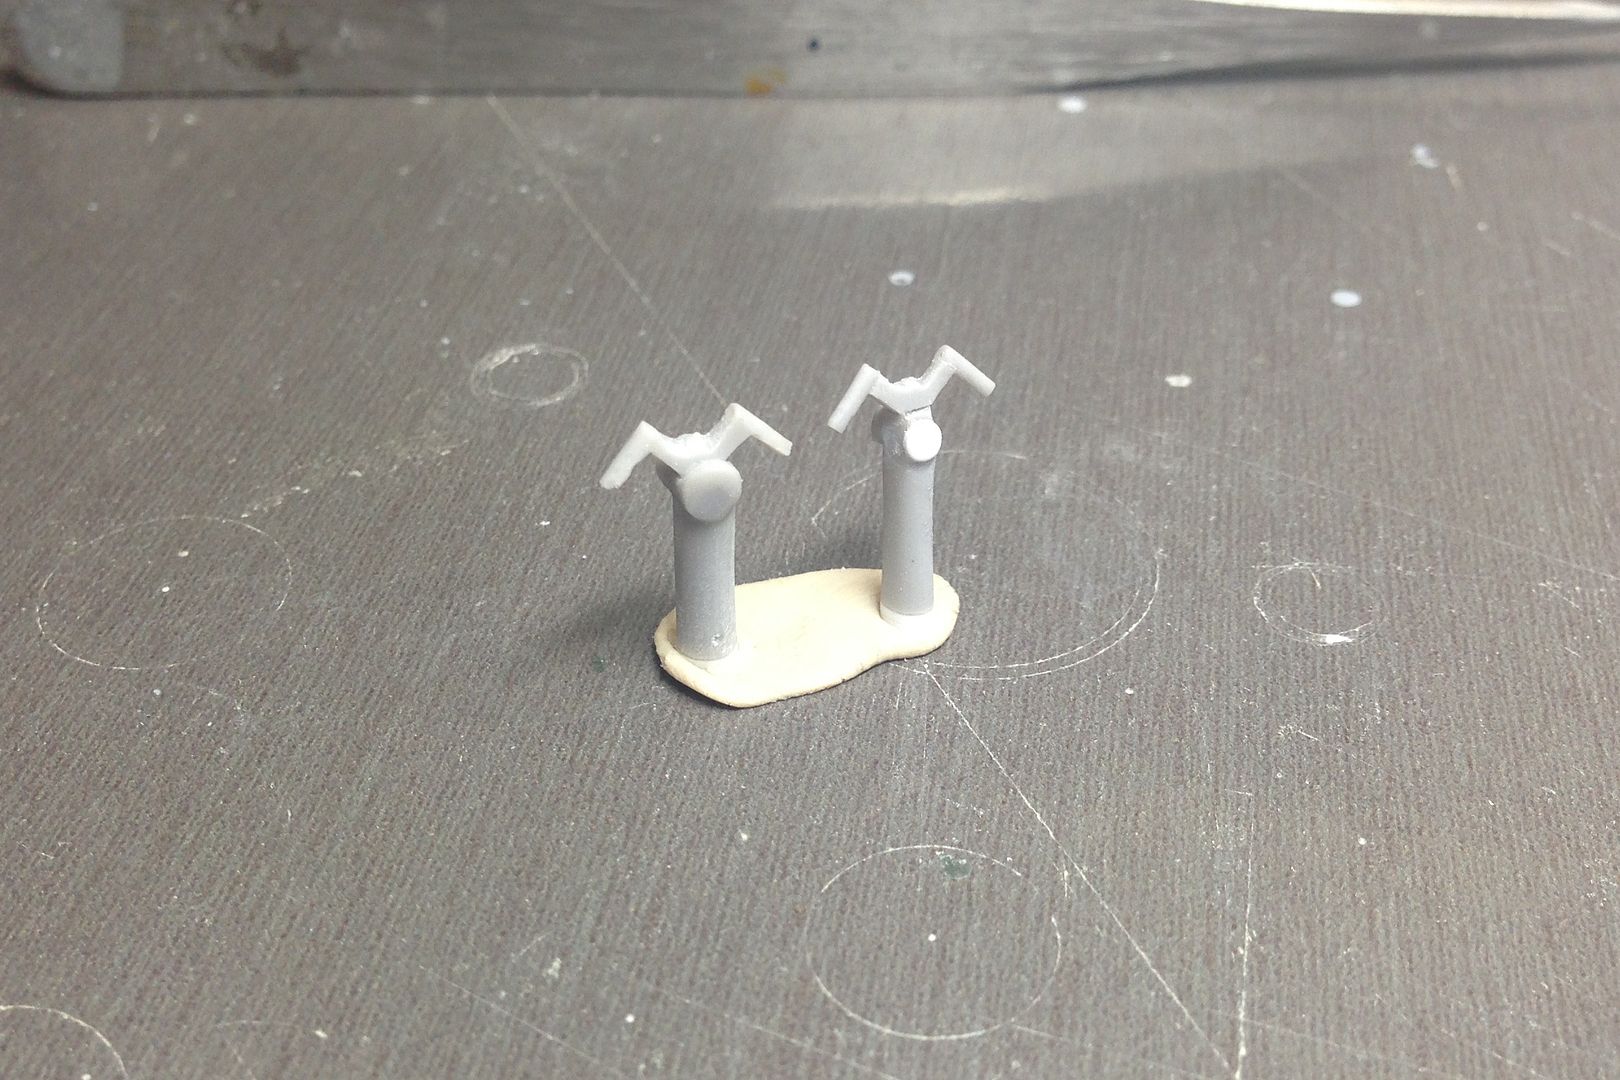
HpH call for you to scratchbuild the steel brackets that hold the water deflectors either sides of the nose wheel with 2 pieces of wire..... I though that I would fabricate the whole part and go one better, as this part would need some strength. 3 parts of carefully formed brass and some solder went into it to give the part a more accurate shape along with the required strength. The resin deflectors will come later.
Here is the start of the detailing of the nose gear leg. This will be fairly prominent on the model especially with the nose of the aircraft rearing up, and will be my way of drawing the viewer to look closer at the model once the physical size of the model has been seen. There is plenty more work to go into this area.
I was going to try and not do too much with this kit as far as putting extra detail into it, but I thought I might trick it up a bit.
HpH call for you to scratchbuild the steel brackets that hold the water deflectors either sides of the nose wheel with 2 pieces of wire..... I though that I would fabricate the whole part and go one better, as this part would need some strength. 3 parts of carefully formed brass and some solder went into it to give the part a more accurate shape along with the required strength. The resin deflectors will come later.

Here is the start of the detailing of the nose gear leg. This will be fairly prominent on the model especially with the nose of the aircraft rearing up, and will be my way of drawing the viewer to look closer at the model once the physical size of the model has been seen. There is plenty more work to go into this area.

- Ericg
- Posts: 214
- Joined: Mon Apr 14, 2014 7:30 pm
Return to Member's Works in Progress
Who is online
Users browsing this forum: hrtpaul and 2 guests