1/32 NACA Bell X-1 Finished
Re: Bell X-1
![]() by Nillus » Sat May 10, 2014 11:44 am
by Nillus » Sat May 10, 2014 11:44 am
Great to see tools being improvised from old stuff that is normally in the landfill. Great tip. 
- Nillus
- Posts: 308
- Joined: Mon Apr 14, 2014 5:59 pm
Re: Bell X-1
![]() by Ericg » Wed May 14, 2014 11:15 pm
by Ericg » Wed May 14, 2014 11:15 pm
Some small progress.
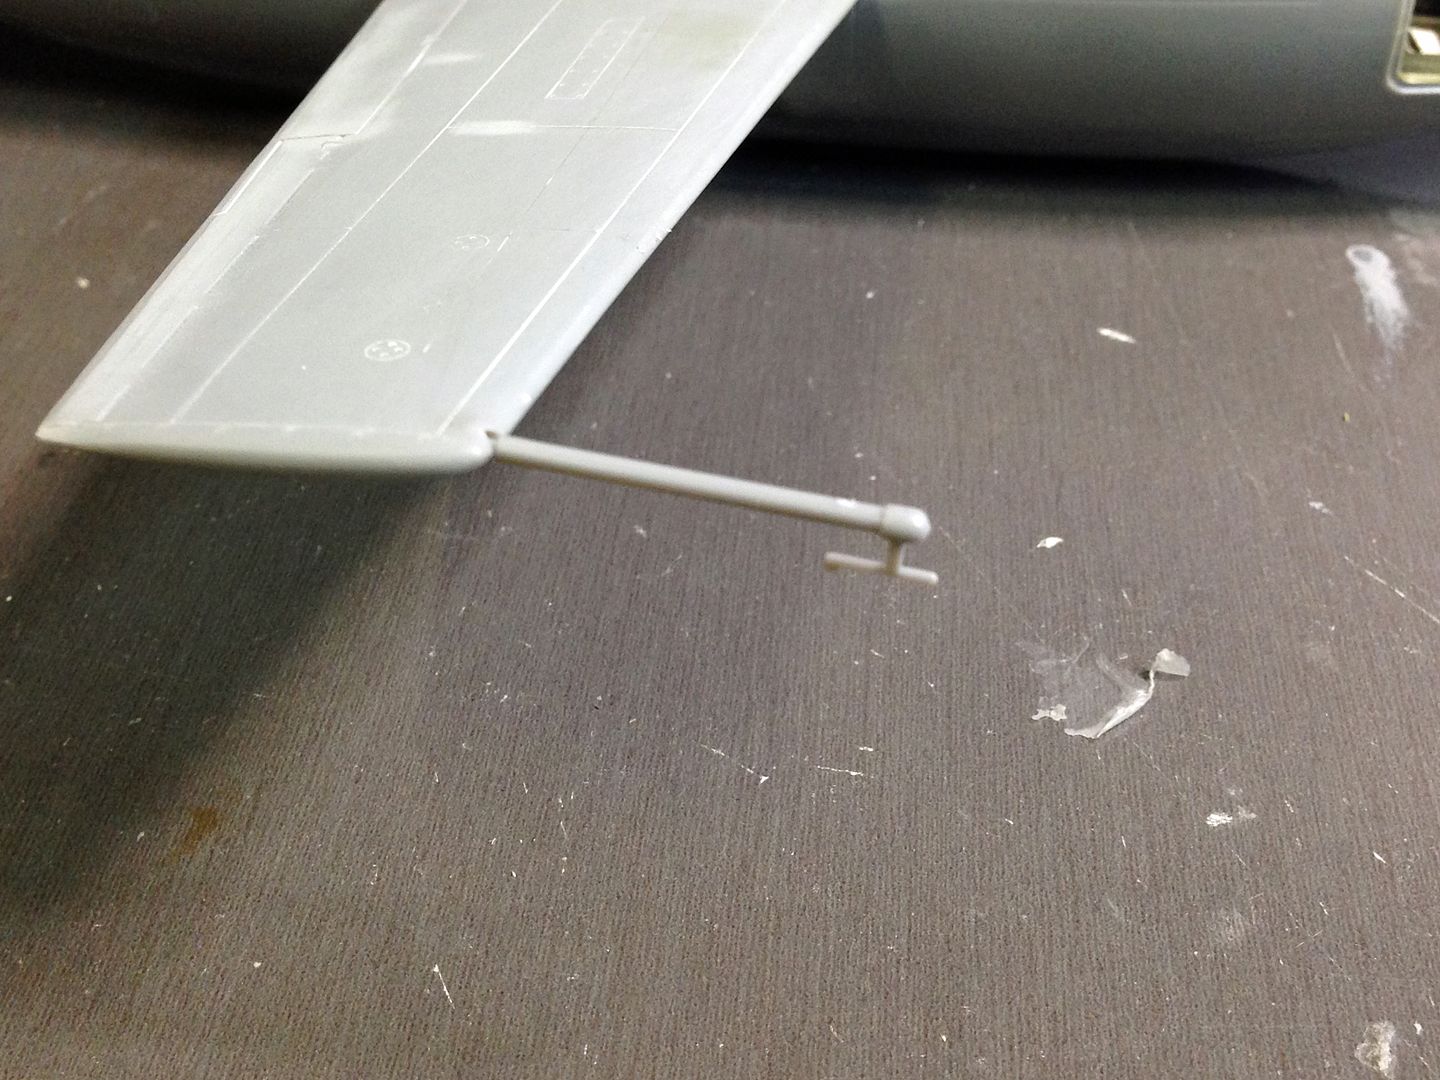
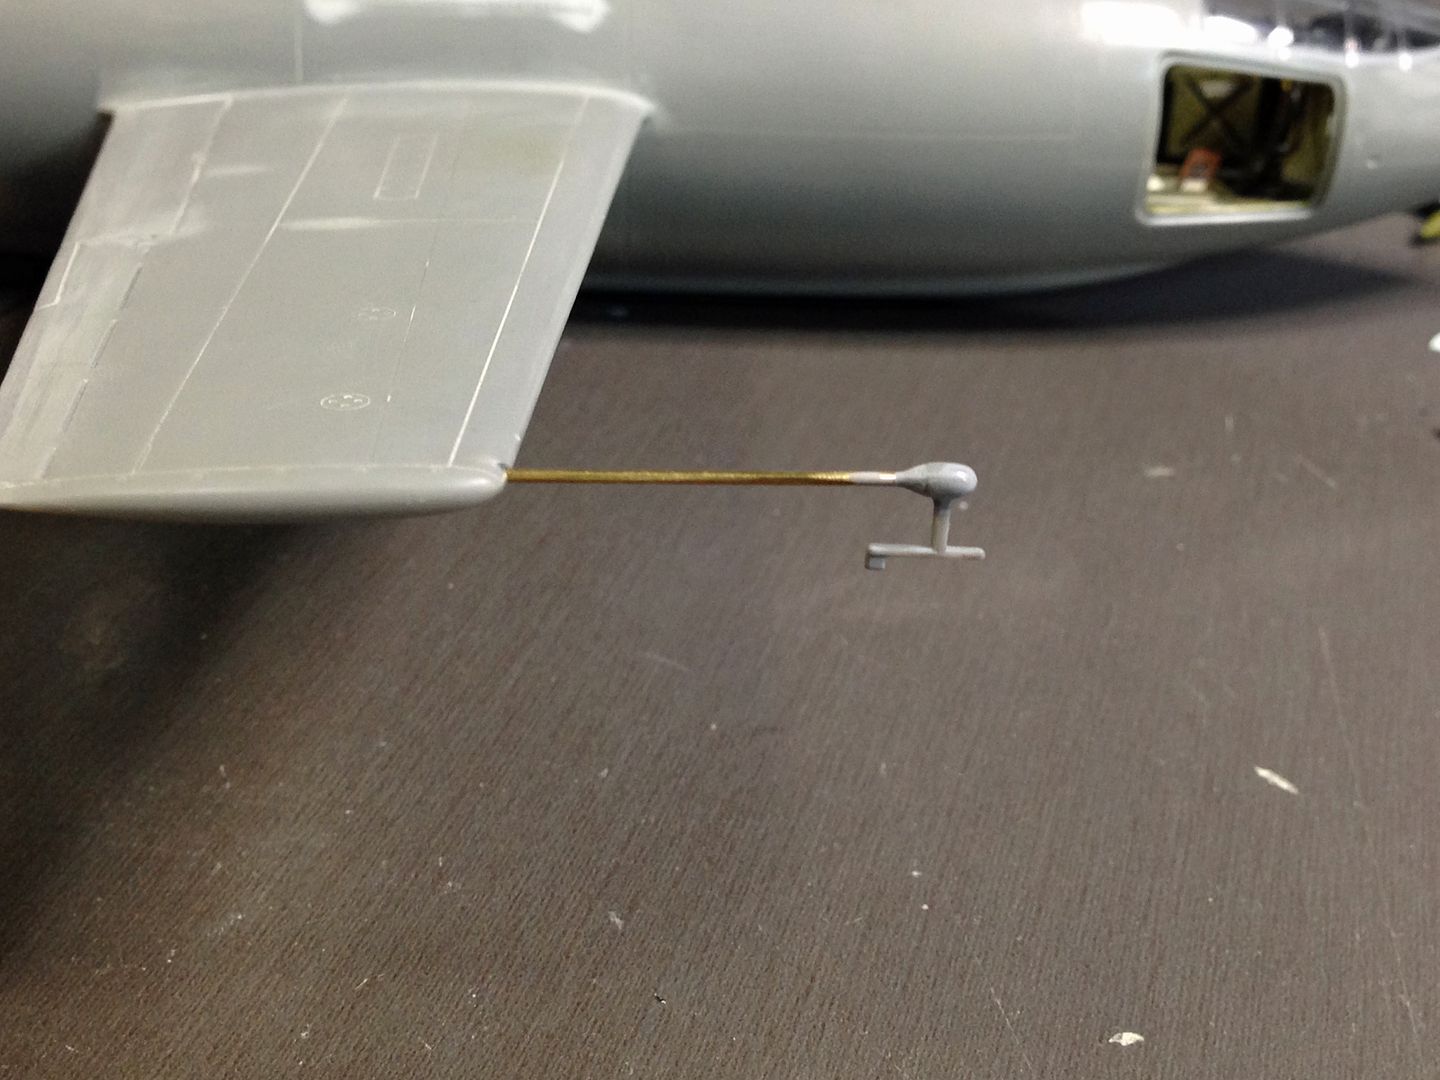
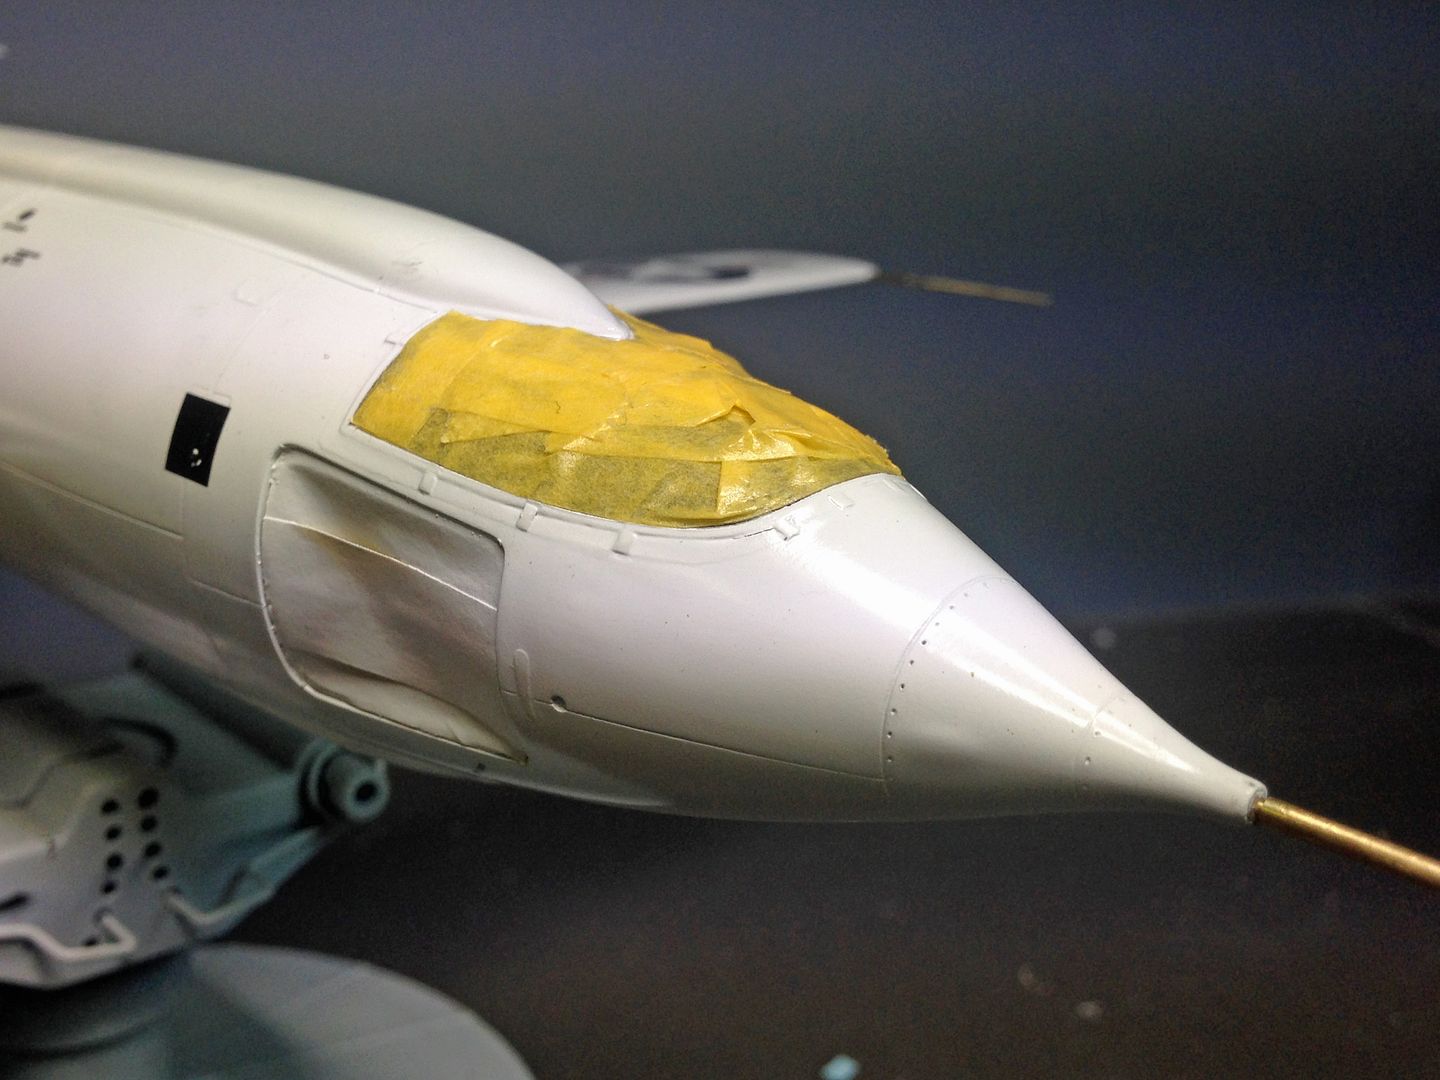
I thought the pitot tube could do with a bit of work as the old one is a bit on the thick side. I also like to make these sorts of details removable for easier transport, so I embedded an aluminium tube in the wing that would fit a brass rod and then fixed the end of the sensor onto the new piece of rod.
Old one:
New One:
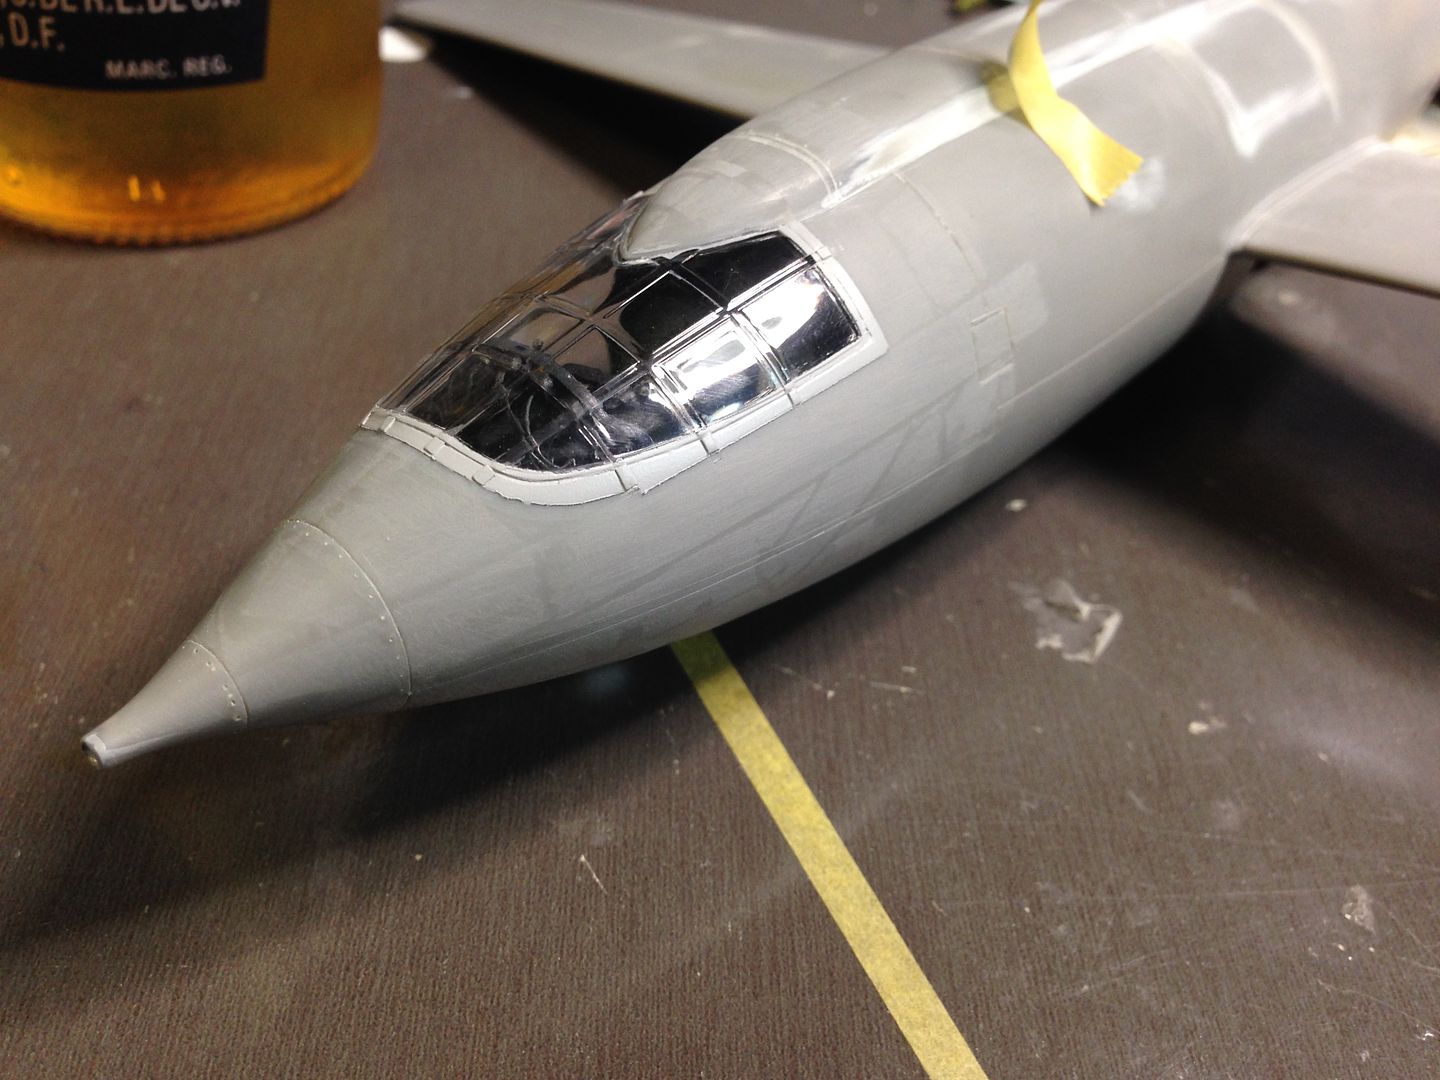
Another detail that I felt needed some work was the canopy. It fits fairly well onto the fuselage but it is missing some detail. Not a big issue for some but I like to add some extra stuff to my builds to set them apart from the rest. On close inspection of photos of the real thing, each strap of the canopy extends a small distance further over the fuselage than Revell would have you believe. As well as this, there is a raised panel that extends the same distance around the canopy, which I decided I will also depict.
Here is a good pic that illustrates what I mean:
http://upload.wikimedia.org/wikipedia/e ... X1nose.JPG
Using some Tamiya PLA paper like this: (and thanks Brent for the heads up)
http://www.tamiya.com/english/products/ ... /index.htm
I superglued sections of it that were the same size as the kit straps to the fuselage:
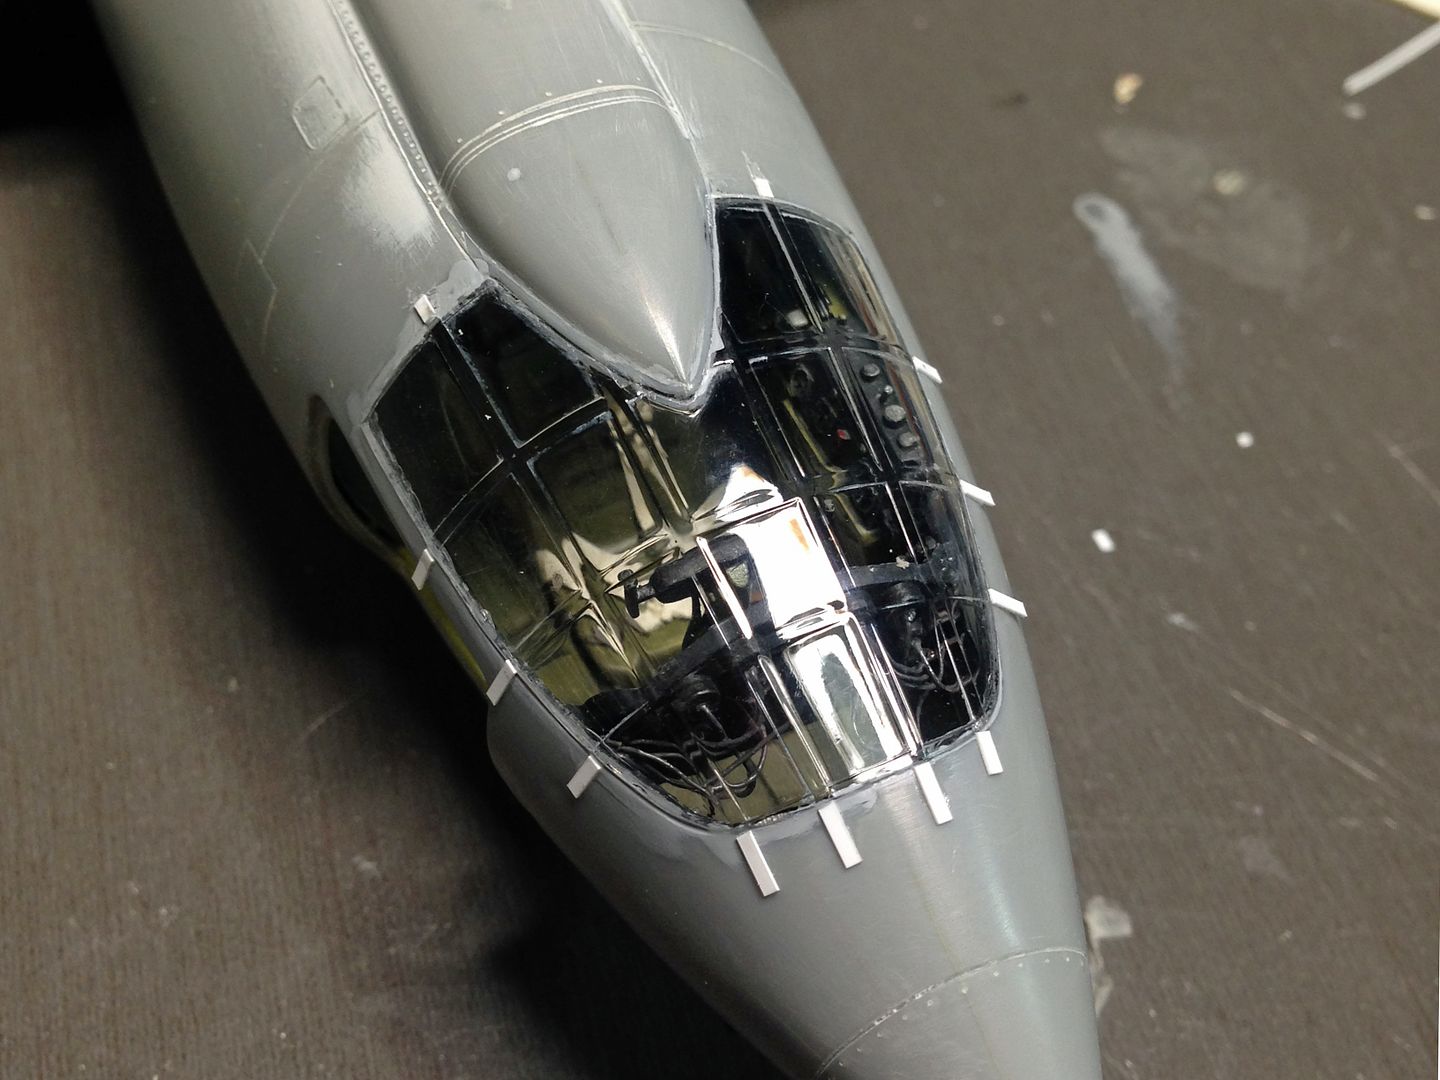
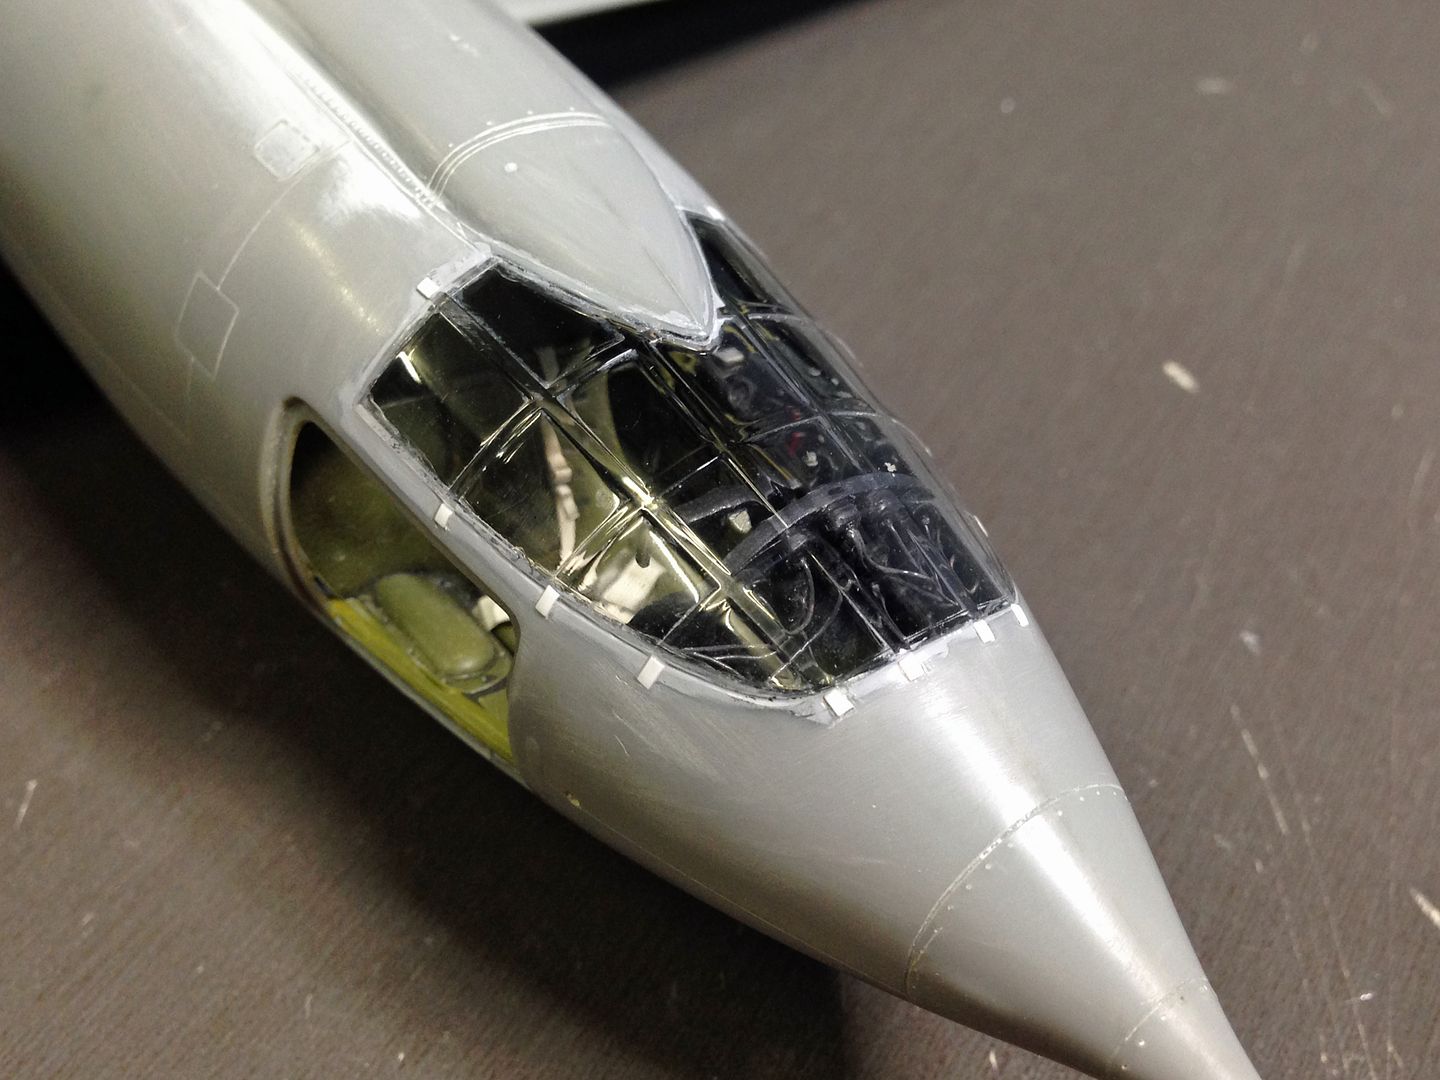
I then trimmed them to shape and polished them to match the canopy with the Dremel. The next stage will be to add the raised panel around the canopy.
I thought the pitot tube could do with a bit of work as the old one is a bit on the thick side. I also like to make these sorts of details removable for easier transport, so I embedded an aluminium tube in the wing that would fit a brass rod and then fixed the end of the sensor onto the new piece of rod.
Old one:

New One:

Another detail that I felt needed some work was the canopy. It fits fairly well onto the fuselage but it is missing some detail. Not a big issue for some but I like to add some extra stuff to my builds to set them apart from the rest. On close inspection of photos of the real thing, each strap of the canopy extends a small distance further over the fuselage than Revell would have you believe. As well as this, there is a raised panel that extends the same distance around the canopy, which I decided I will also depict.
Here is a good pic that illustrates what I mean:
http://upload.wikimedia.org/wikipedia/e ... X1nose.JPG
Using some Tamiya PLA paper like this: (and thanks Brent for the heads up)
http://www.tamiya.com/english/products/ ... /index.htm
I superglued sections of it that were the same size as the kit straps to the fuselage:

I then trimmed them to shape and polished them to match the canopy with the Dremel. The next stage will be to add the raised panel around the canopy.

- Ericg
- Posts: 214
- Joined: Mon Apr 14, 2014 7:30 pm
Re: Bell X-1
![]() by hrtpaul » Thu May 15, 2014 6:49 pm
by hrtpaul » Thu May 15, 2014 6:49 pm
Very cool man. Coming along rather nicely 
Head A/CAM Phantom Phanatic, Shit Stirrer and Karma Bus Driver toot fkn toot 
- hrtpaul
- Posts: 4122
- Joined: Sat Apr 12, 2014 10:44 am
- Location: Like I'm gonna tell you lot
Re: Bell X-1
![]() by Nillus » Thu May 15, 2014 7:15 pm
by Nillus » Thu May 15, 2014 7:15 pm
"...add the raised panel around the canopy."
Well that's a very tricky gig. I'll be interested to see how you do that, coz working in/around clear parts is fraught with danger.
Watching...watching...watching.
Well that's a very tricky gig. I'll be interested to see how you do that, coz working in/around clear parts is fraught with danger.
Watching...watching...watching.
- Nillus
- Posts: 308
- Joined: Mon Apr 14, 2014 5:59 pm
Re: Bell X-1
![]() by Ericg » Thu May 15, 2014 10:53 pm
by Ericg » Thu May 15, 2014 10:53 pm
Hey Salty, no sweat mate. If you saw what I did with the Mirage canopy, you would think I was crazy.
The model is getting ever so close to its gloss white paint.
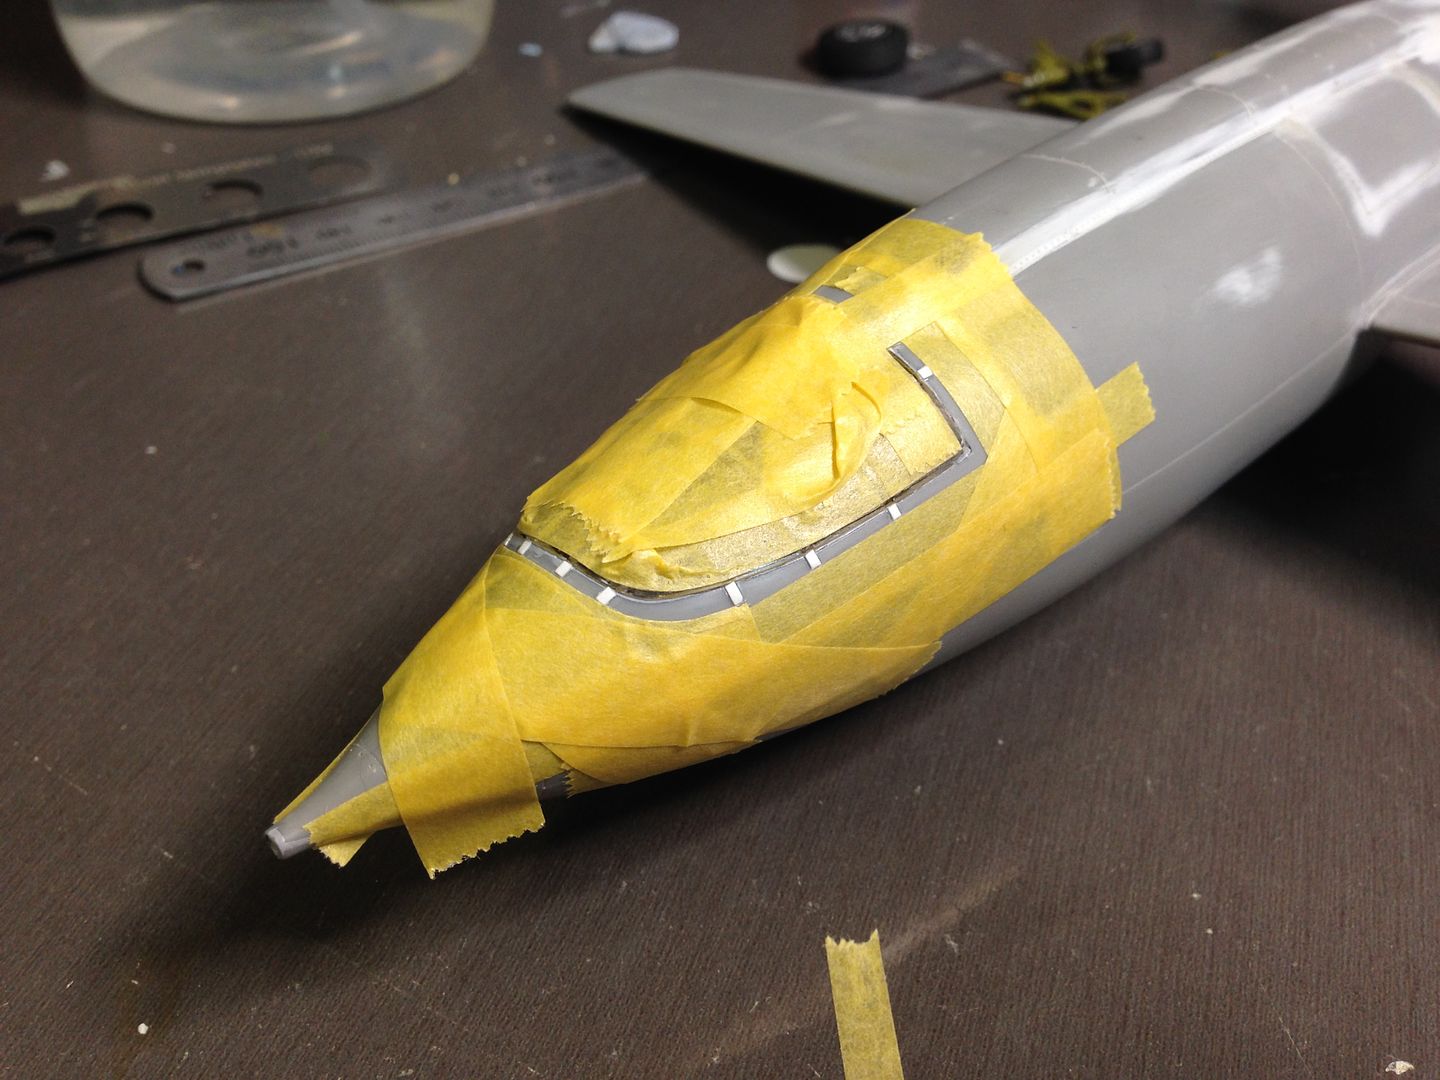
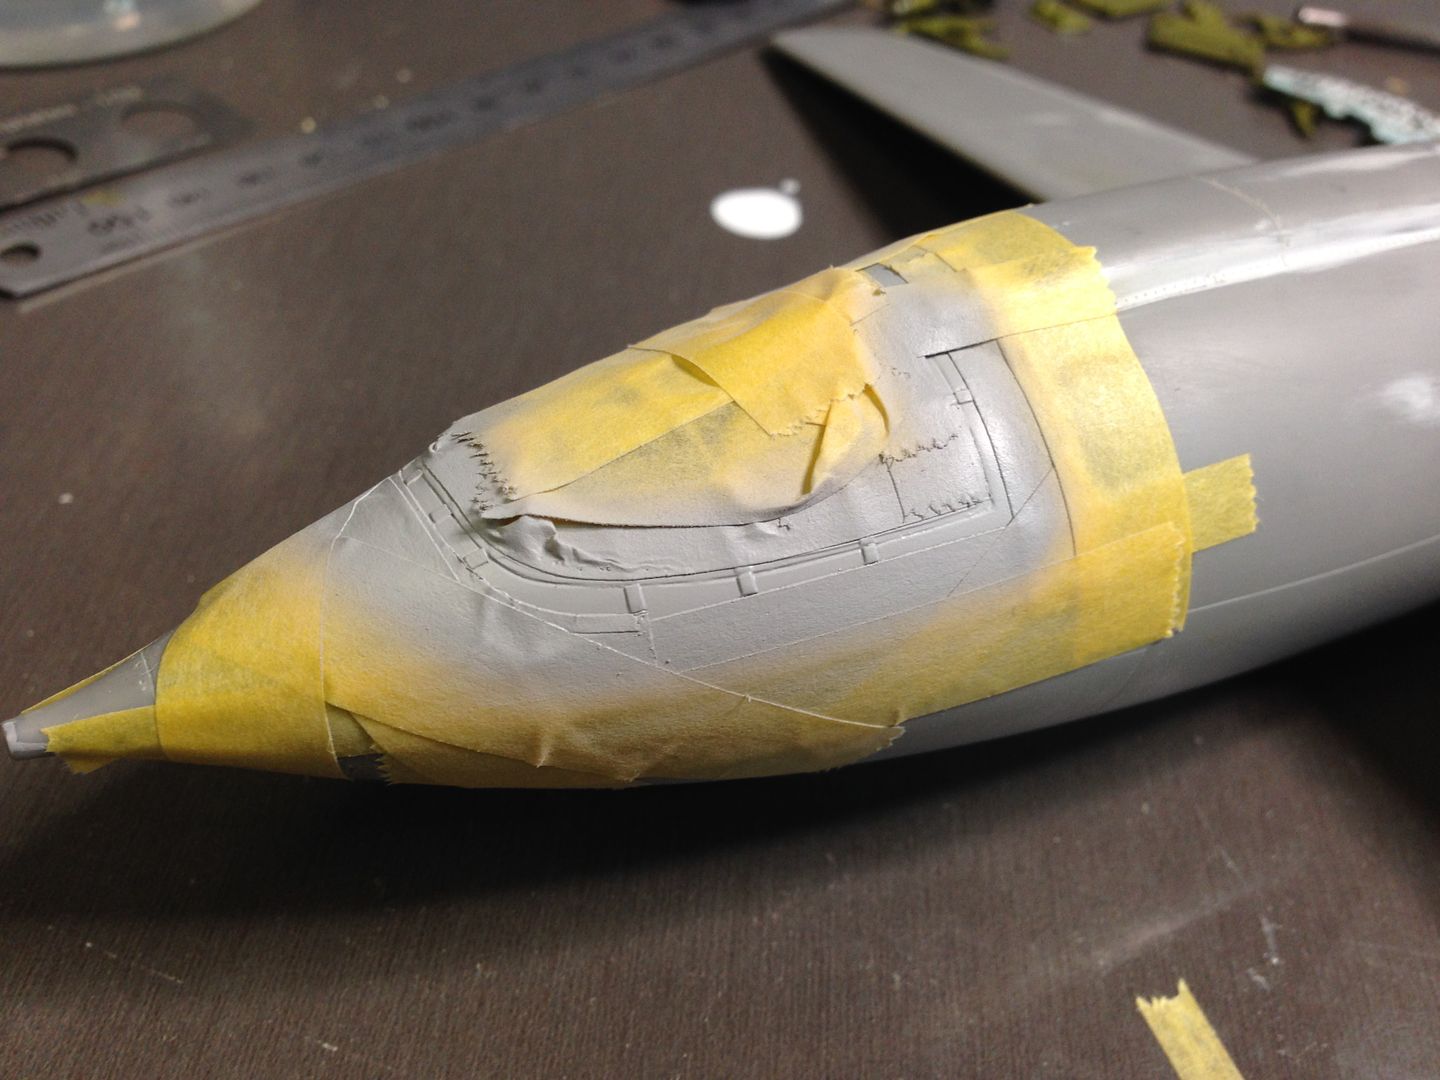
Here is the raised panel around the canopy.
I masked off the area and then built up a couple of thin layers of tamiya primer over the area. I have since polished the whole area with a Dremel to further incorporate this panel into the model. This process has left a nice raised area that I have now primed over and it looks quite good.
The model is getting ever so close to its gloss white paint.
Here is the raised panel around the canopy.
I masked off the area and then built up a couple of thin layers of tamiya primer over the area. I have since polished the whole area with a Dremel to further incorporate this panel into the model. This process has left a nice raised area that I have now primed over and it looks quite good.


- Ericg
- Posts: 214
- Joined: Mon Apr 14, 2014 7:30 pm
Re: Bell X-1
![]() by Ericg » Fri May 16, 2014 5:39 pm
by Ericg » Fri May 16, 2014 5:39 pm
Time for paint.
Now I am sure the airliner guys are thinking that as I am a military model guy, that a gloss white paint job is out of reach. One of the reasons I chose the white scheme was to give gloss white another try. My Supermarine S4 was gloss white and I wanted to develop that technique a little further.
Masked up and ready to paint. I scrubbed the model with a toothbrush, paying particular attention to the panel lines, as they were all rescribed. I next followed that with a rub down with Testors Plastic Prep (a damn good product BTW) to get rid of any residue that may affect the overlying paint.
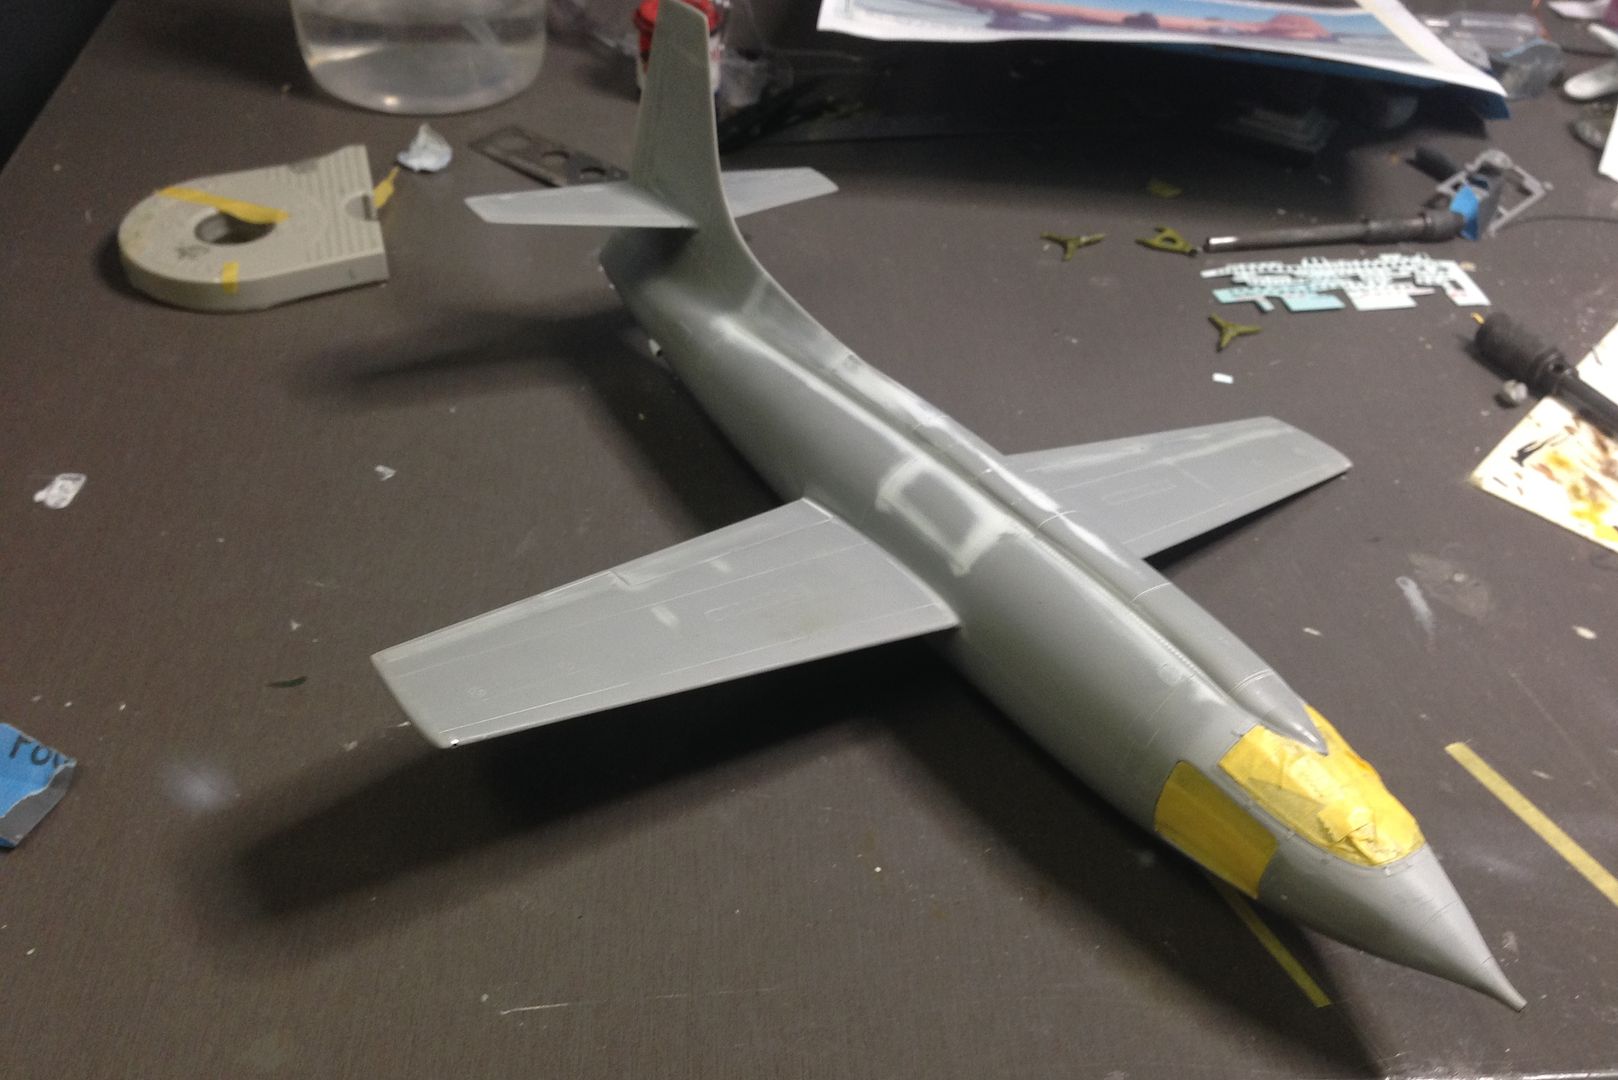
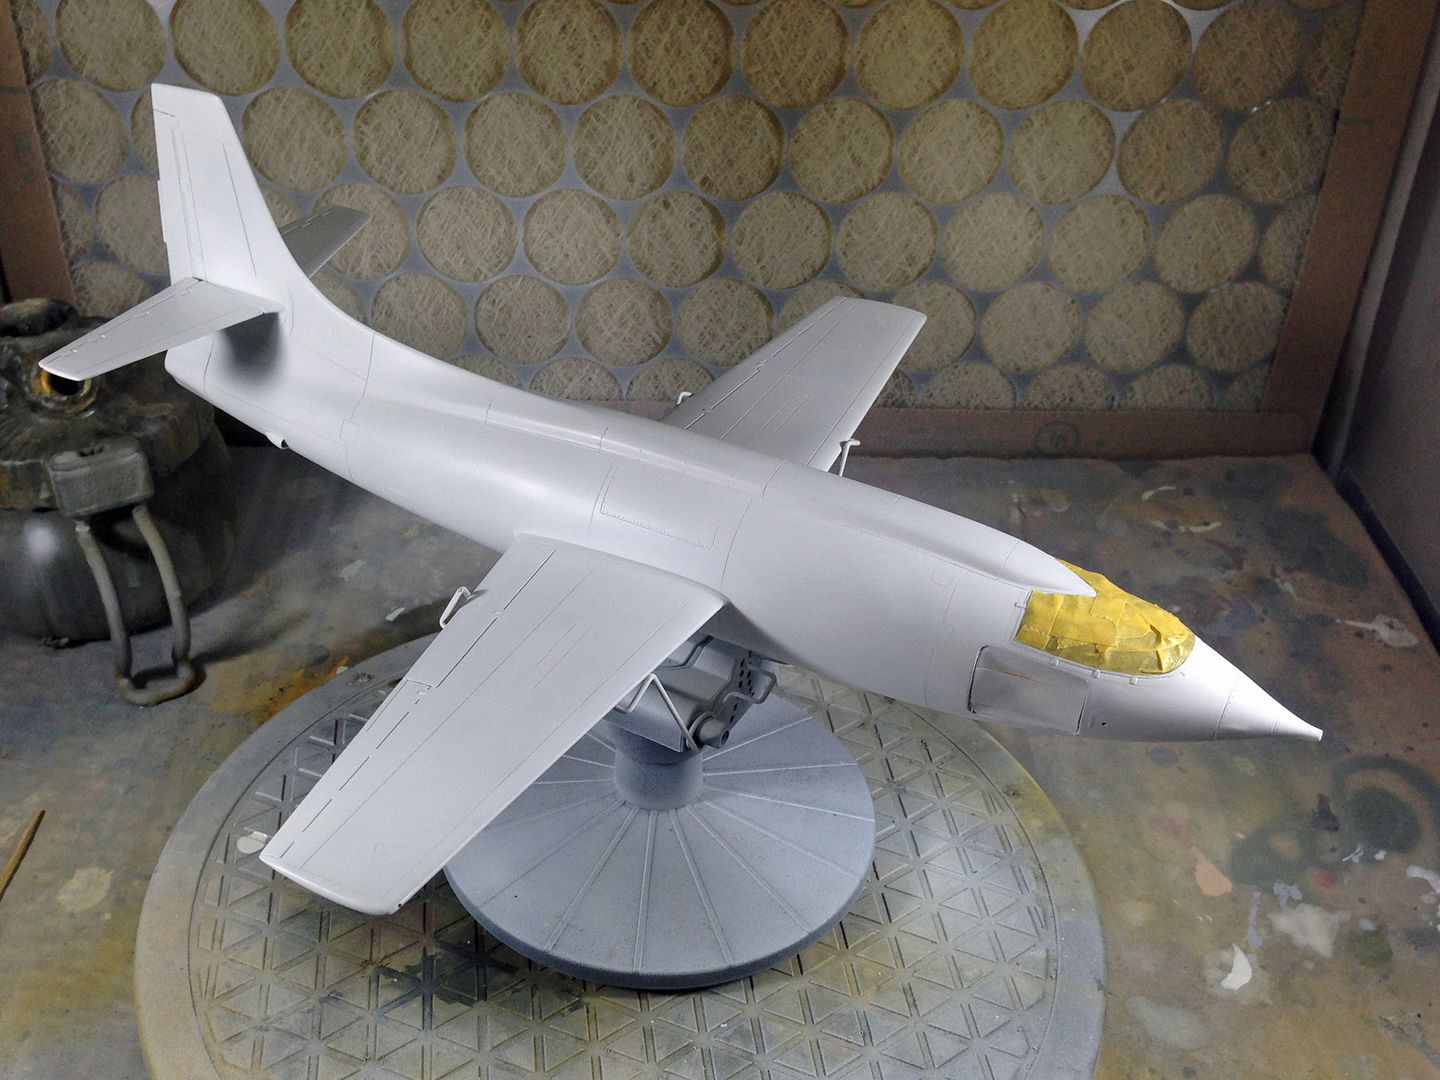
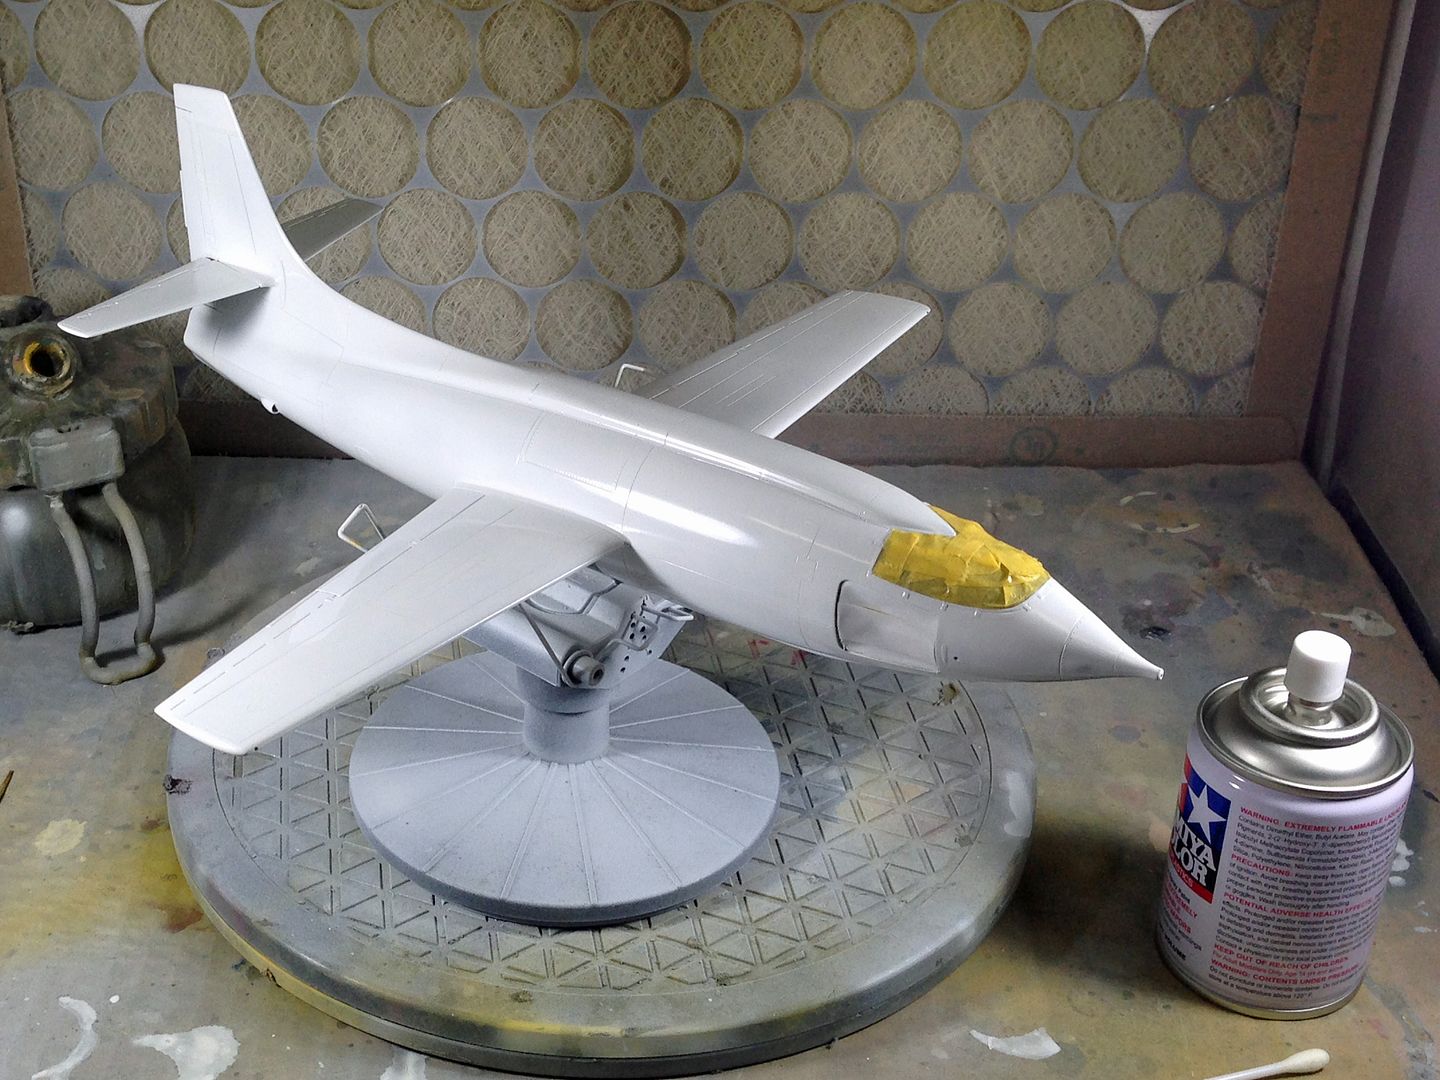
I prepared the spray booth by giving it a spray on the inside with a light mist of water to help hold down any old dust or paint particles. The weapon of choice is the Mr White Surfacer 1000 from the spray can.
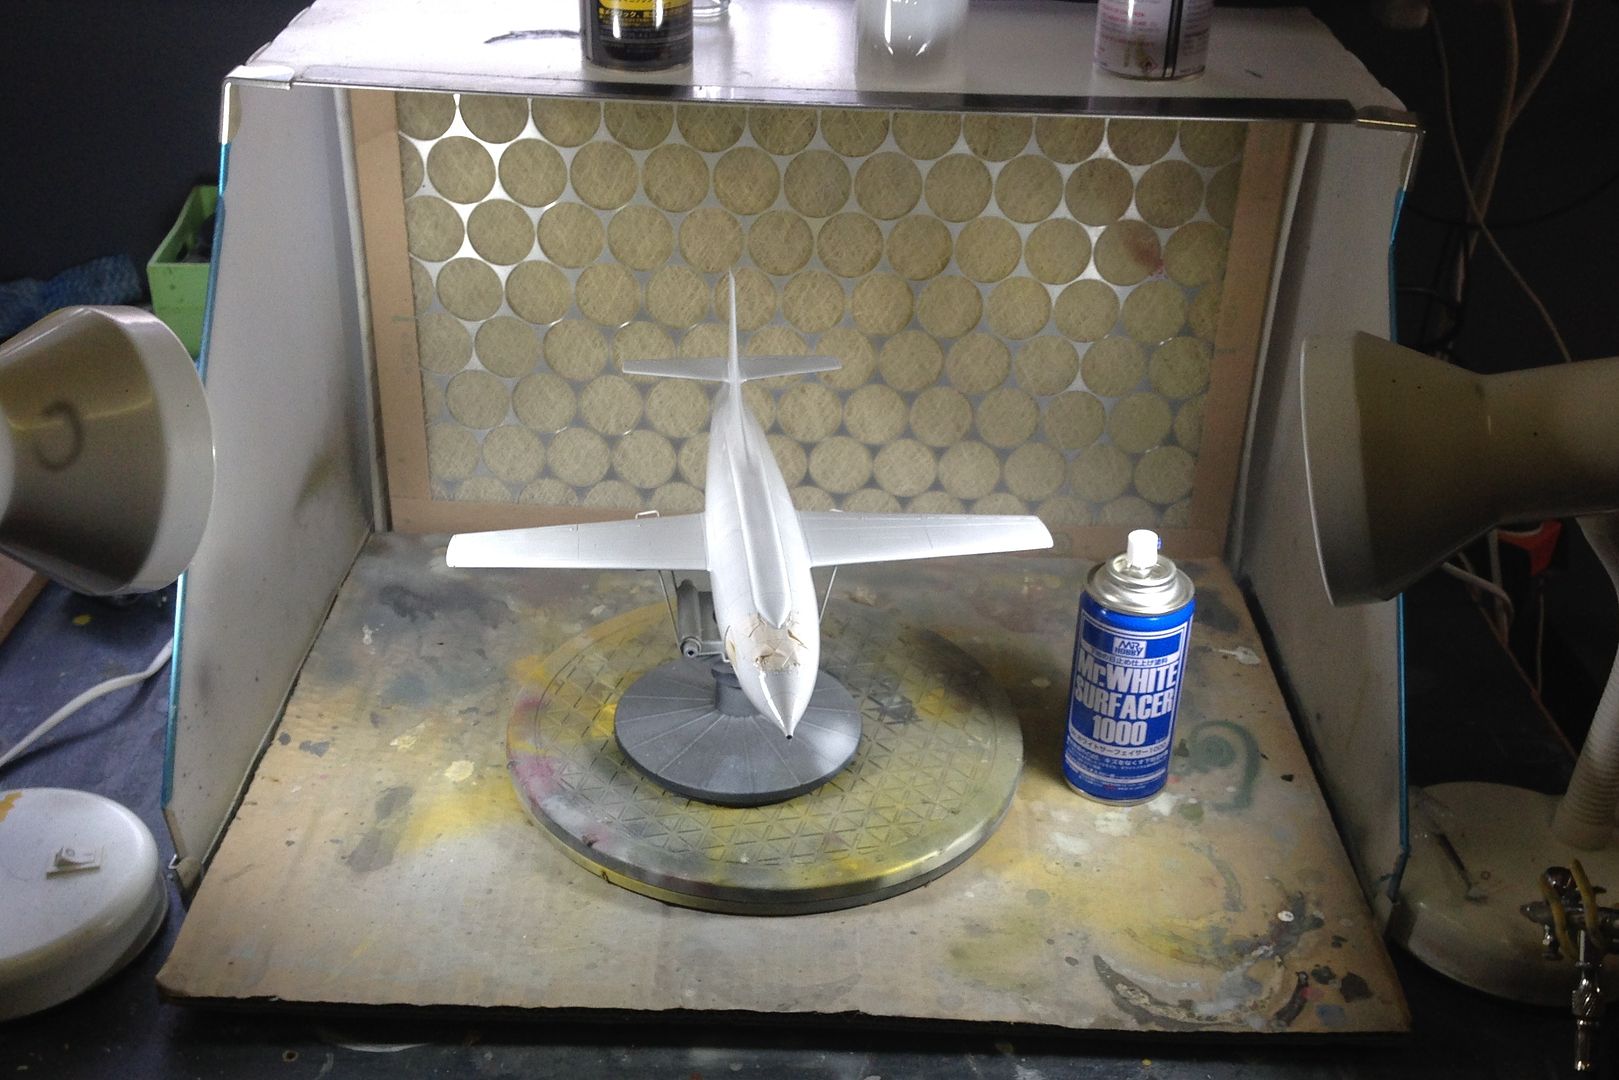
This stuff goes on very smooth as per the pic below. This was taken a few seconds after a pas with the spray can and it is very glossy at this stage.
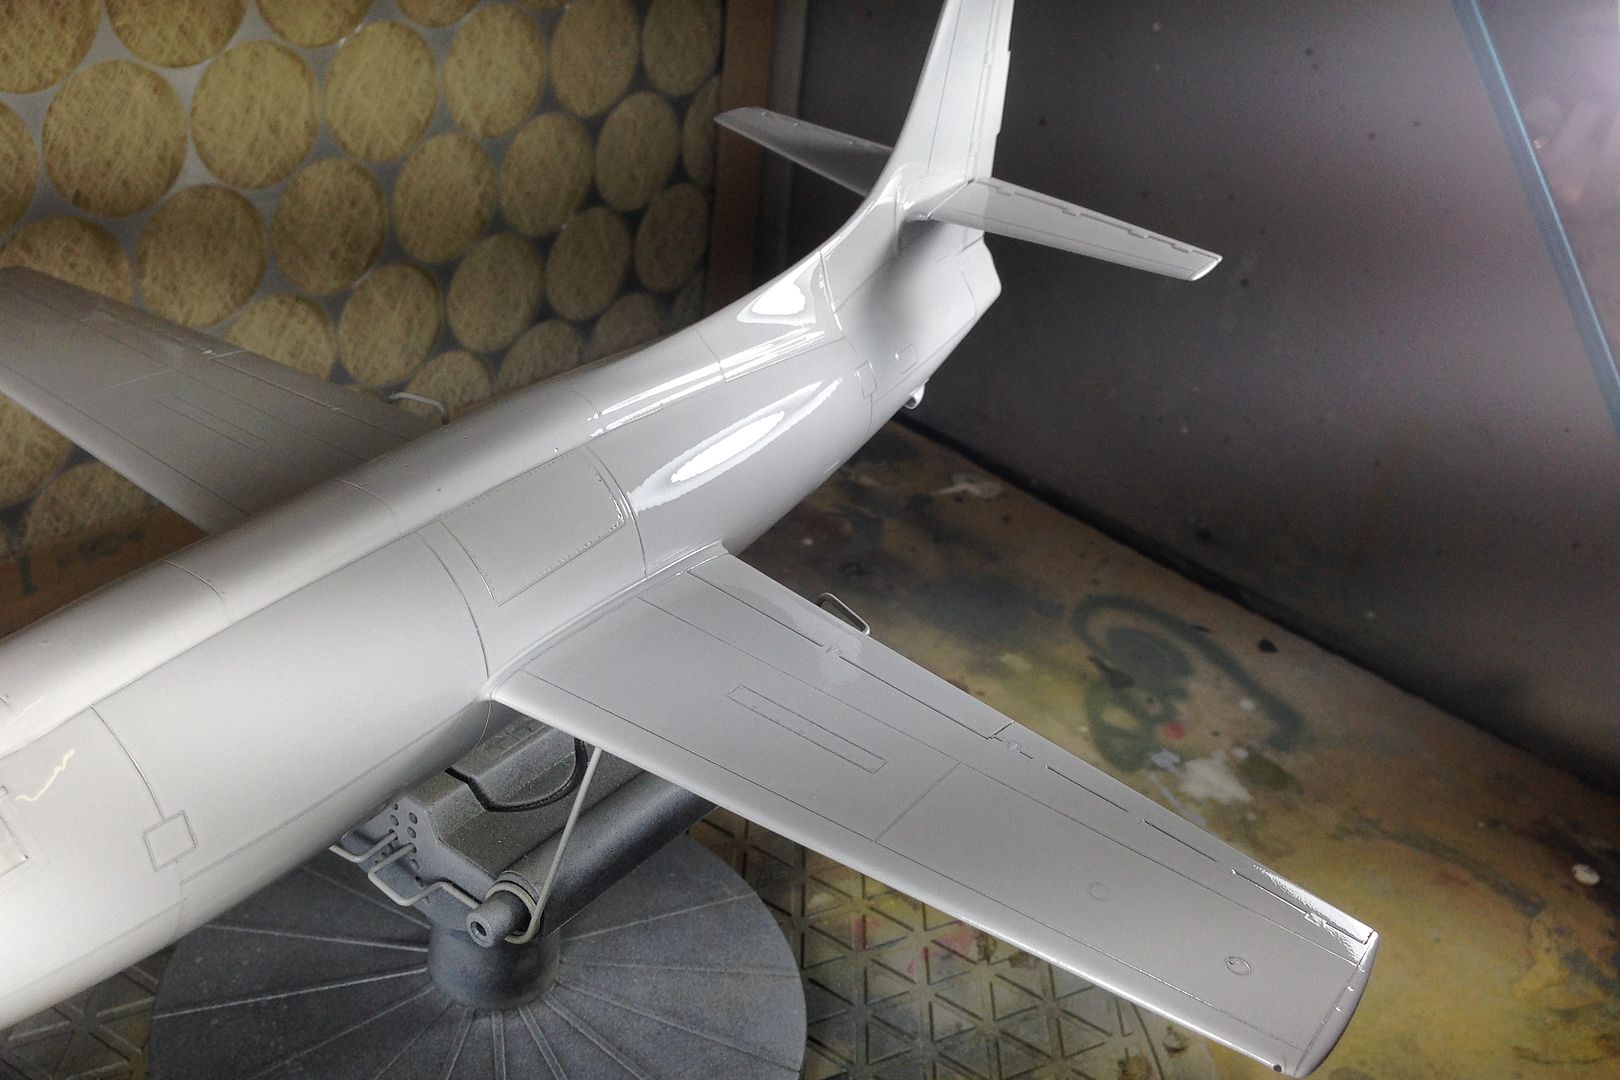
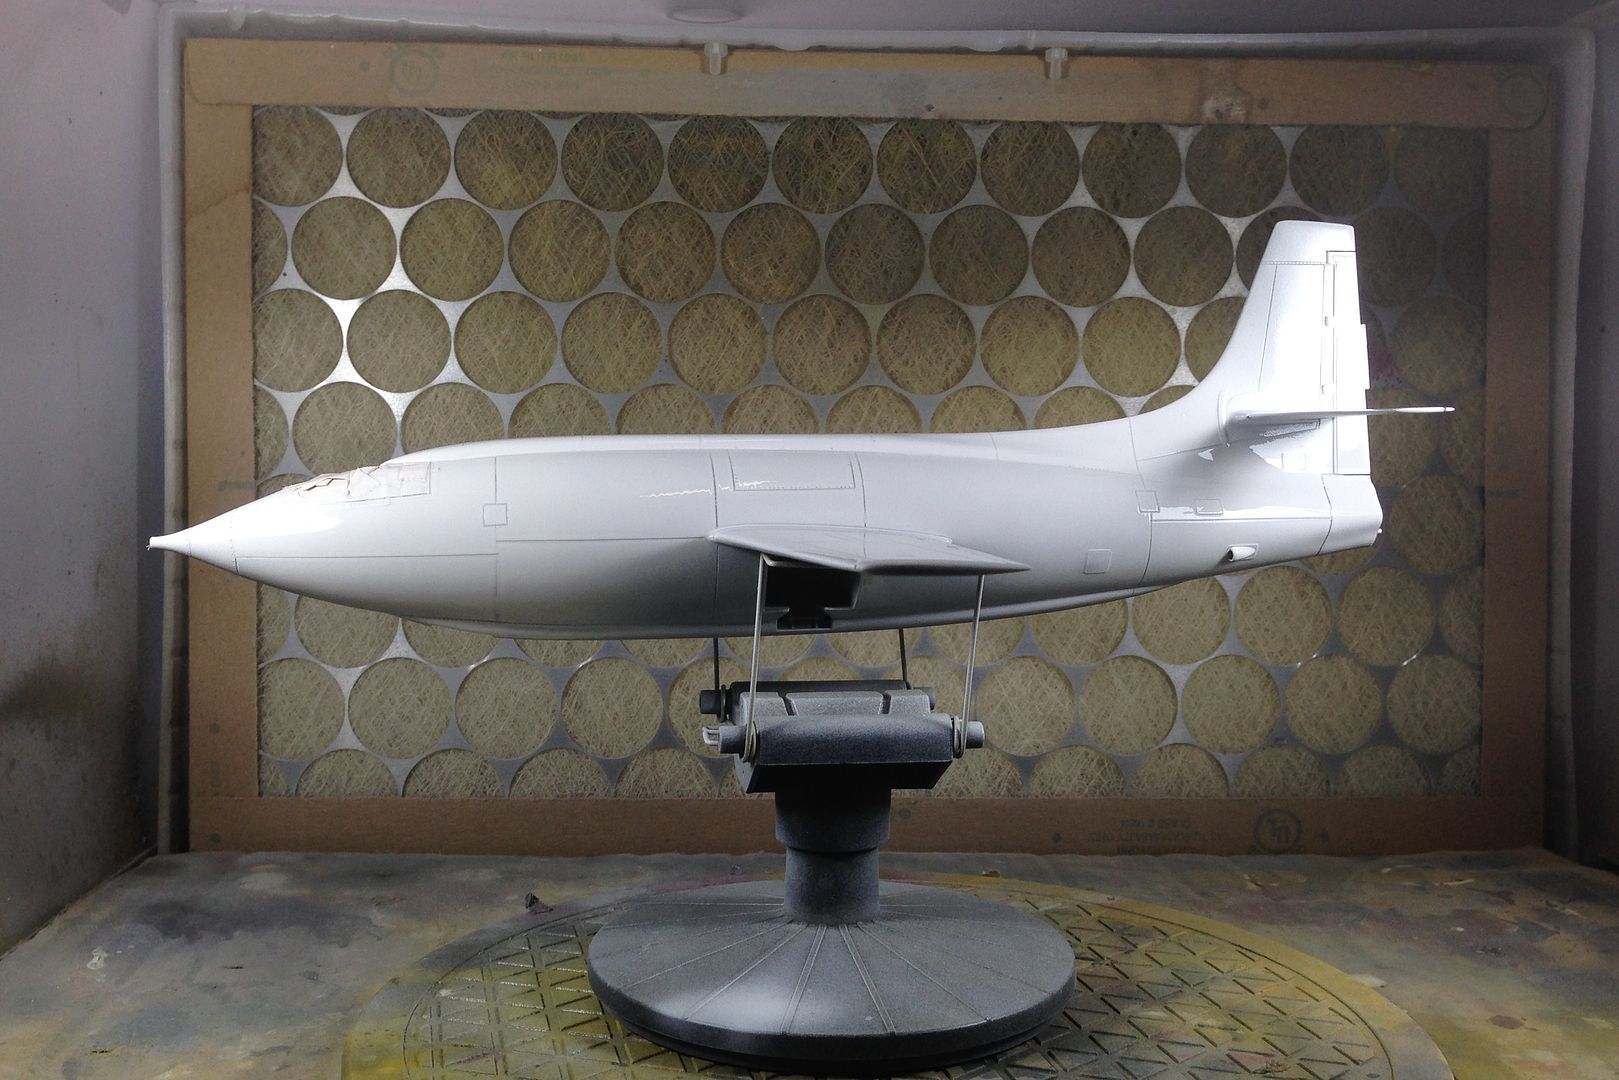
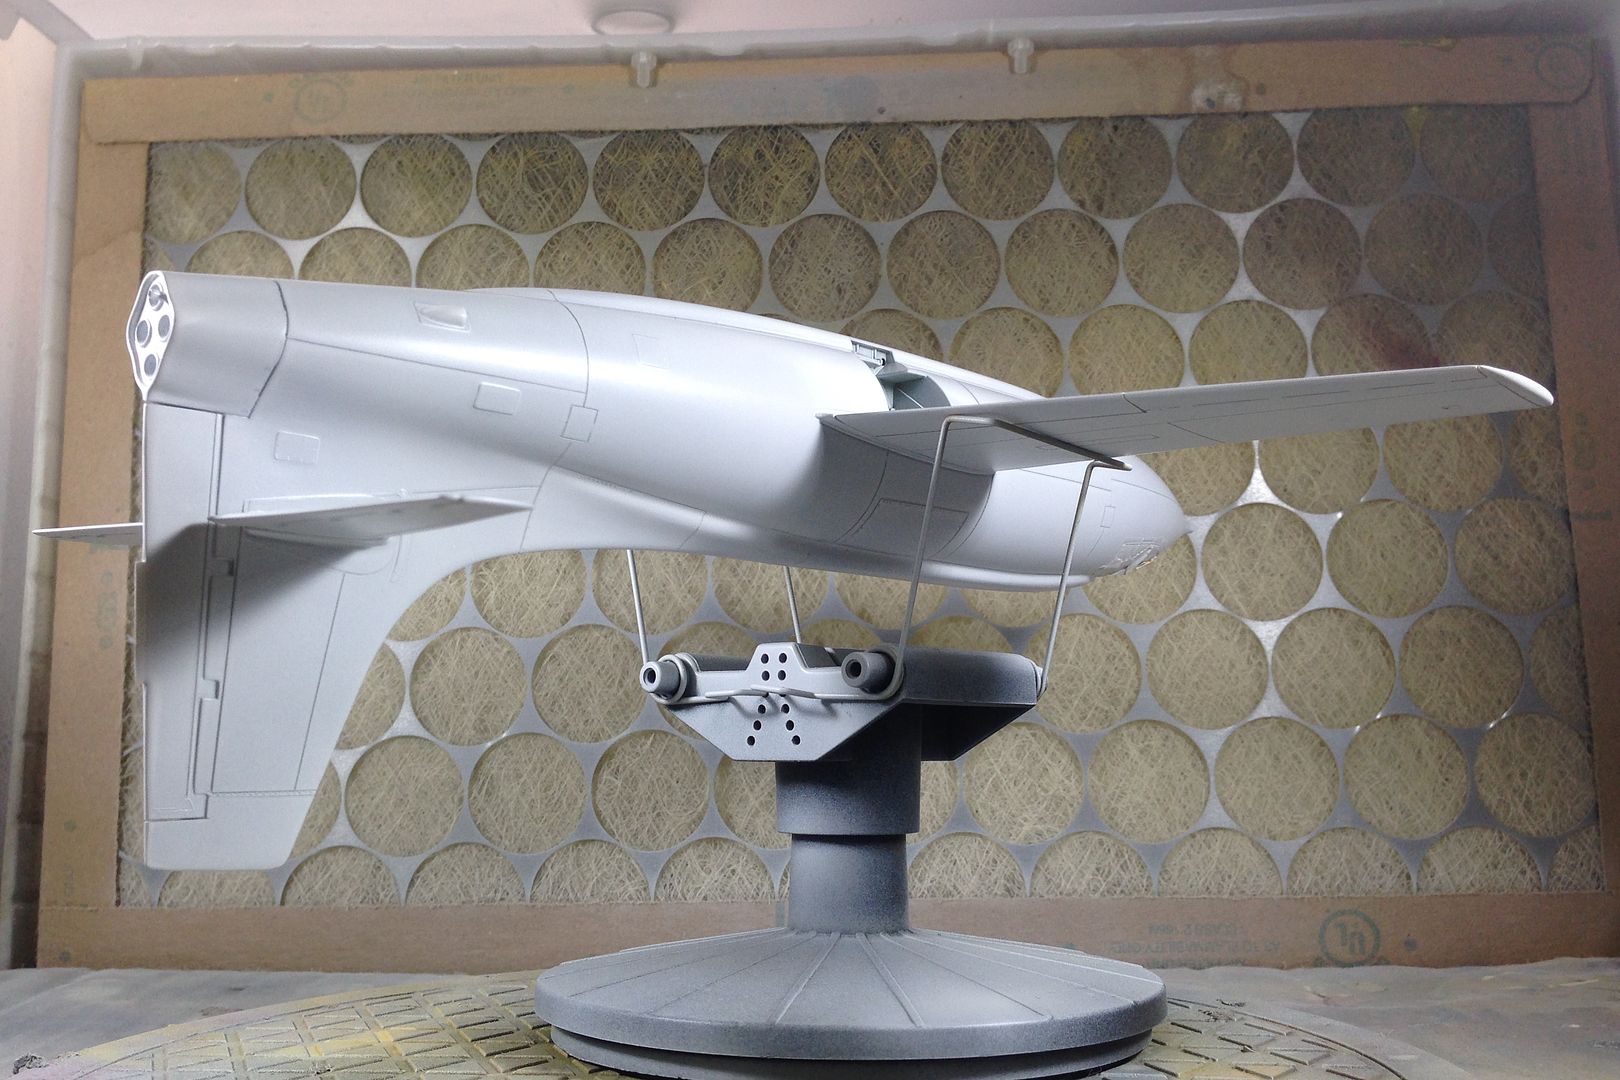
As this paint is very quick drying, I was able to flip the model over on its back and spray the remaining parts of the fuselage and under the wings. As you can see, the paint has etched into the surface of the model and gives it a satin sheen. Being the first coat, I am able to fix any flaws evident on the surface of the model and it is now being prepared for a second coat.
Now I am sure the airliner guys are thinking that as I am a military model guy, that a gloss white paint job is out of reach. One of the reasons I chose the white scheme was to give gloss white another try. My Supermarine S4 was gloss white and I wanted to develop that technique a little further.
Masked up and ready to paint. I scrubbed the model with a toothbrush, paying particular attention to the panel lines, as they were all rescribed. I next followed that with a rub down with Testors Plastic Prep (a damn good product BTW) to get rid of any residue that may affect the overlying paint.

I prepared the spray booth by giving it a spray on the inside with a light mist of water to help hold down any old dust or paint particles. The weapon of choice is the Mr White Surfacer 1000 from the spray can.

This stuff goes on very smooth as per the pic below. This was taken a few seconds after a pas with the spray can and it is very glossy at this stage.


As this paint is very quick drying, I was able to flip the model over on its back and spray the remaining parts of the fuselage and under the wings. As you can see, the paint has etched into the surface of the model and gives it a satin sheen. Being the first coat, I am able to fix any flaws evident on the surface of the model and it is now being prepared for a second coat.

- Ericg
- Posts: 214
- Joined: Mon Apr 14, 2014 7:30 pm
Re: Bell X-1 who said Military modellers cant paint gloss wh
![]() by Nillus » Sat May 17, 2014 1:23 am
by Nillus » Sat May 17, 2014 1:23 am
Looks really good so far.
- Nillus
- Posts: 308
- Joined: Mon Apr 14, 2014 5:59 pm
Re: Bell X-1 who said Military modellers cant paint gloss wh
![]() by Knotty » Sat May 17, 2014 9:36 am
by Knotty » Sat May 17, 2014 9:36 am
Coming along nicely Eric .
- Knotty
- Posts: 580
- Joined: Sat Apr 12, 2014 6:39 am
Re: Bell X-1 who said Military modellers cant paint gloss wh
![]() by hrtpaul » Sun May 18, 2014 4:56 pm
by hrtpaul » Sun May 18, 2014 4:56 pm
That's looking great Eric
Head A/CAM Phantom Phanatic, Shit Stirrer and Karma Bus Driver toot fkn toot
- hrtpaul
- Posts: 4122
- Joined: Sat Apr 12, 2014 10:44 am
- Location: Like I'm gonna tell you lot
Re: Bell X-1 who said Military modellers cant paint gloss wh
![]() by Ericg » Sun May 18, 2014 10:47 pm
by Ericg » Sun May 18, 2014 10:47 pm
I am hoping to have this model ready for the model Expo in a couple of weeks, so I am not really messing around with it. After fixing a few flaws following the first coat of Mr Surfacer white, I went back and touched up those areas with the paint decanted into my airbrush, ensuring a solid covering over the model. As you can see it is a nice satin sheen.
I rubbed down the first coats with the excellent Flory stick sanders and then applied Tamiya clear using their laquer spray can paints. This will ensure a nice hard clear coat that will take a fair bit of punishment during the polishing stage.
I let the clear coat dry for a day and then applied most of the decals. I also took some time out of the decalling stage to complete the construction of the remaining two pitot tube/sensors as can be seen in some of the pics below. I turned these in my lathe. I have a few more decals and some more painting to do, then its done.
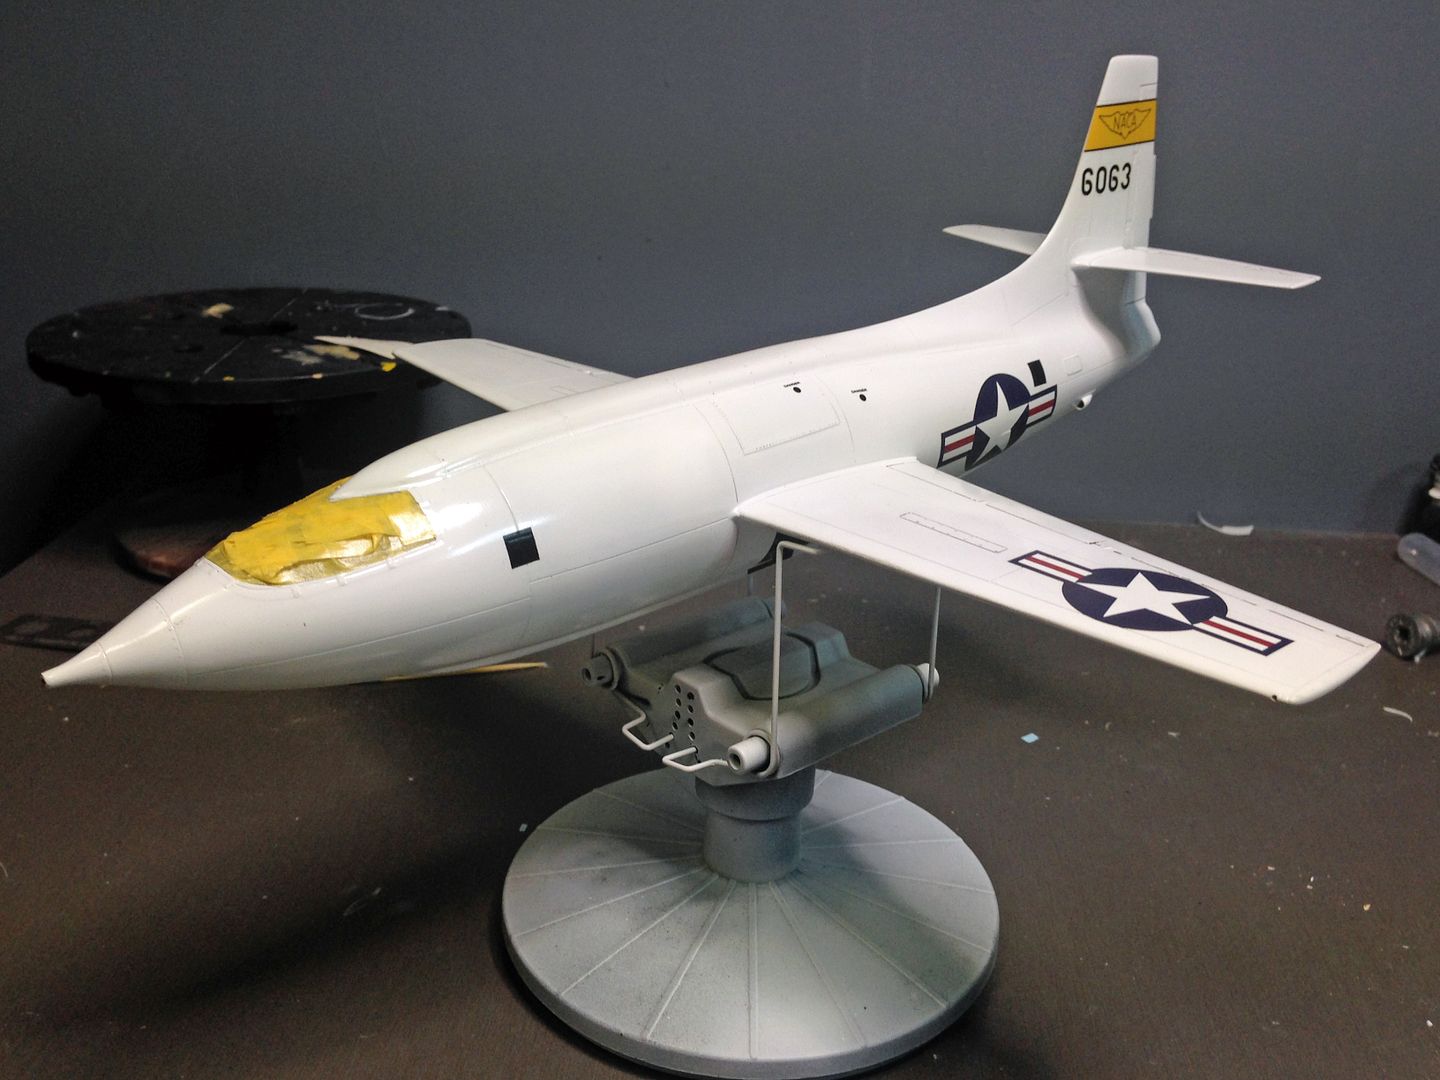
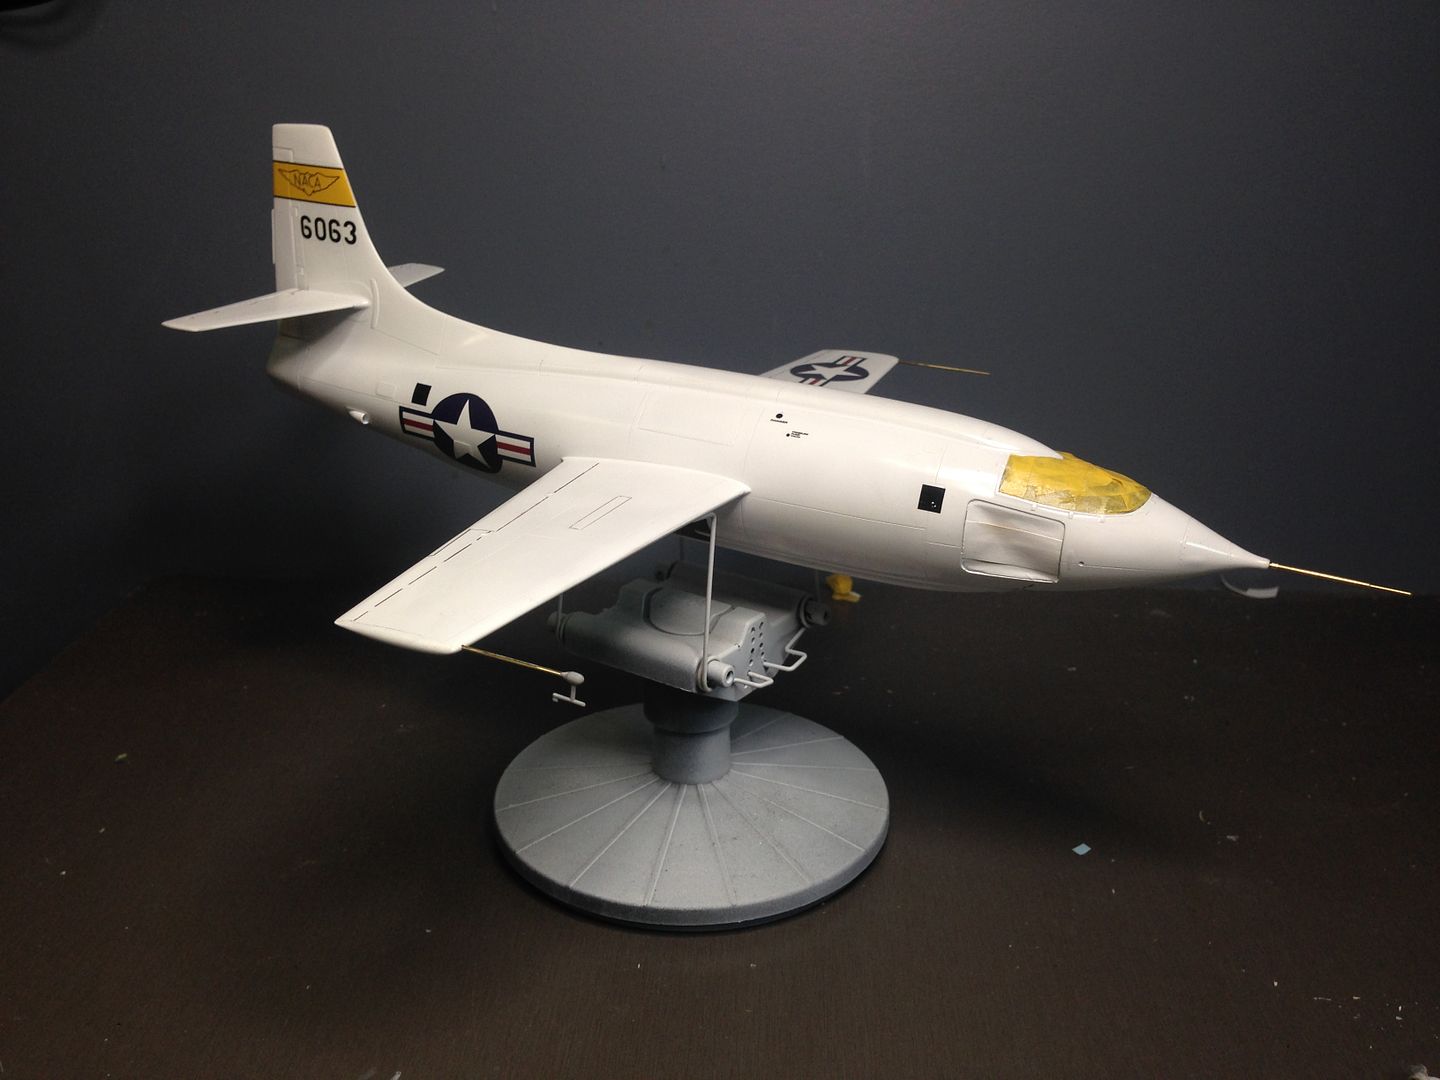
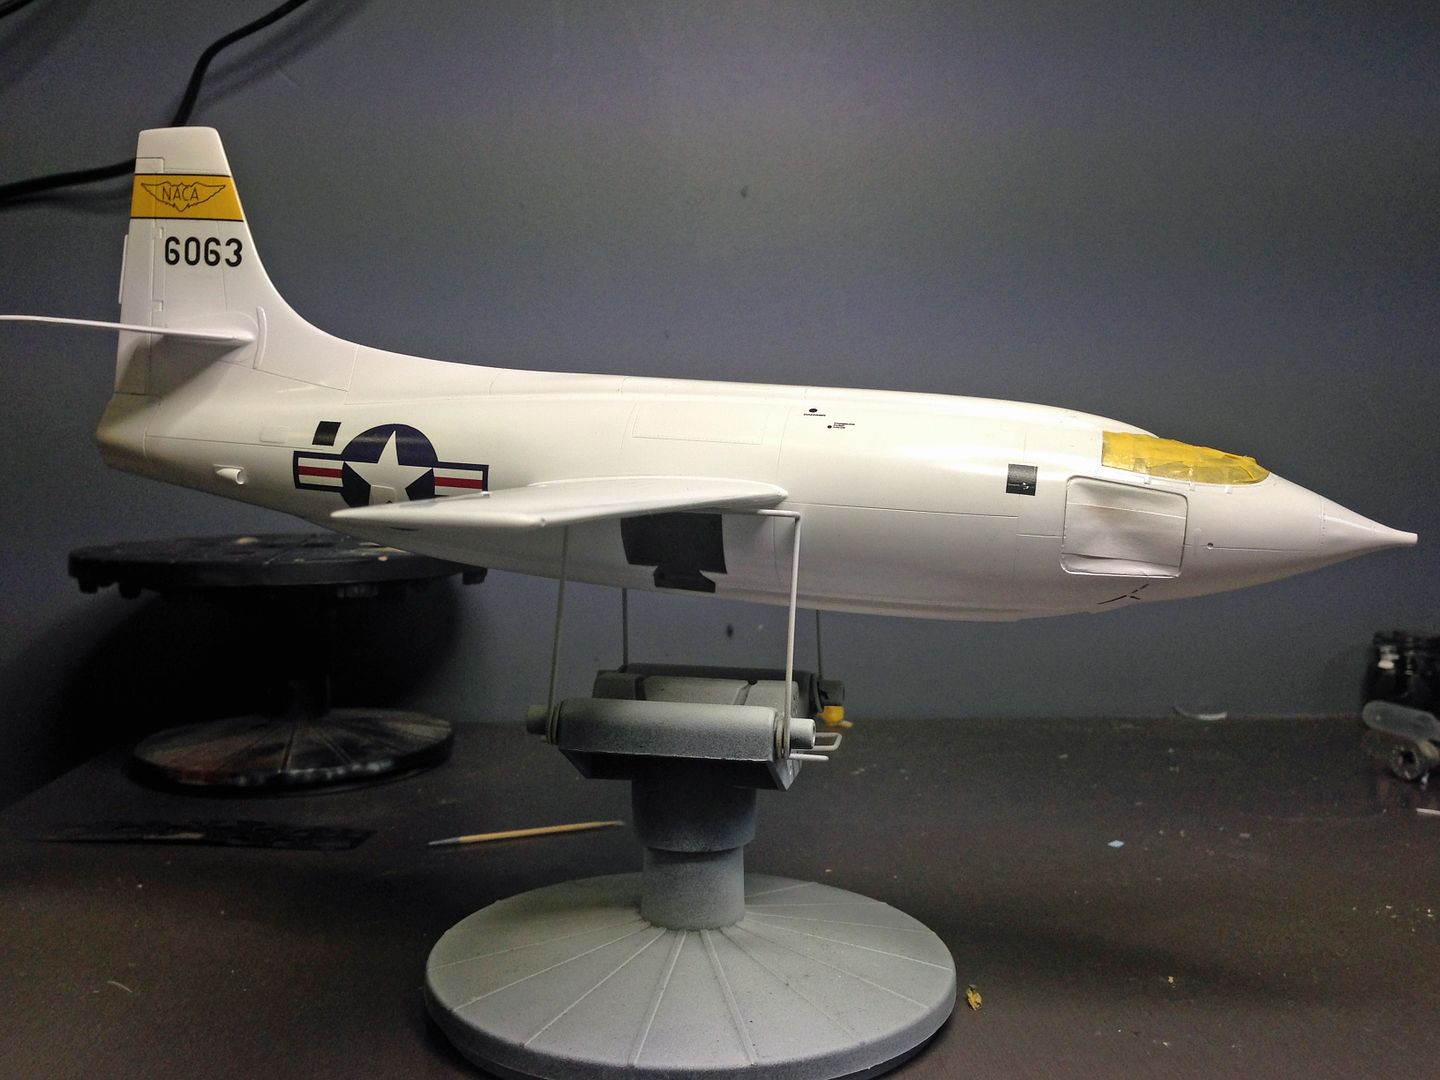
The raised panel along with the straps around the canopy that I added has settled nicely under the coats of paint.

I rubbed down the first coats with the excellent Flory stick sanders and then applied Tamiya clear using their laquer spray can paints. This will ensure a nice hard clear coat that will take a fair bit of punishment during the polishing stage.

I let the clear coat dry for a day and then applied most of the decals. I also took some time out of the decalling stage to complete the construction of the remaining two pitot tube/sensors as can be seen in some of the pics below. I turned these in my lathe. I have a few more decals and some more painting to do, then its done.


The raised panel along with the straps around the canopy that I added has settled nicely under the coats of paint.

- Ericg
- Posts: 214
- Joined: Mon Apr 14, 2014 7:30 pm
Return to Member's Works in Progress
Who is online
Users browsing this forum: No registered users and 4 guests