Matchbox 1/72 HS-125 (or 2)

Show us what's on the bench

Matchbox 1/72 HS-125 (or 2)

Postby RayS » Fri Feb 04, 2022 3:40 pm

I am building an HS-125 for a Matchbox GB over at BritModeller and the UAMF.

I will be using the Model Alliance sheet to mark mine up.
Image

It includes three schemes (as well as a  number of Dominies).
Image

Looks like the previous owner of the kit did some test fitting and the kit decals also look to be in good nick.
Image

I had built one of these back in 2005 as a RAAF what if, It left my collection soon after but I now have it back. It needs a refurb as that kit did not include clear parts so I had to use clear cement for all the cabin and cockpit transparencies and the clear coat has cracked over time. So I will be also remarking it as an RAF machine from the MA sheet.
Image

I stripped the older HS-125 and the oven cleaner ate some of the clear glue on the windscreen, the centre pillar also disappeared during the stripping process which will be replaced.
Image
Image

I also started the cockpit assembly on the new build.
Image

Some progress, I decided to have a go at an instrument panel, and then I went a bit further...
Image
Image
Image

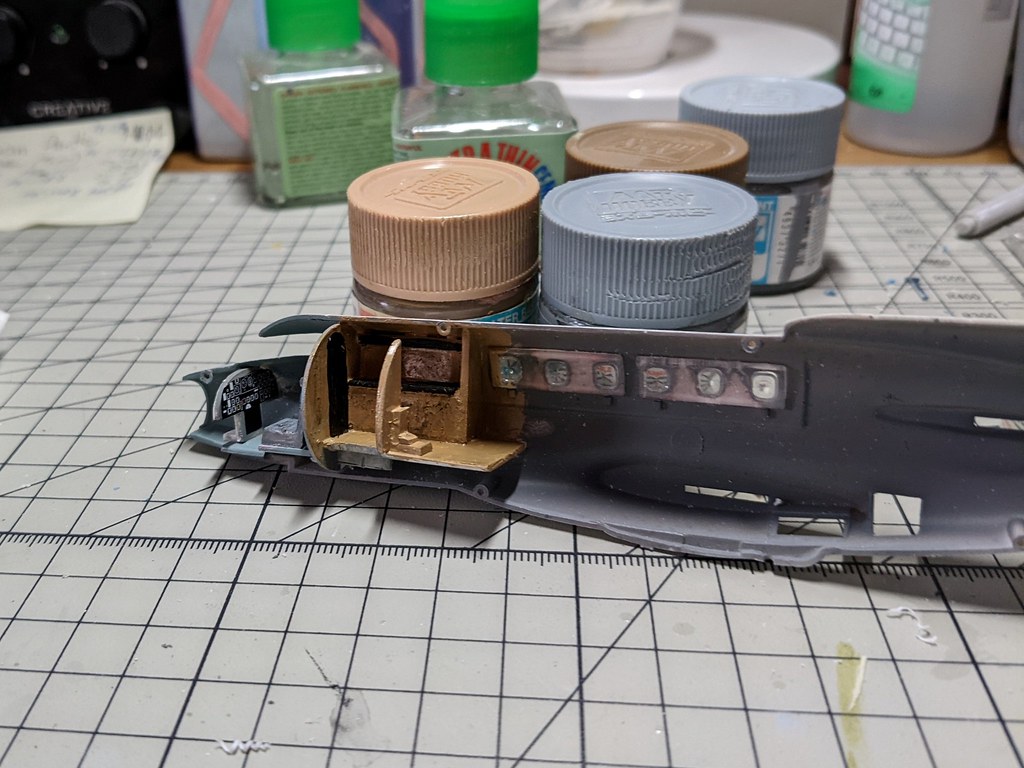
So no it will be wheels down and door open build.

On the refurb model, the clear parts (clear glue) have been removed, new windscreen pillars will have to be made unless I fill the openings with card and used decals for the windscreen and windows.

I started this last week and I think I would have finished them by now if it was not for my 'better do it right' anal retentiveness kicking in.

So the refurb kit will be finished as is without mods as I will do it as a CC2 which is modelled out of the box and decals supplied. I am using the aftermarket CC2 markings for a grey jet though.

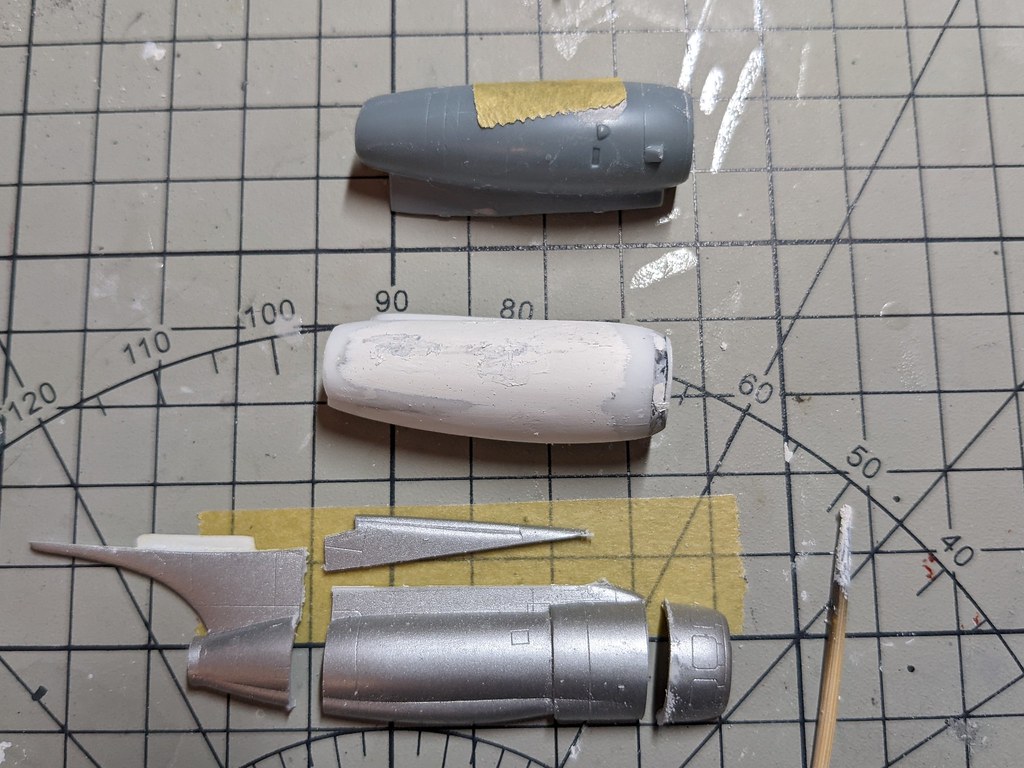
The new build is a CC3, basically an HS125-700 with a different engine. I could not leave it be and decided to make correct powerplants. I have a Sword UC-125 (HS-125-800) which has the correct shaped engines.

-600 engine is on top
Image

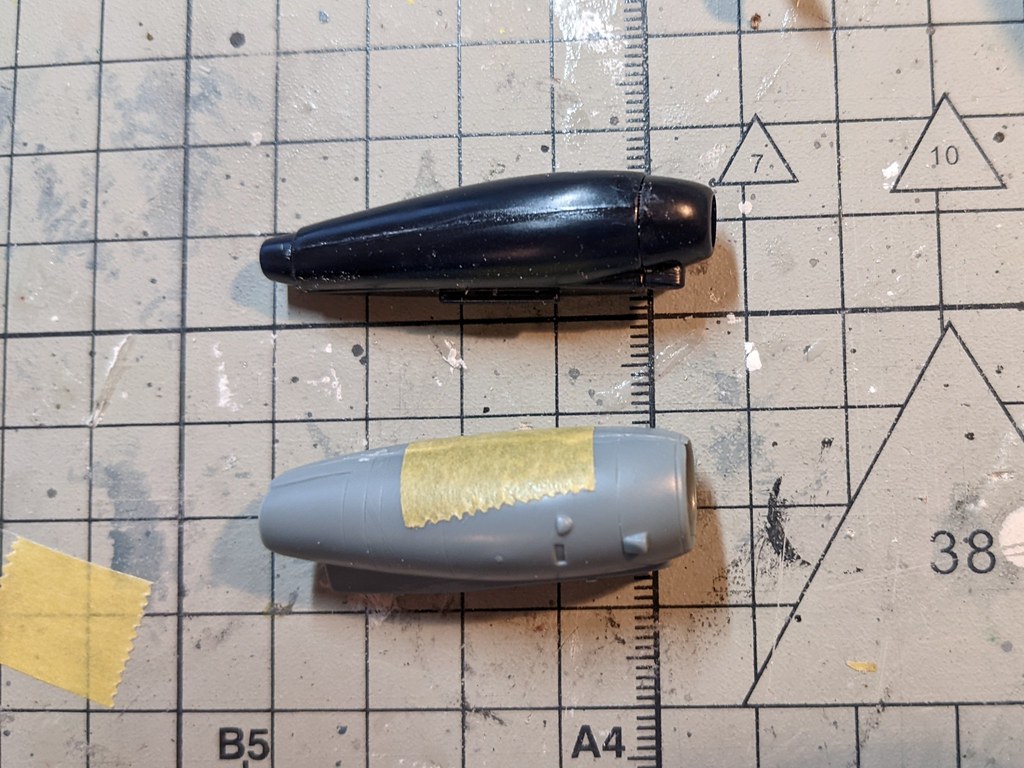
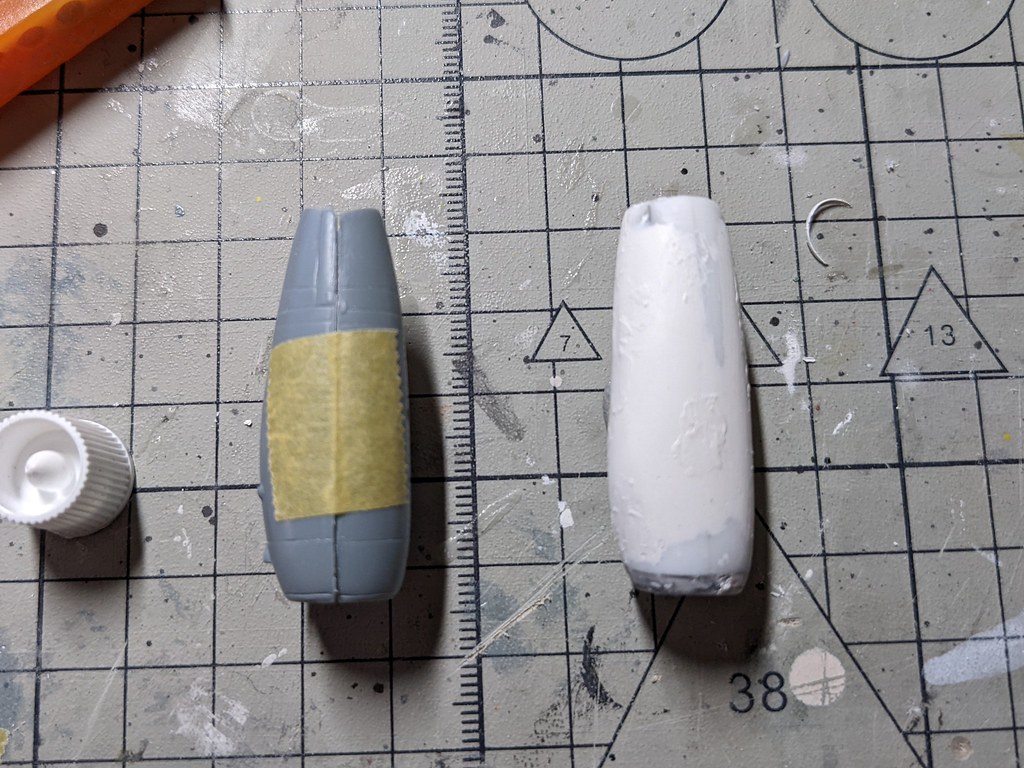
A dive into the spares found some 1/100 JT-3Ds from a B707 and a 1/48 A-10 fuel tank as candidates
Image

I did start with the fuel tank but found the JT-3 a closer shape to start from, with a lot of superglue, putty and sanding it is starting to take shape
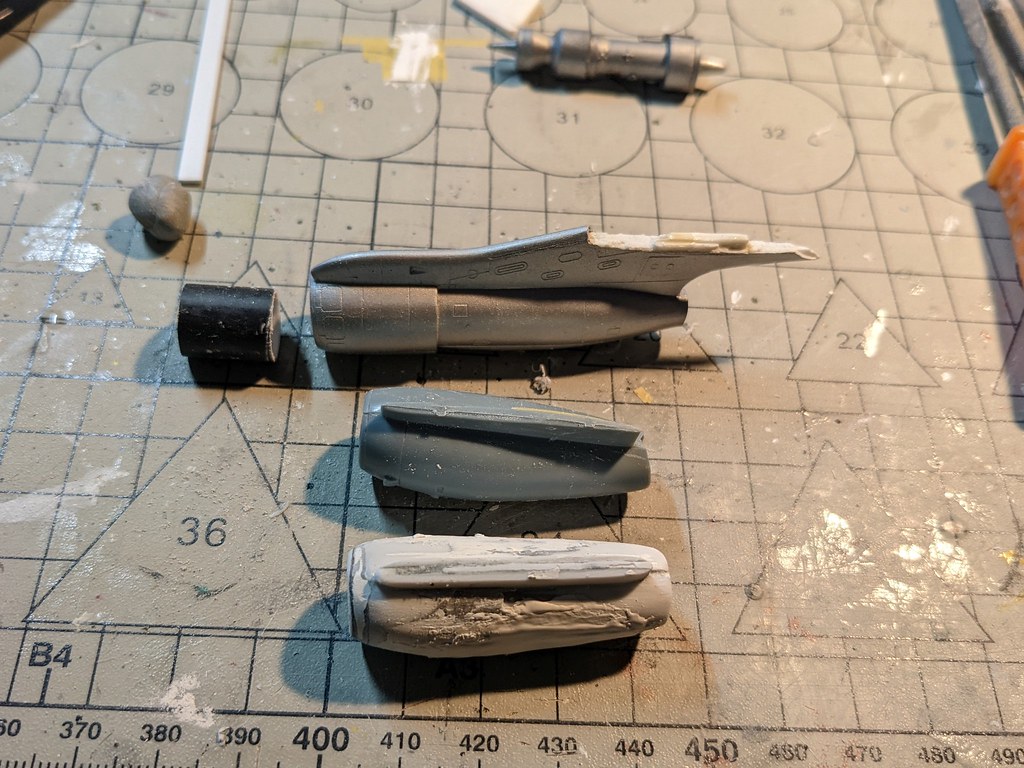
Image

Not quite there
Image
Image

And the wings and tail group are together
Image
Last edited by RayS on Tue Feb 08, 2022 7:31 am, edited 1 time in total.
Ray

Image
User avatar
RayS
 
Posts: 2170
Joined: Thu Apr 17, 2014 10:24 am
Location: RAdelaide!... YPAD

Re: Matchbox 1/72 HS-125 (or 2)

Postby tor lives » Sat Feb 05, 2022 12:39 pm

Absolutely fascinating work Ray.
I am watching this one with very keen interest.
The work you are doing, (especially with the refurb), is very good indeed.
I love the old Matchbox kits....even now, they have plenty of potential.
I was going to attempt to modify one, and build it as the Queensland Government VIP jet.....but I have given that idea the arse, as I have just taken delivery of the new Sword HS-125 kit, (which makes the job a lot easier).
TOR
tor lives
 
Posts: 4255
Joined: Mon Apr 14, 2014 11:01 am

Re: Matchbox 1/72 HS-125 (or 2)

Postby hrtpaul » Sat Feb 05, 2022 2:41 pm

Wow. Just wow :o :o :o :o :o
Head A/CAM Phantom Phanatic, Shit Stirrer and Karma Bus Driver toot toot :twisted:
hrtpaul
 
Posts: 4120
Joined: Sat Apr 12, 2014 10:44 am
Location: Like I'm gonna tell you lot

Re: Matchbox 1/72 HS-125 (or 2)

Postby RayS » Sun Feb 06, 2022 5:34 pm

Thanks, guys

More engine work on the CC3. The second nacelle was chopped up from the donor JT-3D
Image

Assembled and puttied (some layers of superglue as well) to shape it up.
Image

The engines cores were also shortened to fit into the new nacelle.
Image

And test fitted into the first engine.
Image
Image
Ray

Image
User avatar
RayS
 
Posts: 2170
Joined: Thu Apr 17, 2014 10:24 am
Location: RAdelaide!... YPAD

Re: Matchbox 1/72 HS-125 (or 2)

Postby RayS » Mon Feb 07, 2022 9:16 am

Engine fettling is almost complete and installation started.
Image
Image

Image

The cores are still not glued in so they can be painted separately. The pylons need some attention to the seams at the join to the fuselage.

Next is to make up a couple of sets of flap hinges
Ray

Image
User avatar
RayS
 
Posts: 2170
Joined: Thu Apr 17, 2014 10:24 am
Location: RAdelaide!... YPAD

Re: Matchbox 1/72 HS-125 (or 2)

Postby Bell209 » Mon Feb 07, 2022 10:00 am

Great progress, Ray!
Rob
Bell209
 
Posts: 47
Joined: Mon Apr 02, 2018 4:54 pm

Re: Matchbox 1/72 HS-125 (or 2)

Postby Ansett A330 » Thu Feb 10, 2022 11:08 pm

RayS wrote:I am building an HS-125 for a Matchbox GB over at BritModeller and the UAMF.


Great work Ray.

For those who haven't seen this GB over on BM it is amazing. They are well on the way to covering just about every Matchbox kit release in Aircraft, Armour, Ships (even the 1:72 Corvette gets a run), and Cars ("original" Matchbox that is with the exception of a lot of the AMT releases).

Brings back so many memories.
Ansett A330
 
Posts: 1205
Joined: Sat Jun 04, 2016 2:14 pm
Location: Bacon Lettuce Tomato

Re: Matchbox 1/72 HS-125 (or 2)

Postby RayS » Thu Feb 17, 2022 11:47 am

Some more progress now I have a couple of others off the bench.

The CC.2 (refurb) has had the windscreen pillars refitted.
Image

Both primed with any colour you want as long as it is red :-)
Image
Image

The CC.3 was then primed white as it will be predominantly white and there are seams to fill not evident under the red primer.
Image

Those seams were filled with PPP, we'll see how I went when I sand it back.
Image
Ray

Image
User avatar
RayS
 
Posts: 2170
Joined: Thu Apr 17, 2014 10:24 am
Location: RAdelaide!... YPAD

Re: Matchbox 1/72 HS-125 (or 2)

Postby hrtpaul » Thu Feb 17, 2022 4:05 pm

Coming along nicely there Ray :)
Head A/CAM Phantom Phanatic, Shit Stirrer and Karma Bus Driver toot toot :twisted:
hrtpaul
 
Posts: 4120
Joined: Sat Apr 12, 2014 10:44 am
Location: Like I'm gonna tell you lot

Re: Matchbox 1/72 HS-125 (or 2)

Postby RayS » Sat Feb 19, 2022 3:06 pm

Thanks Paul,

I decided to add some missing detail to both kits in the form of flap hinge fairings and the antenna fit. I initially made some mods to my CC2 which I had to remove as XX507 was different from other CC2s I had reference pictures for.
Image
Image

The CC3 as it is before repriming. I also had to scratch build a new main gear door as one of them went missing
Image
Image
Ray

Image
User avatar
RayS
 
Posts: 2170
Joined: Thu Apr 17, 2014 10:24 am
Location: RAdelaide!... YPAD

Next

Return to Member's Works in Progress

Who is online

Users browsing this forum: No registered users and 3 guests

cron