Aerotech DH-88 Comet: Finished.

Show us what's on the bench

Re: Aerotech DH-88 Comet: Markings and Canopy framing

Postby tor lives » Mon Dec 08, 2014 6:23 pm

Ericg wrote:Ah yes, looking at pics of restored examples = traps for young players!


And the not-so-young players :D
tor lives
 
Posts: 4256
Joined: Mon Apr 14, 2014 11:01 am

Re: Aerotech DH-88 Comet: Markings and Canopy framing

Postby Ericg » Wed Dec 10, 2014 11:54 am

On its wheels.

Image
Ericg
 
Posts: 214
Joined: Mon Apr 14, 2014 7:30 pm

Re: Aerotech DH-88 Comet: Markings and Canopy framing

Postby tor lives » Wed Dec 10, 2014 7:21 pm

Just beautiful....but as she is nearly finished I am sort of sad. Thanks for sharing this wonderful modelling journey with us Capt Eric. Did you find the parts that were missing??
TOR
tor lives
 
Posts: 4256
Joined: Mon Apr 14, 2014 11:01 am

Re: Aerotech DH-88 Comet: Markings and Canopy framing

Postby Ericg » Sun Dec 14, 2014 11:05 pm

Still got plenty of fight left in her yet Ray, but I almost have it dusted.

Some more progress on this one.

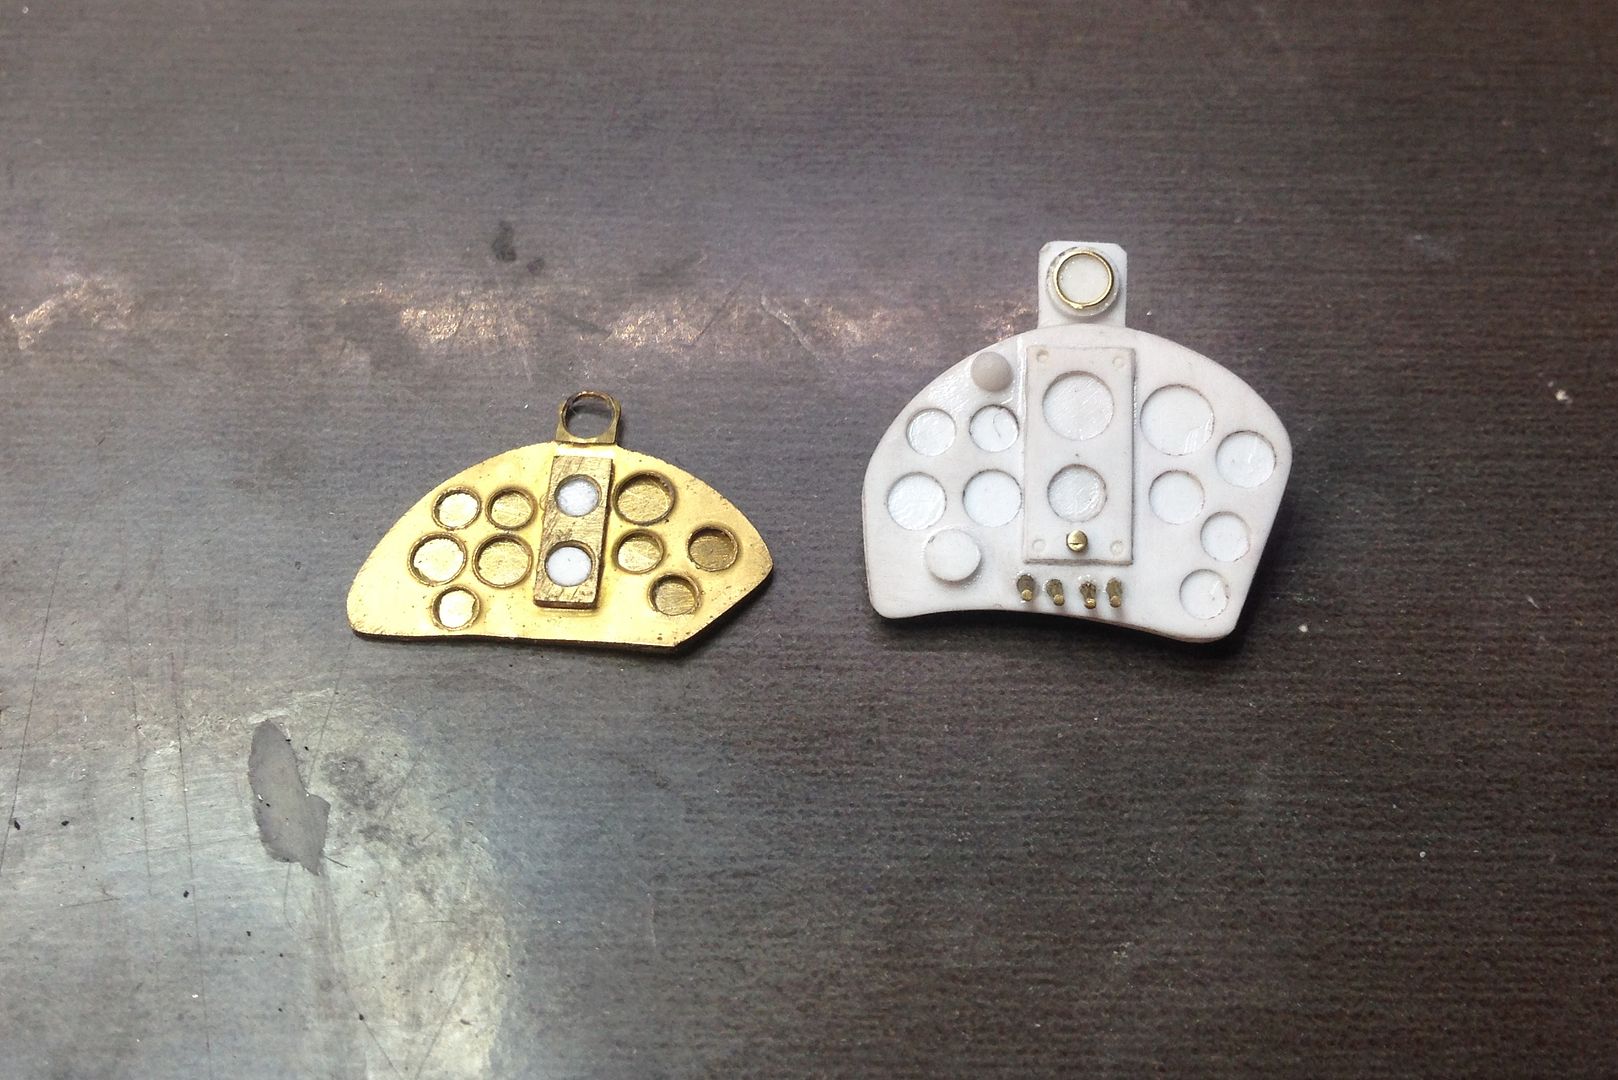
I found the instrument panel, but my chair found it first and I ran over it after it fell from the position that I had placed it for safekeeping. It got a little mangled in the process so I decided to knock up a new panel from plastic card. I was going to incorporate the Airscale bezels but I didn't want it looking too flash as the rest of the cockpit is a bit plain. Here is the kit photo etch panel vs my new one. I found that making a new one gave me the opportunity to increase the size of the panel, as the kit unit seemed to be a little on the small side.

Image

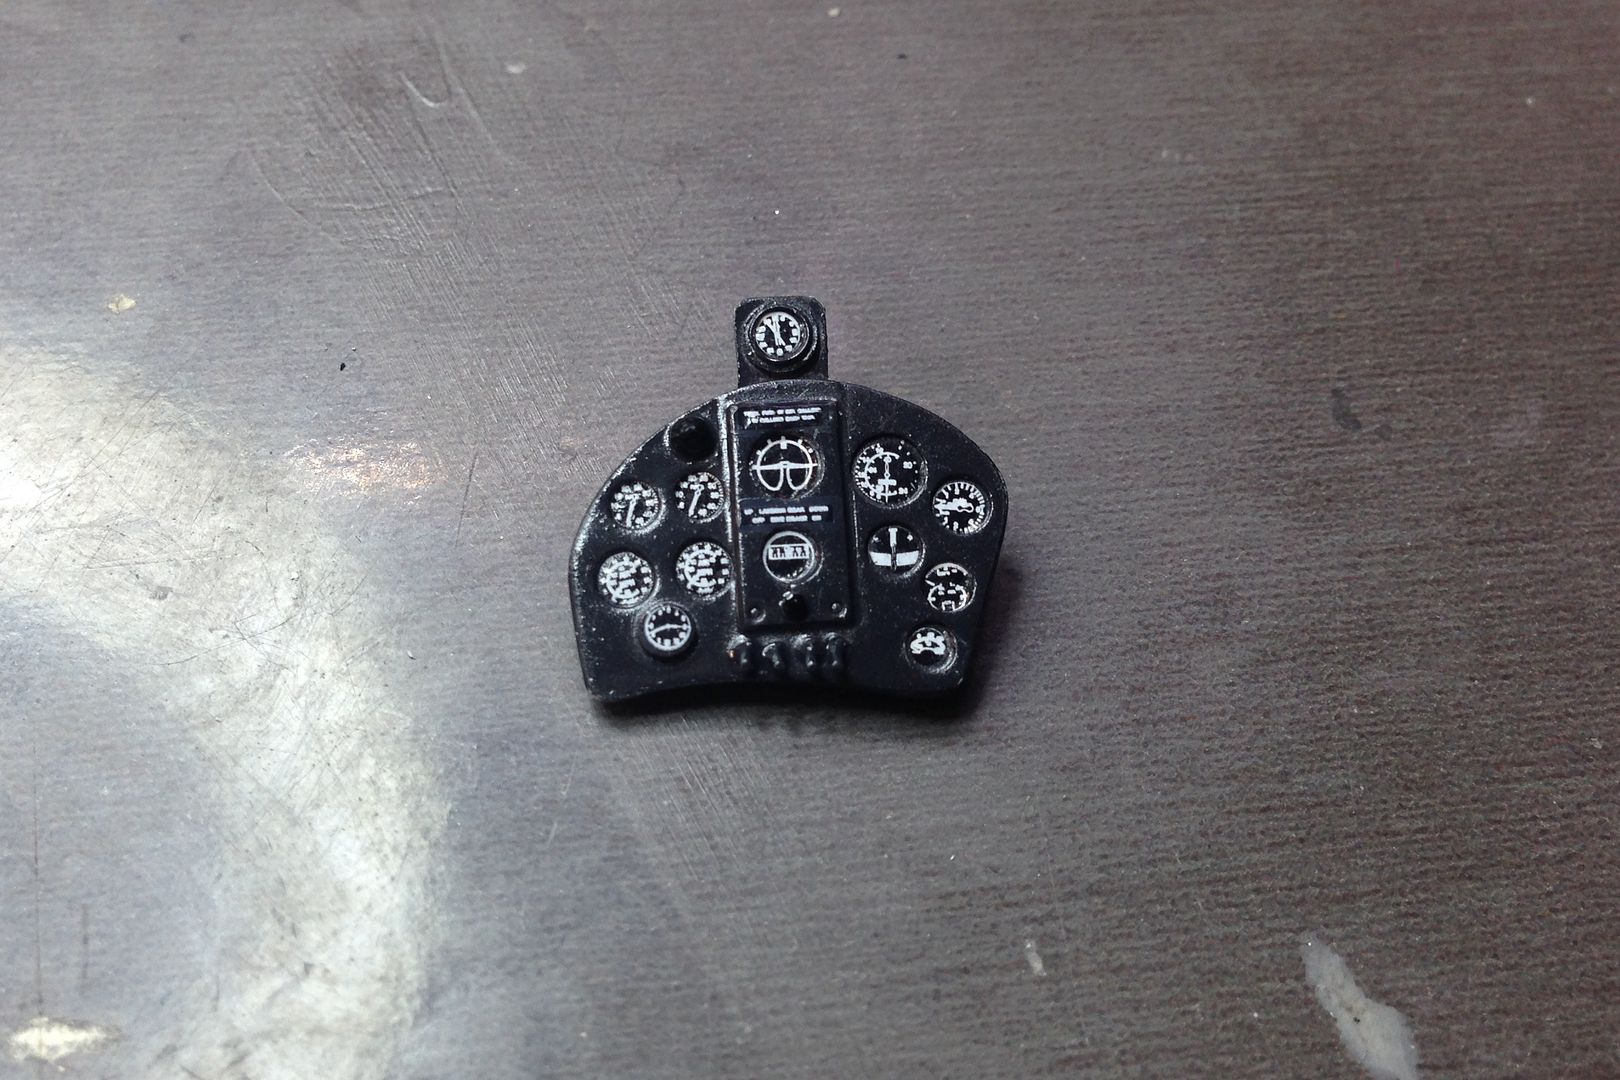
Here is the new panel with instruments from Airscales excellent decal set. I plan to give this a coat of semi gloss to flatten it and then apply clear glue to simulate the clear instrument faces.

Image

An issue that I have had with the finishing process has been picking out detail using a wash. Given the glossy finish, the wash is very hard to get to stay in the cracks and it was leaving me a bit annoyed as to how to get around this important process without it looking like it does below. I wanted a pin wash but it ended up looking very patchy and certainly would not cut it in the display cabinet.

Image

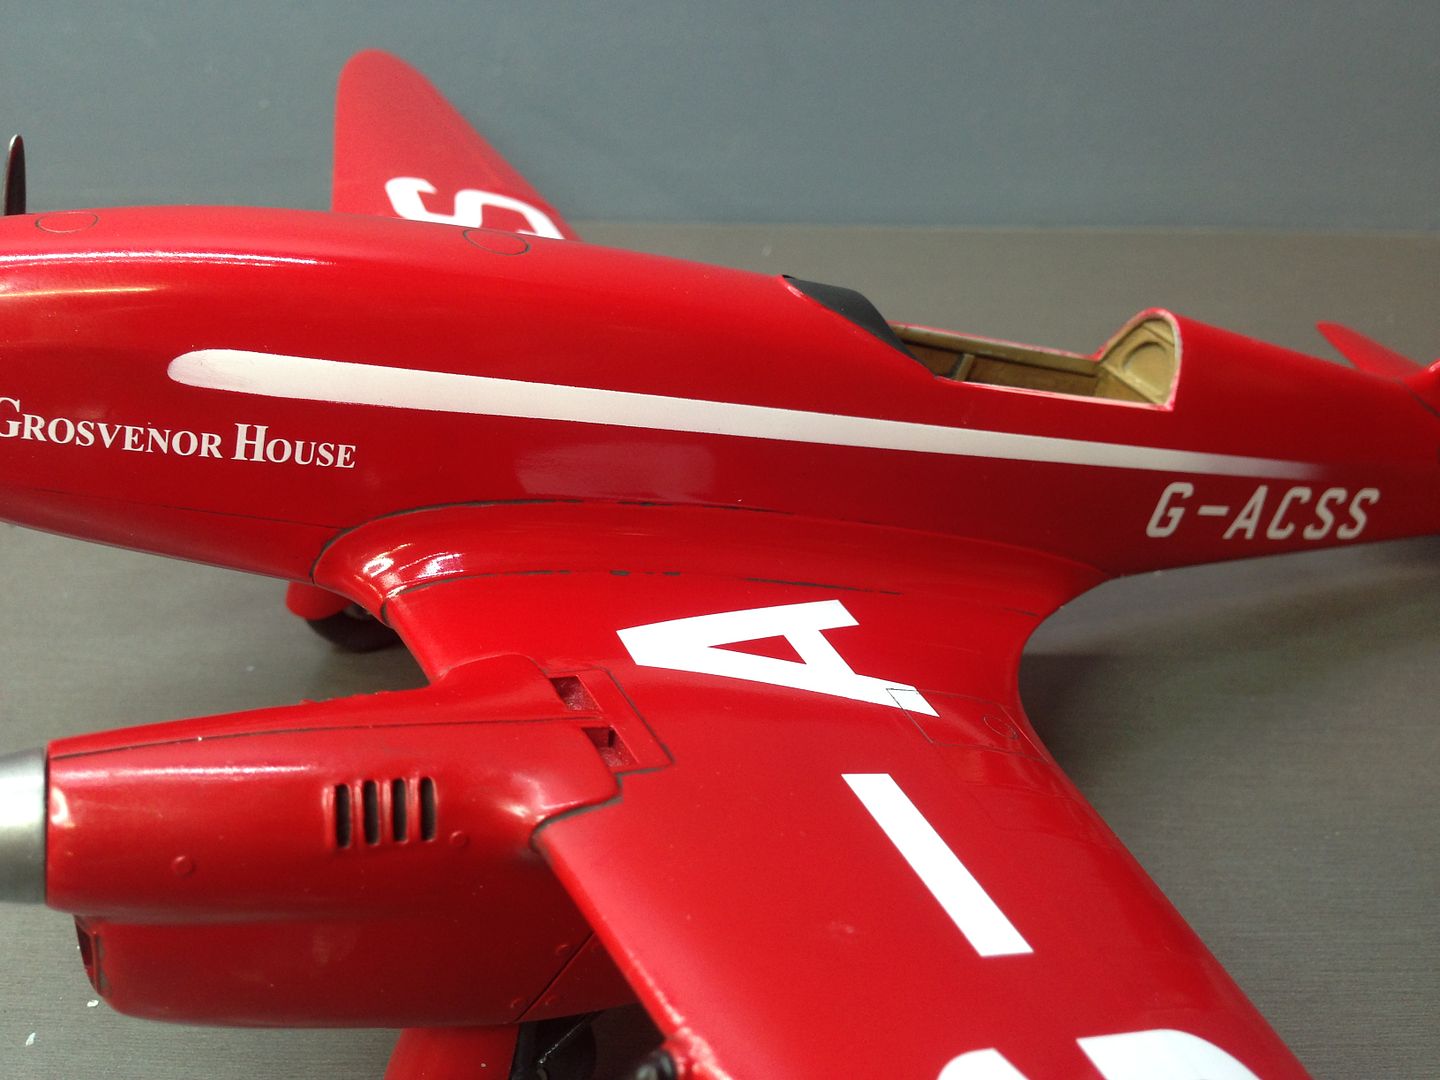
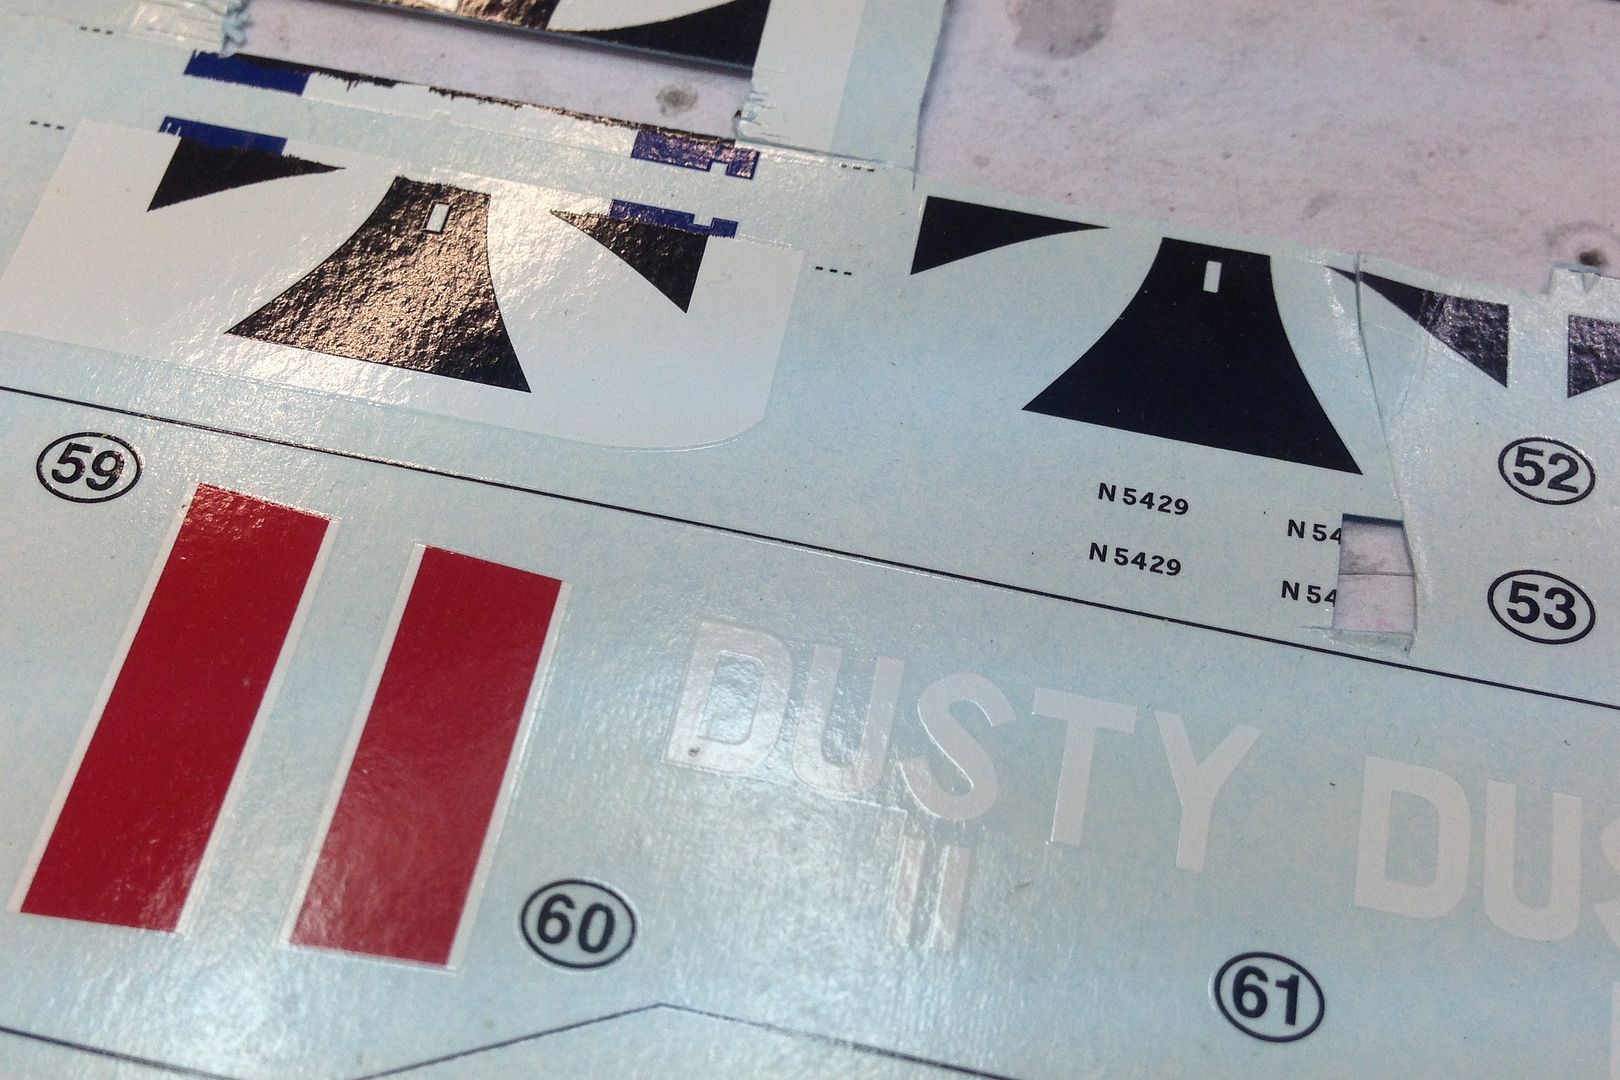
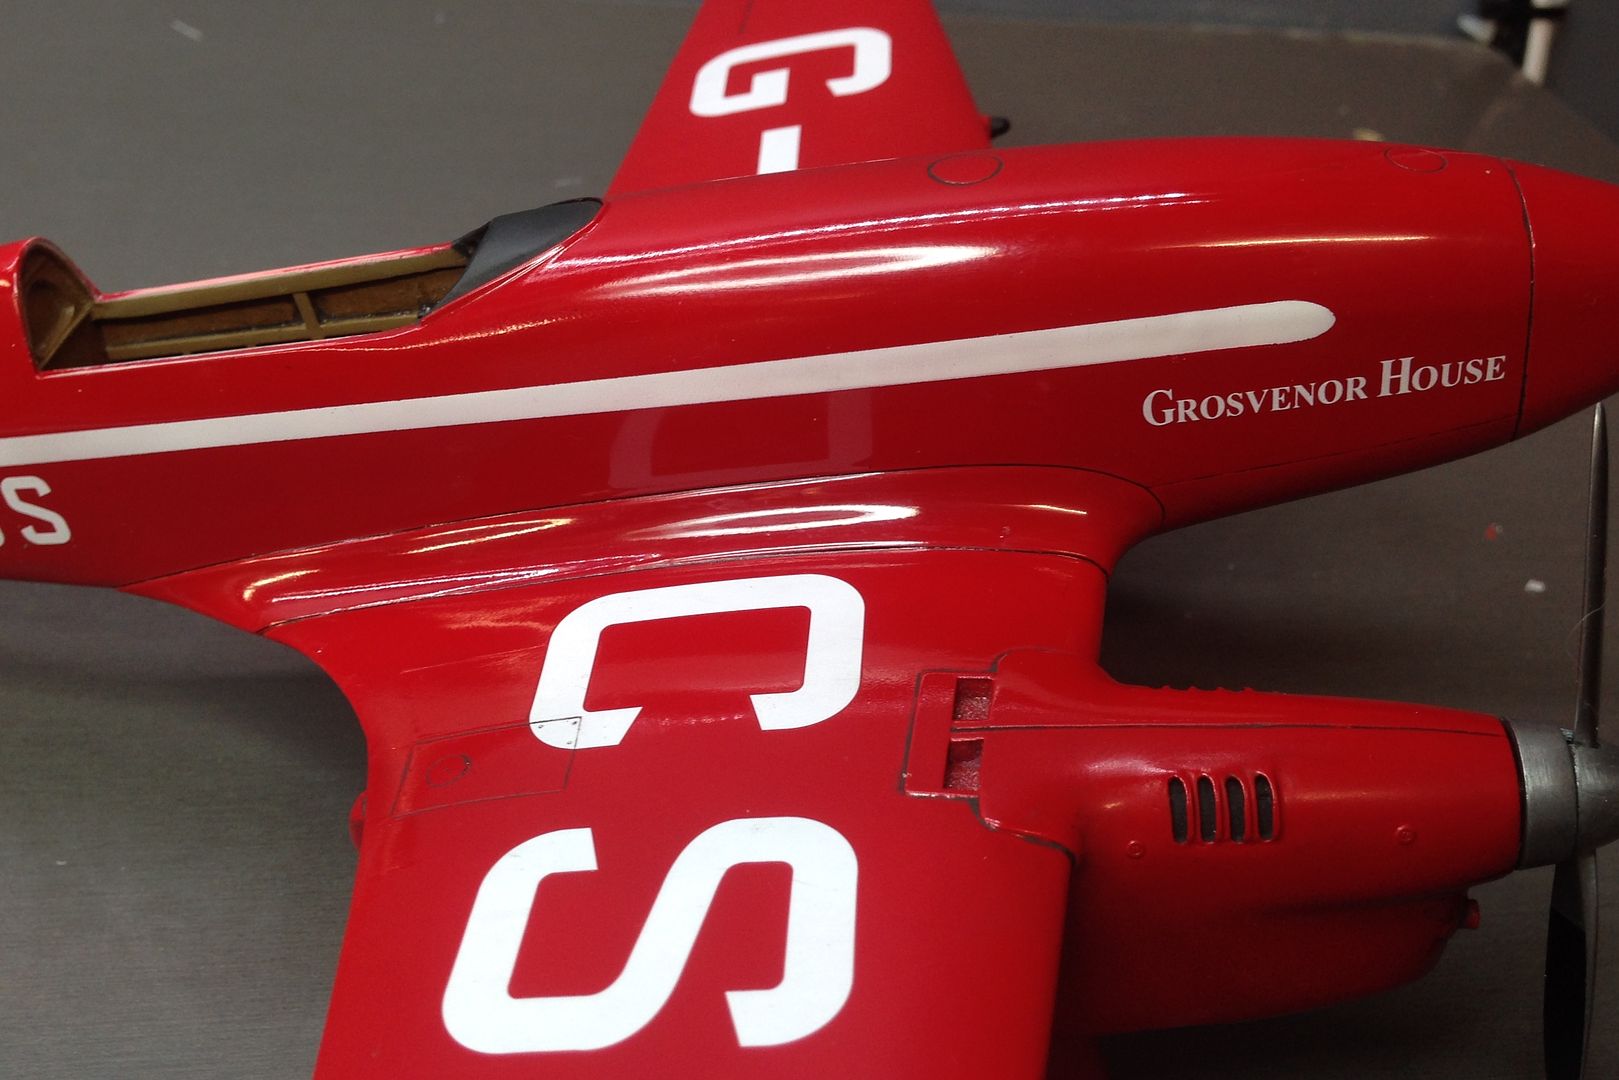
One of those little techniques that I often use to get tiny black lines is to use the black strip that seperates marking options in Wingnut Wings kits. They are very thin, straight and are high quality decals and are an excellent alternative to trying to paint the lines. I thought I would give it a try as a pin wash. Here you can see the new `wash' as applied to the wing root fairing. I have used the traditional wash technique on the engine cowling which you can see in this pic.

Image

Image

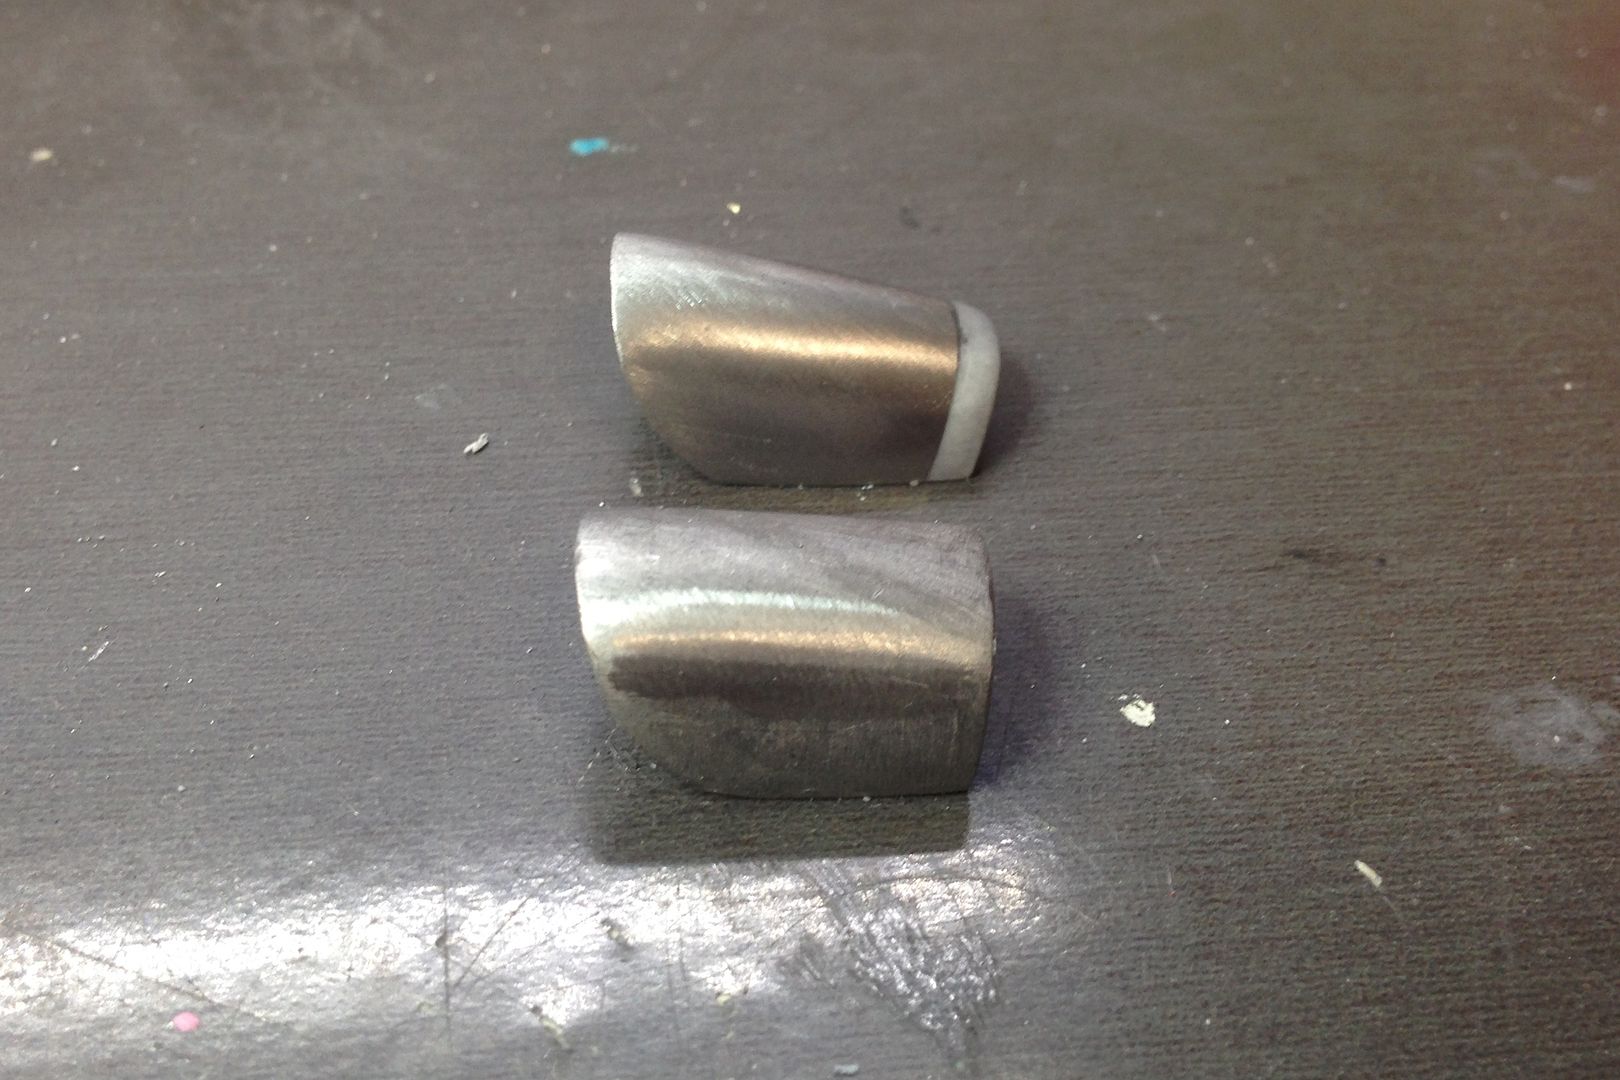
I modified the gear doors, Reshaping the white metal parts to make them thinner, longer and more curved. The kit one is on the bottom.

Image

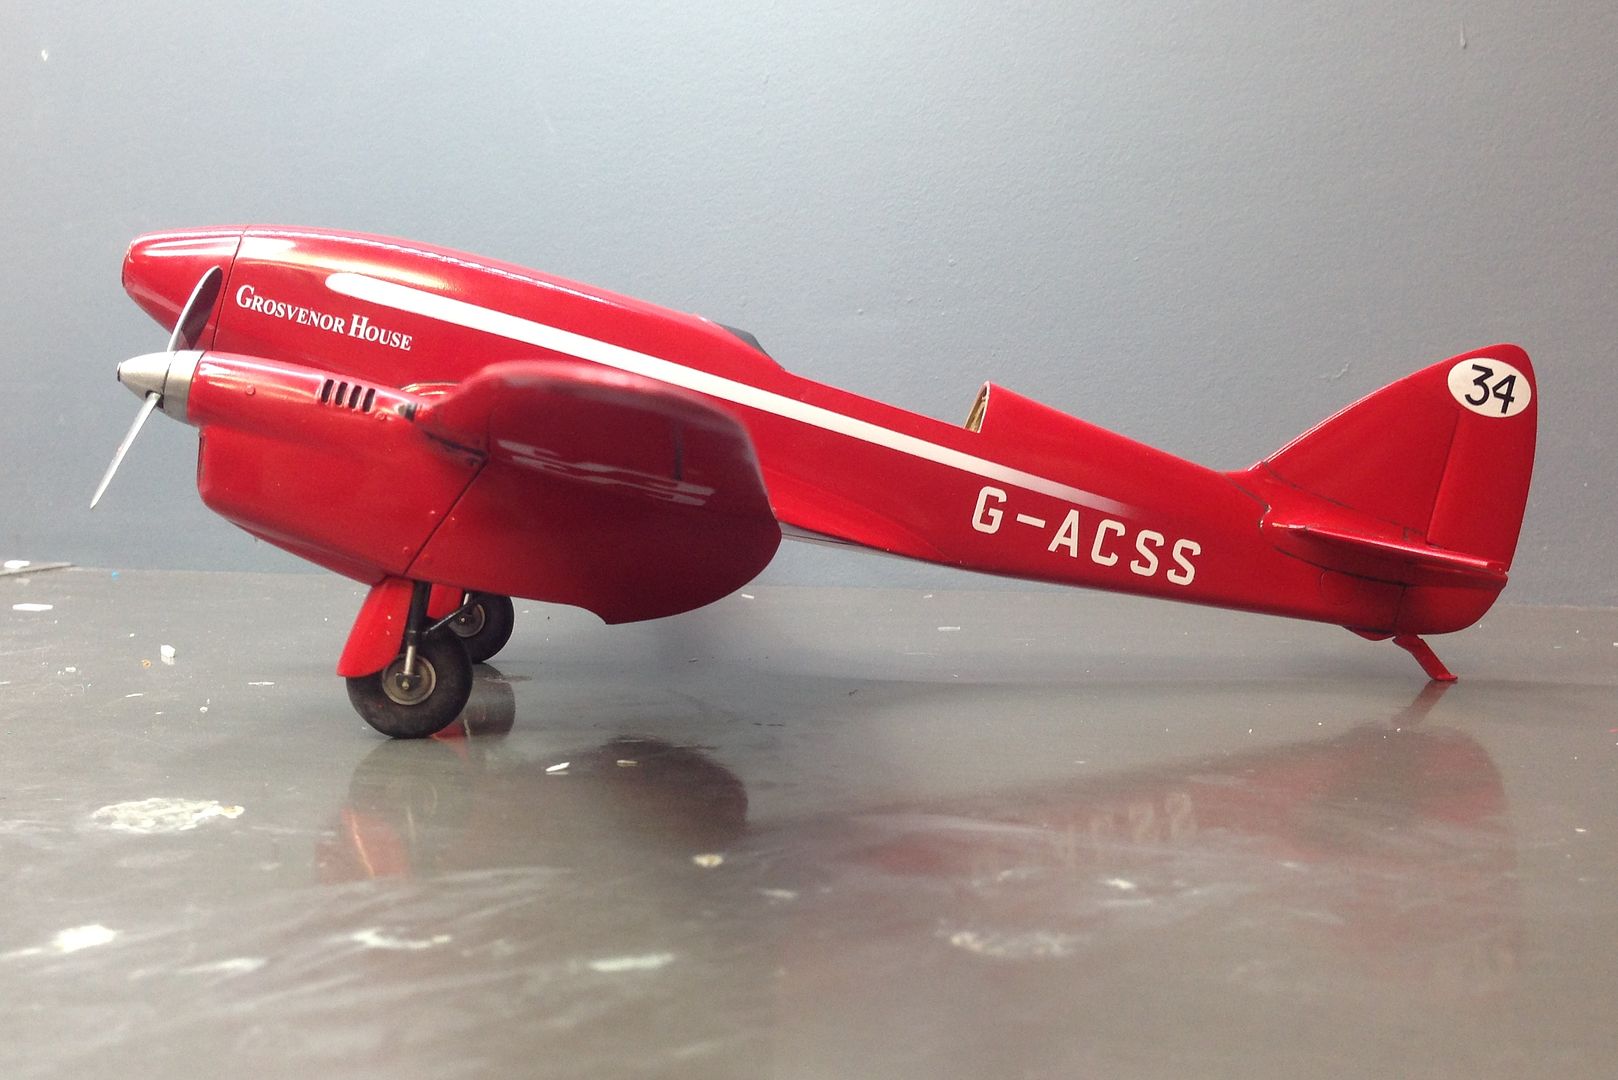
Looking pretty good!

Image

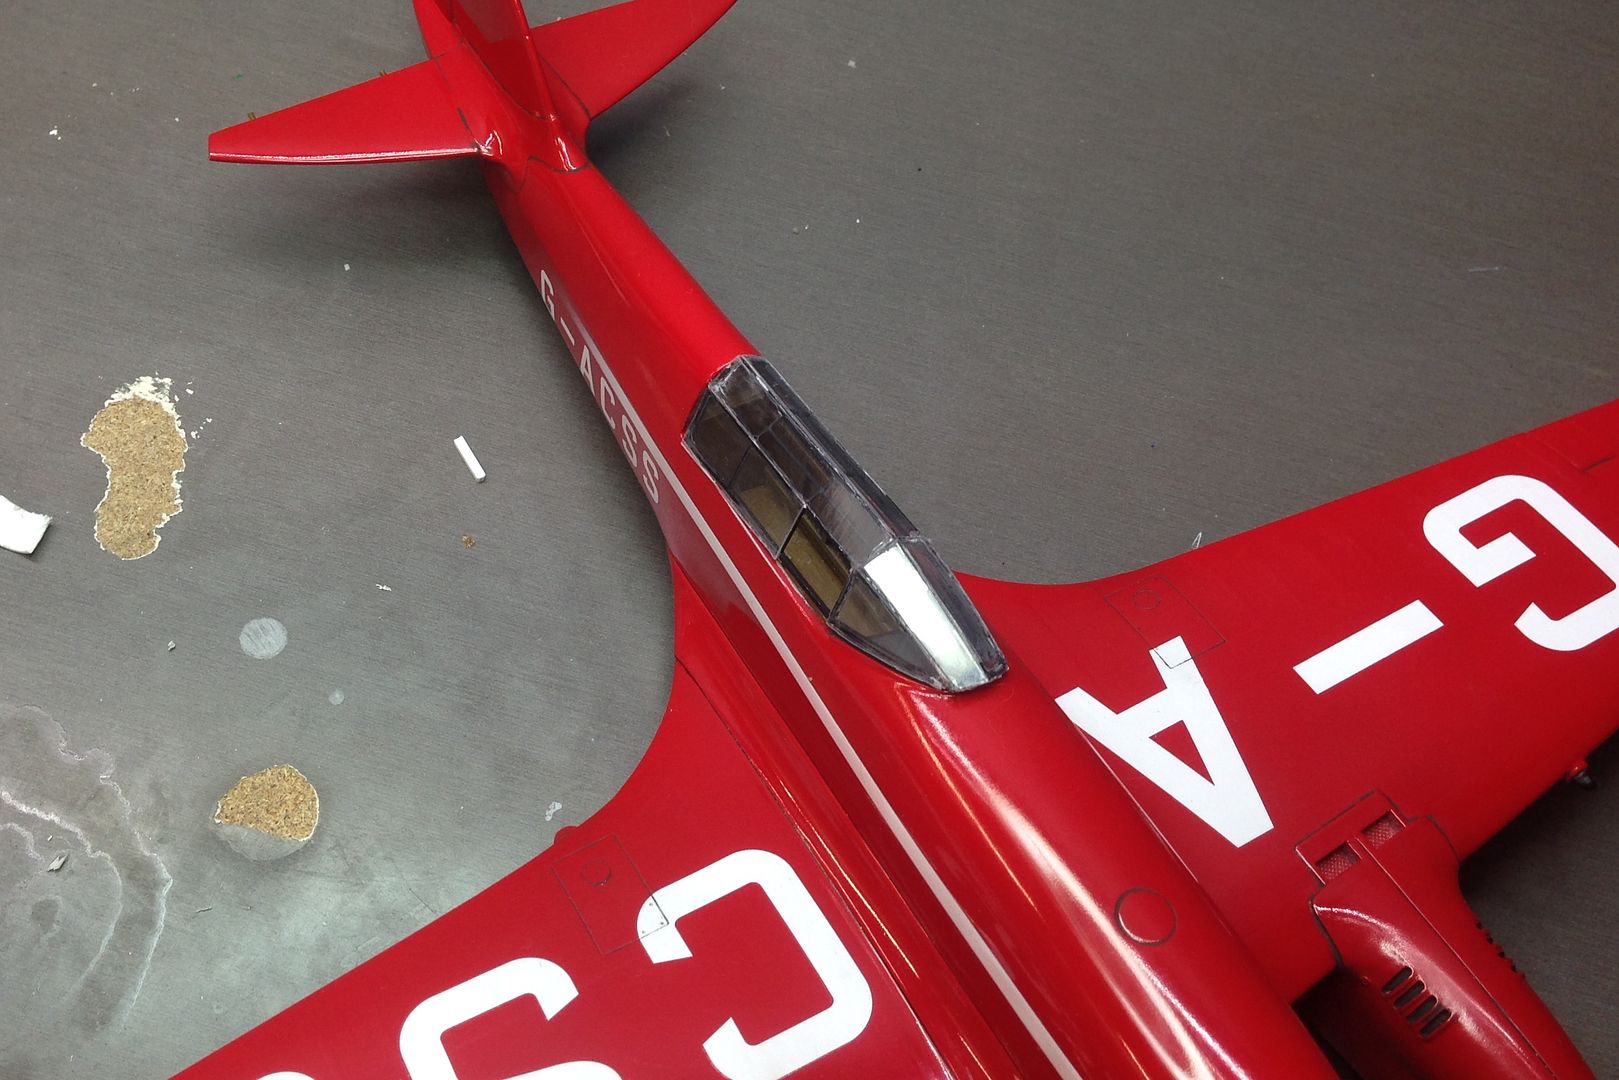
I glazed the canopy frame with individual pieces that I cut from a product packet. One of the more difficult modelling tasks that I have set myself, but in the end it should be worth it. (or it will end up in a tangled mess on the workshop floor!)
I have this shot zoomed out as it is a bit rough at this stage. Closer inspection once I am done.

Image
Ericg
 
Posts: 214
Joined: Mon Apr 14, 2014 7:30 pm

Re: Aerotech DH-88 Comet: Markings and Canopy framing

Postby hrtpaul » Mon Dec 15, 2014 6:55 am

MMMMMMMMMMMMMMMMMMMM :D :D :D :D :D :D
Head A/CAM Phantom Phanatic, Shit Stirrer and Karma Bus Driver toot toot :twisted:
hrtpaul
 
Posts: 4121
Joined: Sat Apr 12, 2014 10:44 am
Location: Like I'm gonna tell you lot

Re: Aerotech DH-88 Comet: Markings and Canopy framing

Postby Knotty » Mon Dec 15, 2014 7:36 am

Amazing work as usual Eric , really enjoying this build .
Knotty
 
Posts: 580
Joined: Sat Apr 12, 2014 6:39 am

Re: Aerotech DH-88 Comet: Markings and Canopy framing

Postby tor lives » Mon Dec 15, 2014 7:50 am

Just bloody superb as usual Capt Eric.
What adhesive did you use to glue the clear plastic pieces to the canopy framing???
Your instrument panel is just beautiful.
TOR
tor lives
 
Posts: 4256
Joined: Mon Apr 14, 2014 11:01 am

Re: Aerotech DH-88 Comet: Markings and Canopy framing

Postby Ericg » Fri Dec 19, 2014 8:59 pm

Hi Ray, the answer to the glue is in the following update.

Onto the final stages of this build now guys. I decided to remove the decal strips that I had used as a wash, and instead I used a sharp lead pencil to highlight all panels. This has worked very well and is very effective.

I used 2000 grit wet and dry sandpaper to knock any blemishes off the surface of the clear coat. I then rubbed it back further with 4000 grit micromesh. A cut with some Automotive cut and polish followed by Gunze Sangyo `Finish' has the model paint looking as smooth as silk.

Image

I use Formula 560 to glue any clear parts and also to form clear glass for instruments.

Image

Image

I have used the excellent RB productions Sutton harnesses on this build as I found a picture of one of the shoulder belts hanging out of the cockpit on the original aircraft and that is what I wish to recreate. Here are the lap belts installed on the seats. The belts responded very well to a few coats of Humbrol clear followed by a Flory wash.

Image

The kit has a nice vac formed lens for the landing light which has horizontal grooves in it.

Image

The clear cover for the landing light. A very important feature of the real thing

Image

A couple of more days and this will be in the cabinet!

Image
Ericg
 
Posts: 214
Joined: Mon Apr 14, 2014 7:30 pm

Re: Aerotech DH-88 Comet: Markings and Canopy framing

Postby hrtpaul » Fri Dec 19, 2014 9:43 pm

Fan freakin tastic Eric. I love it so far mate :)
Head A/CAM Phantom Phanatic, Shit Stirrer and Karma Bus Driver toot toot :twisted:
hrtpaul
 
Posts: 4121
Joined: Sat Apr 12, 2014 10:44 am
Location: Like I'm gonna tell you lot

Re: Aerotech DH-88 Comet: Markings and Canopy framing

Postby Ericg » Sun Dec 21, 2014 1:22 pm

I decided to re-do the canopy frame, as the original one that I made wasn't strong enough, and an eagle eyed reader spotted an error that I was keen to fix. I wanted to re-visit the idea of using the kit vac-formed clear part as they are super thin and pretty clear. I had to work a little harder to get this frame to better match the kit canopy though and in the process I made the frame a lot stronger than my original by making a couple of the parts of the frame one piece instead of multiple.

Image

Image

Another feature of the real aircraft that I wanted to depict were the two small sliding windows either side of the canopy. Most of the pics that I have shows one or both slid open and I wanted to have both open, regardless of the difficulty of doing so. Working on the very thin vac formed clear part proved very tricky and knowing that I had a spare certainly helped but I wanted to avoid putting myself into a situation were the spare needed to be used. Here is where I am at with it and I just need to scratch build the windows and slides.

Masking off the opening.


Image

I used some clay behind the opening to support the part as I was drilling and cutting it.

Image

I filed the opening until I was happy with it and completed both sides.

Image

Image

Image

I have a picture were a Sutton harness has been flung out of the side of the cockpit and wanted to depict that on the model.

Image
Ericg
 
Posts: 214
Joined: Mon Apr 14, 2014 7:30 pm

PreviousNext

Return to Member's Works in Progress

Who is online

Users browsing this forum: No registered users and 8 guests