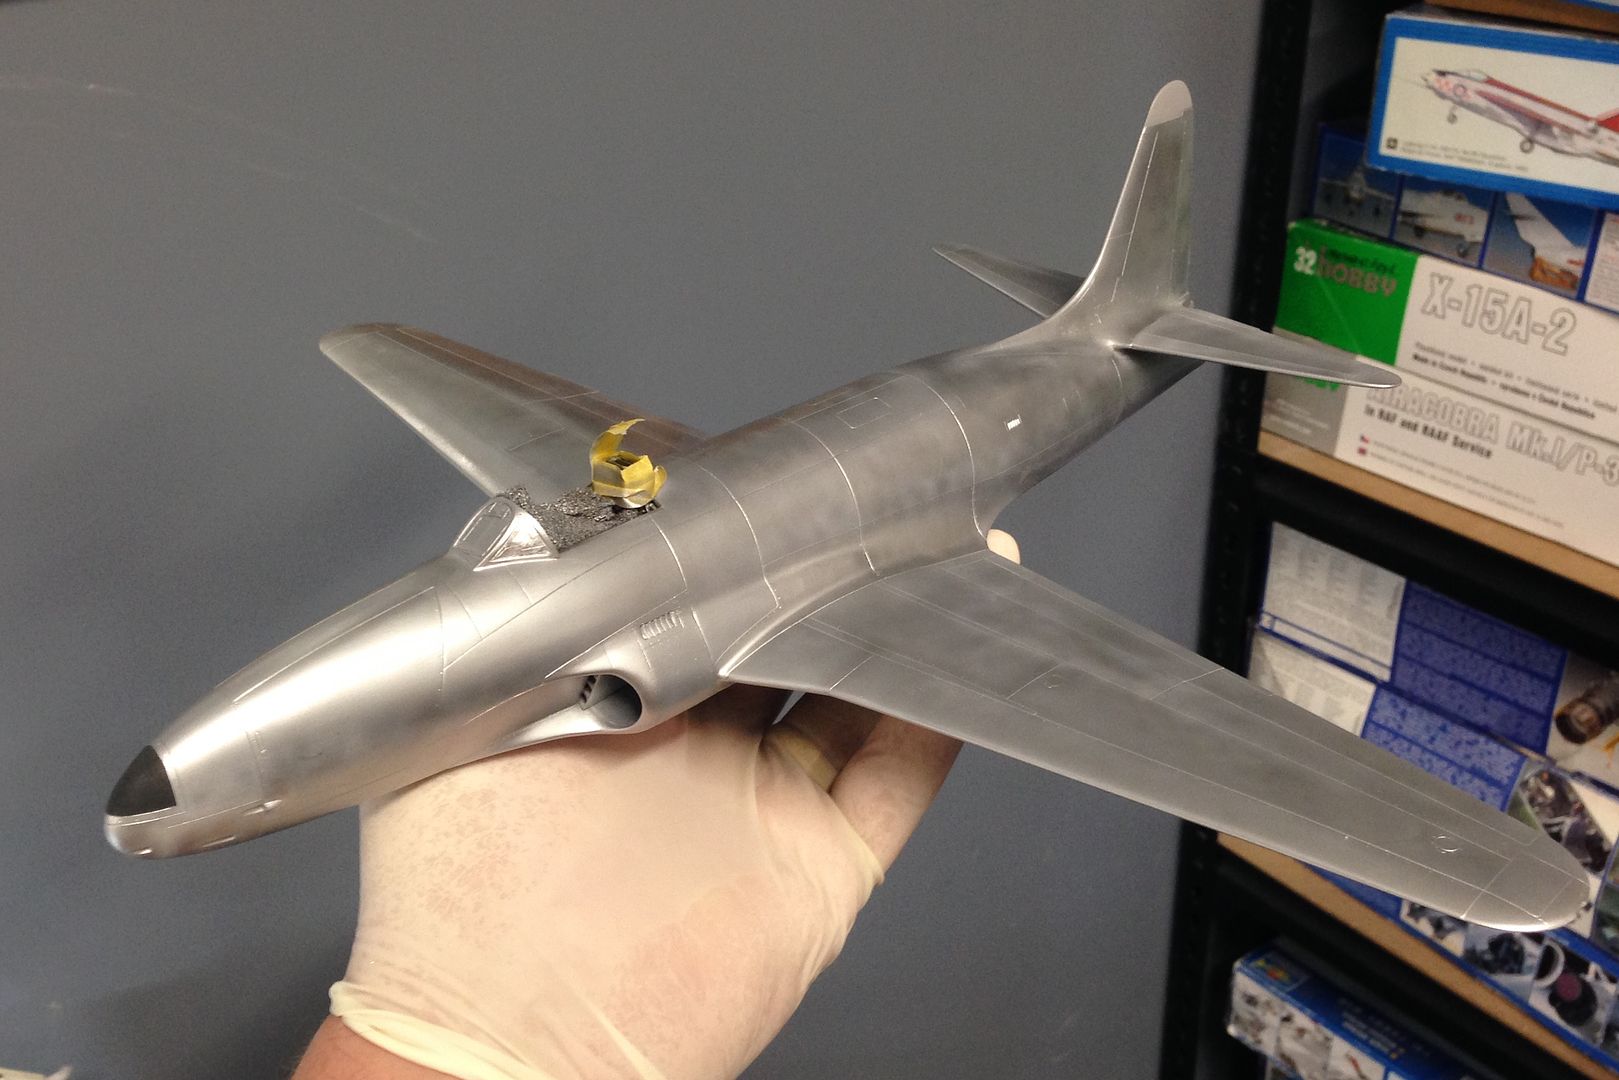
Czech Model F-80C Finished (with Glamour shots)

A place for our military aviation modellers to show their stuff. It may not be civil but it still has a home here

Czech Model F-80C Finished (with Glamour shots)

Postby Ericg » Fri Jun 13, 2014 2:28 pm

So I know I said I was going to only put civil stuff on this site but I thought you guys that only do Airliner stuff would like to see what your missing out on.

I have been working on this kit for a few days and thought I would put it on here as another WIP. I was waiting until I got to close the fuselage before I did, just so that there was a bit of momentum with the build. Had to put the tools down for Model Expo but generally has been moving along quite quickly.

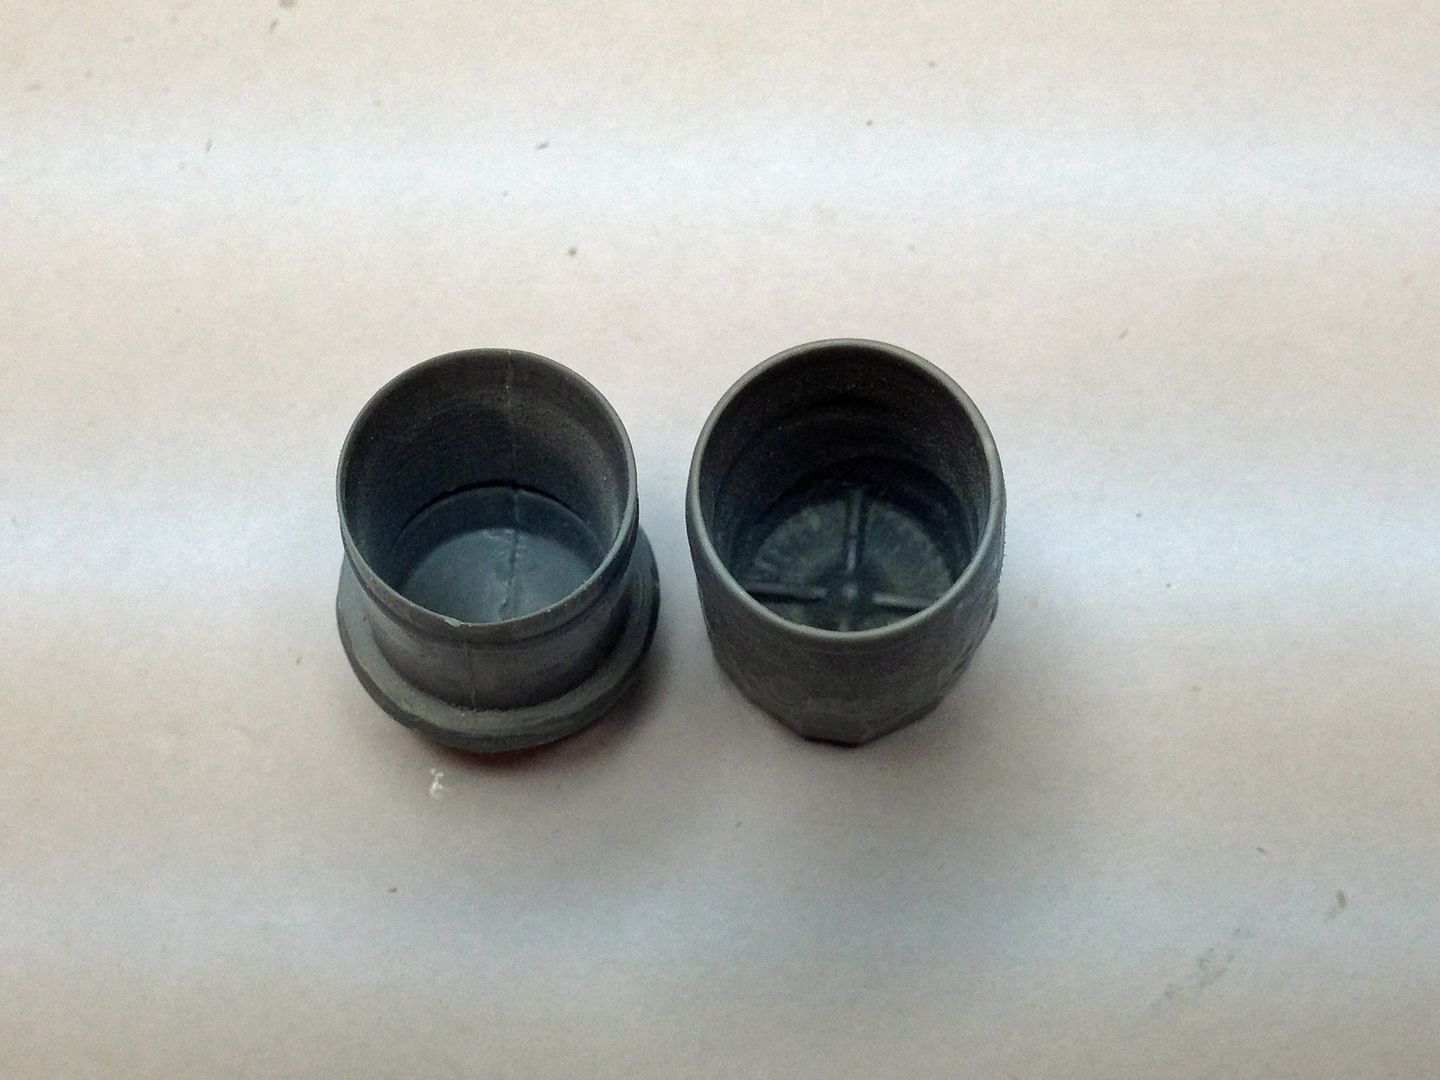
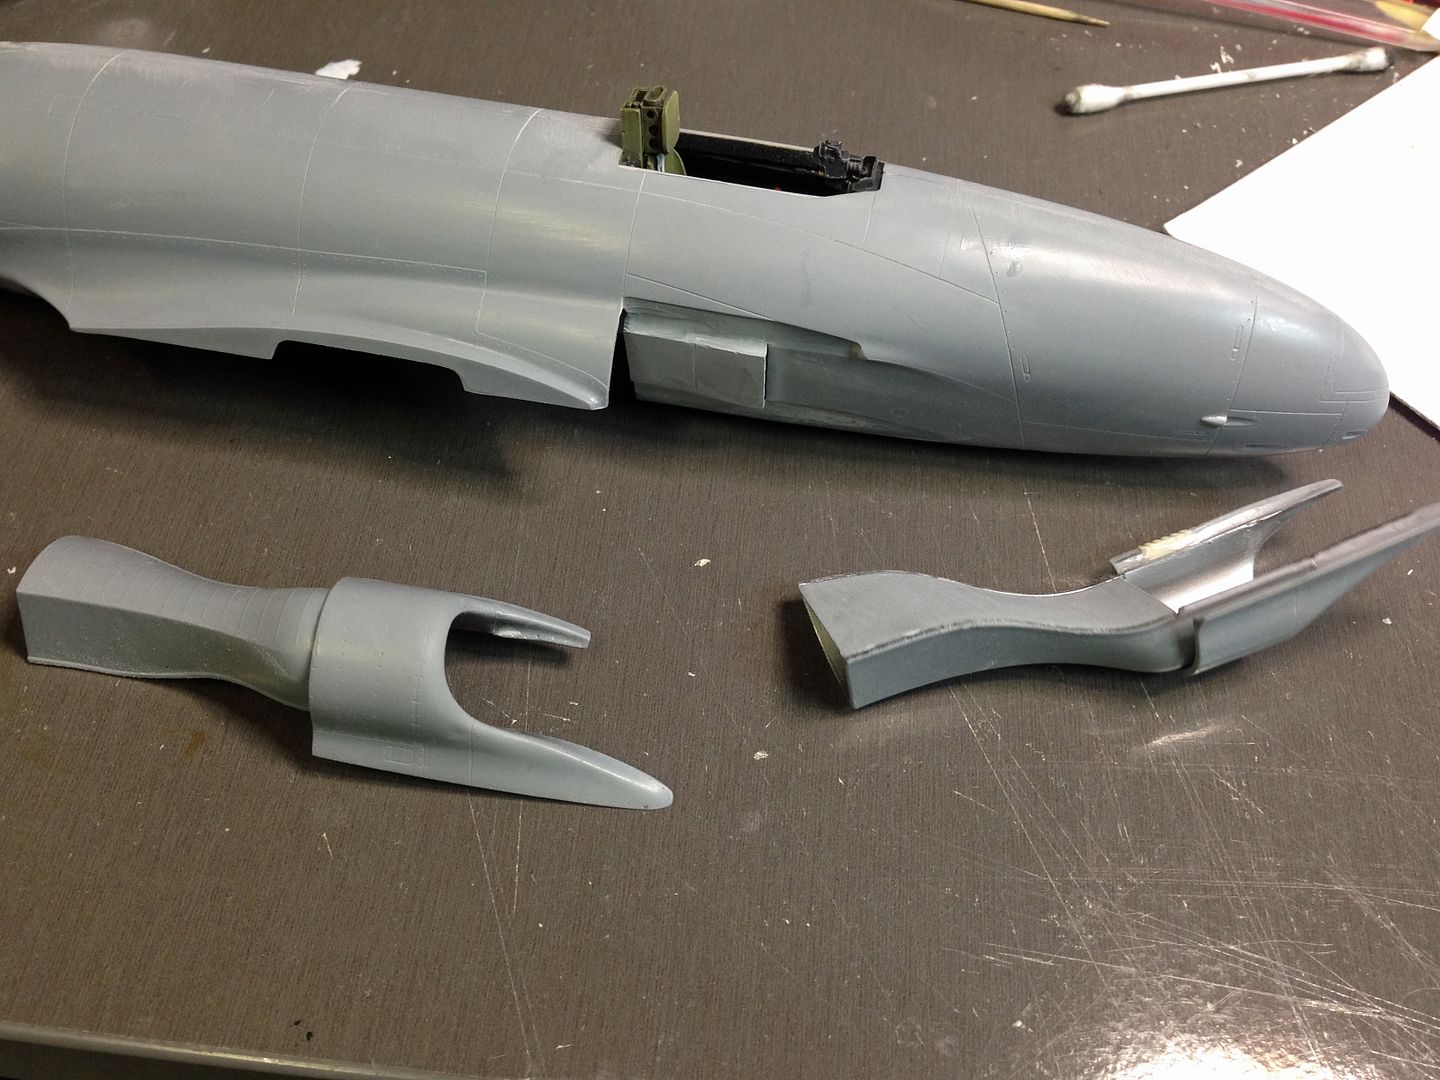
The kit exhaust is terrible! it is closed at one end and sits too far inside the fuselage. The real thing actually juts out a bit. Looking through my stash, I whipped up a copy of a Panther exhaust which suited this build very nicely.

Kit on the left, better one on the right. (I would have used Harold's exhaust but it was out of stock at the Aussie supplier, and I needed it yesterday!
Image

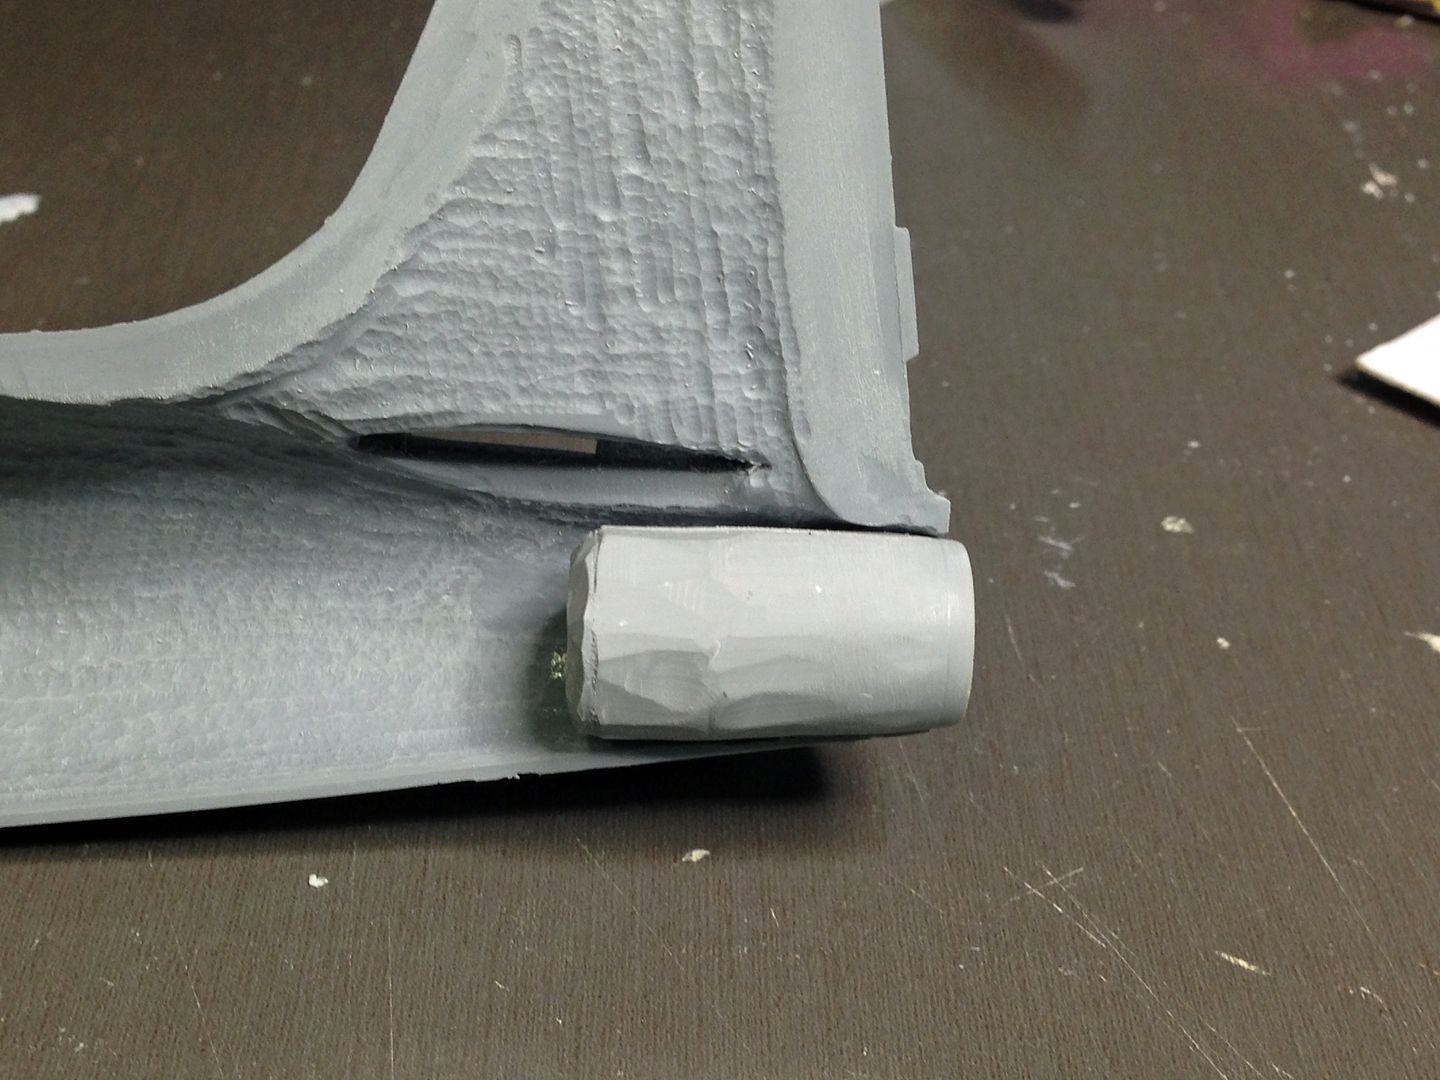
The new exhaust needed some trimming to fit but it is a vast improvement
Image

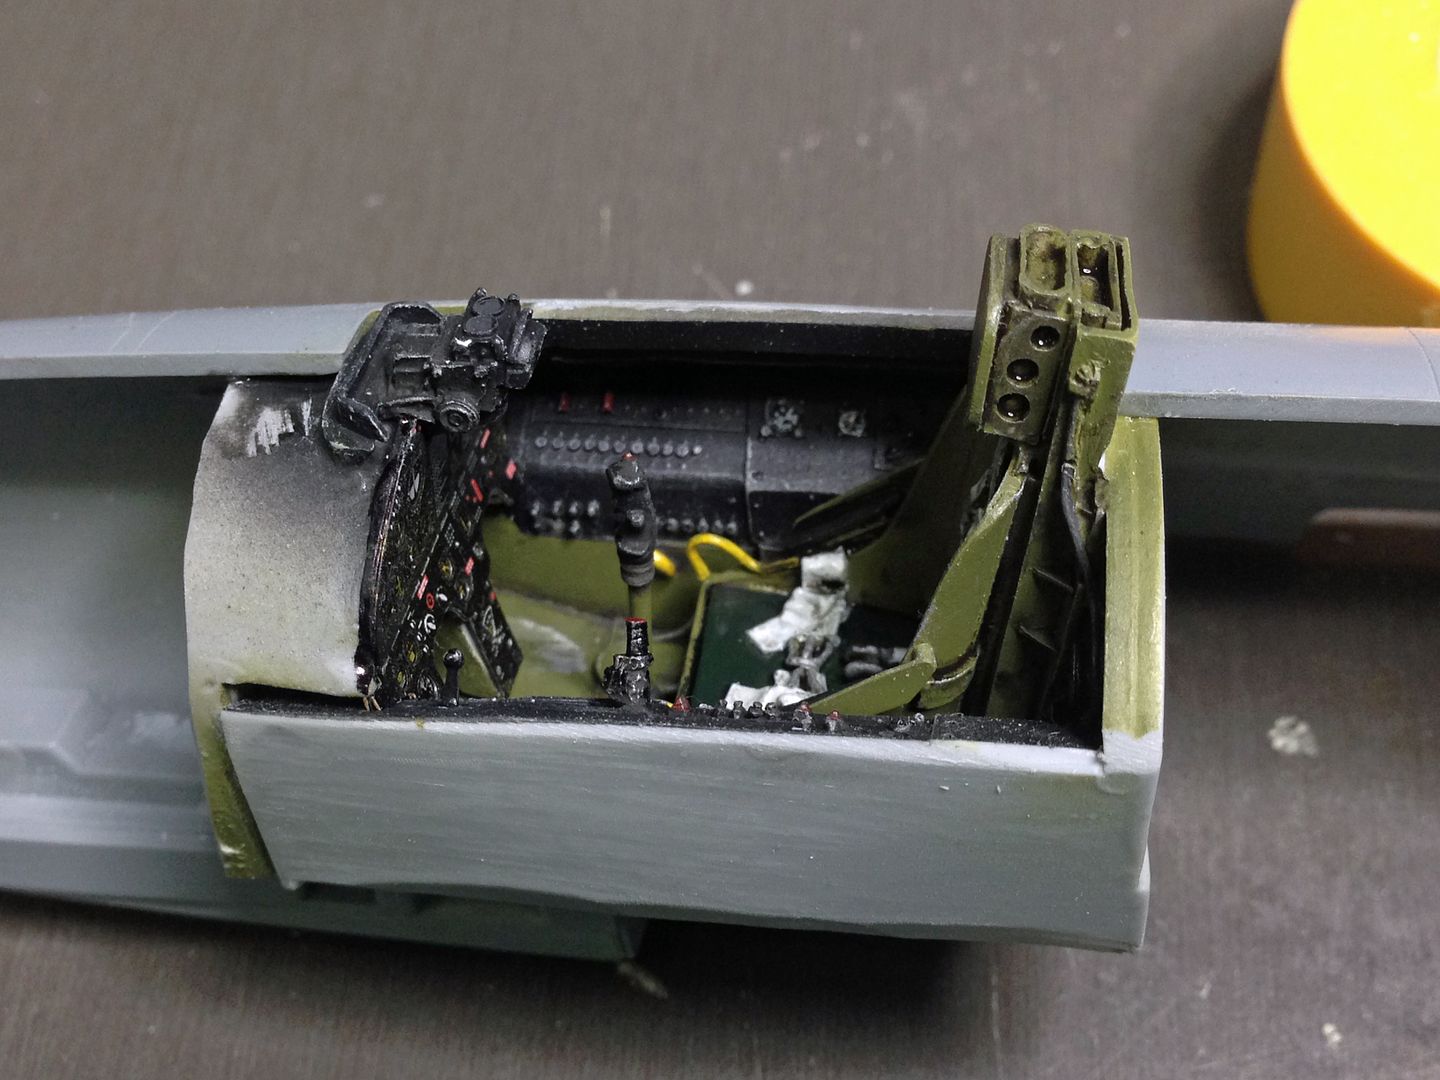
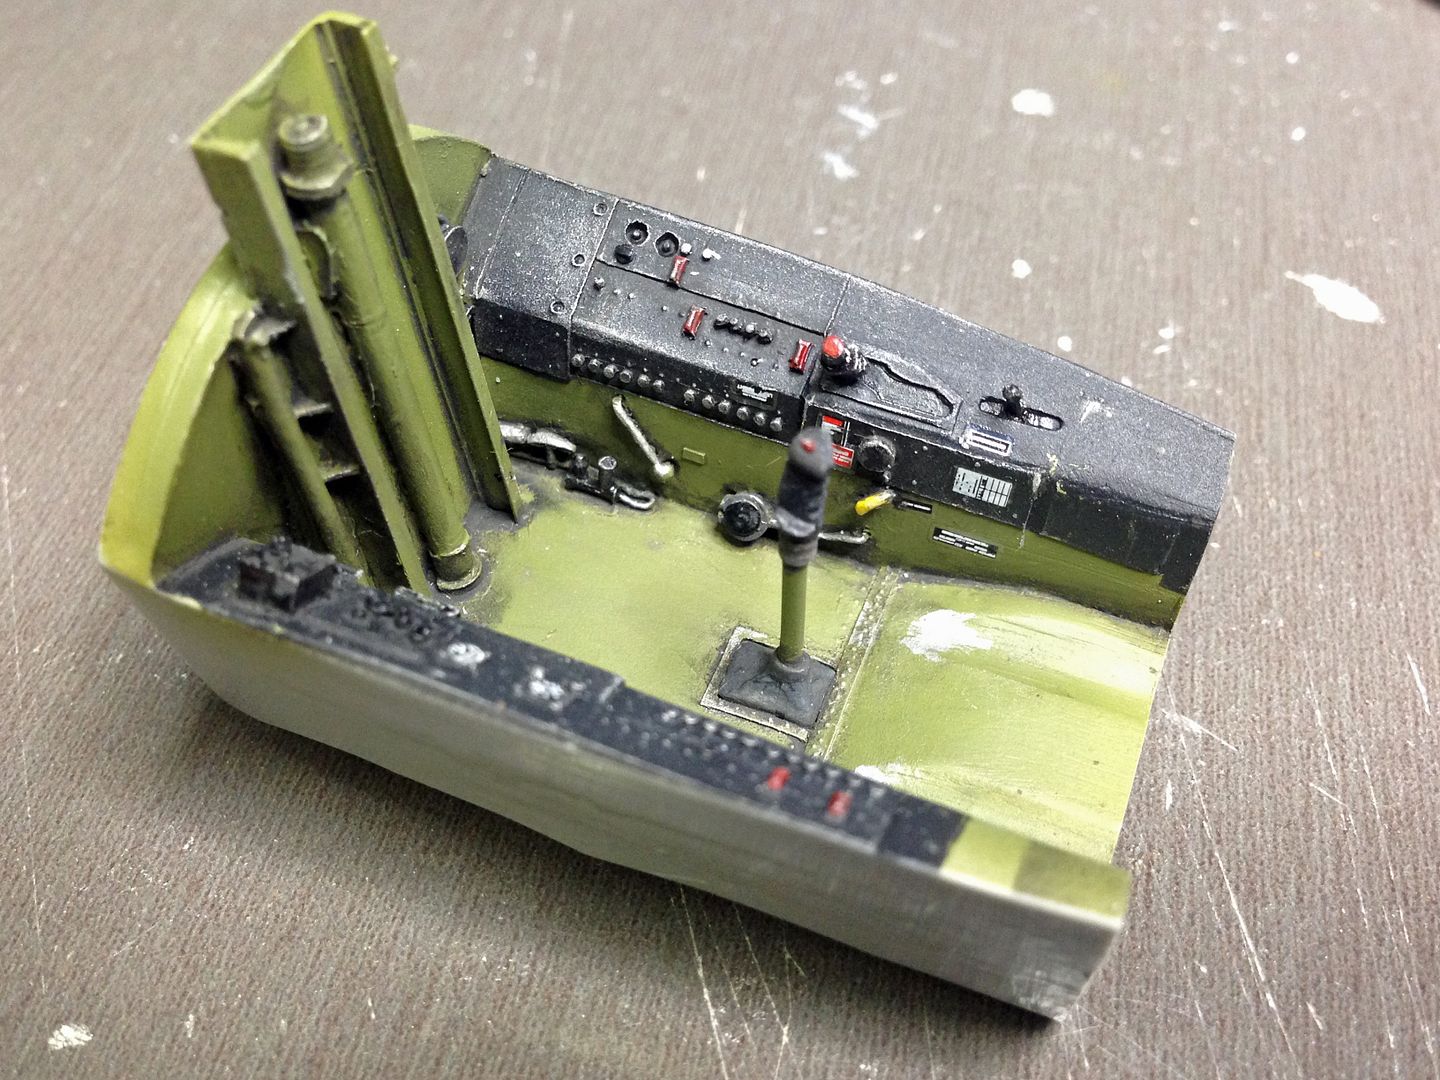
Onto the the cockpit. I have had this kit in the stash for a year and it came with the wonderful AMS pit. (Top job Harold)
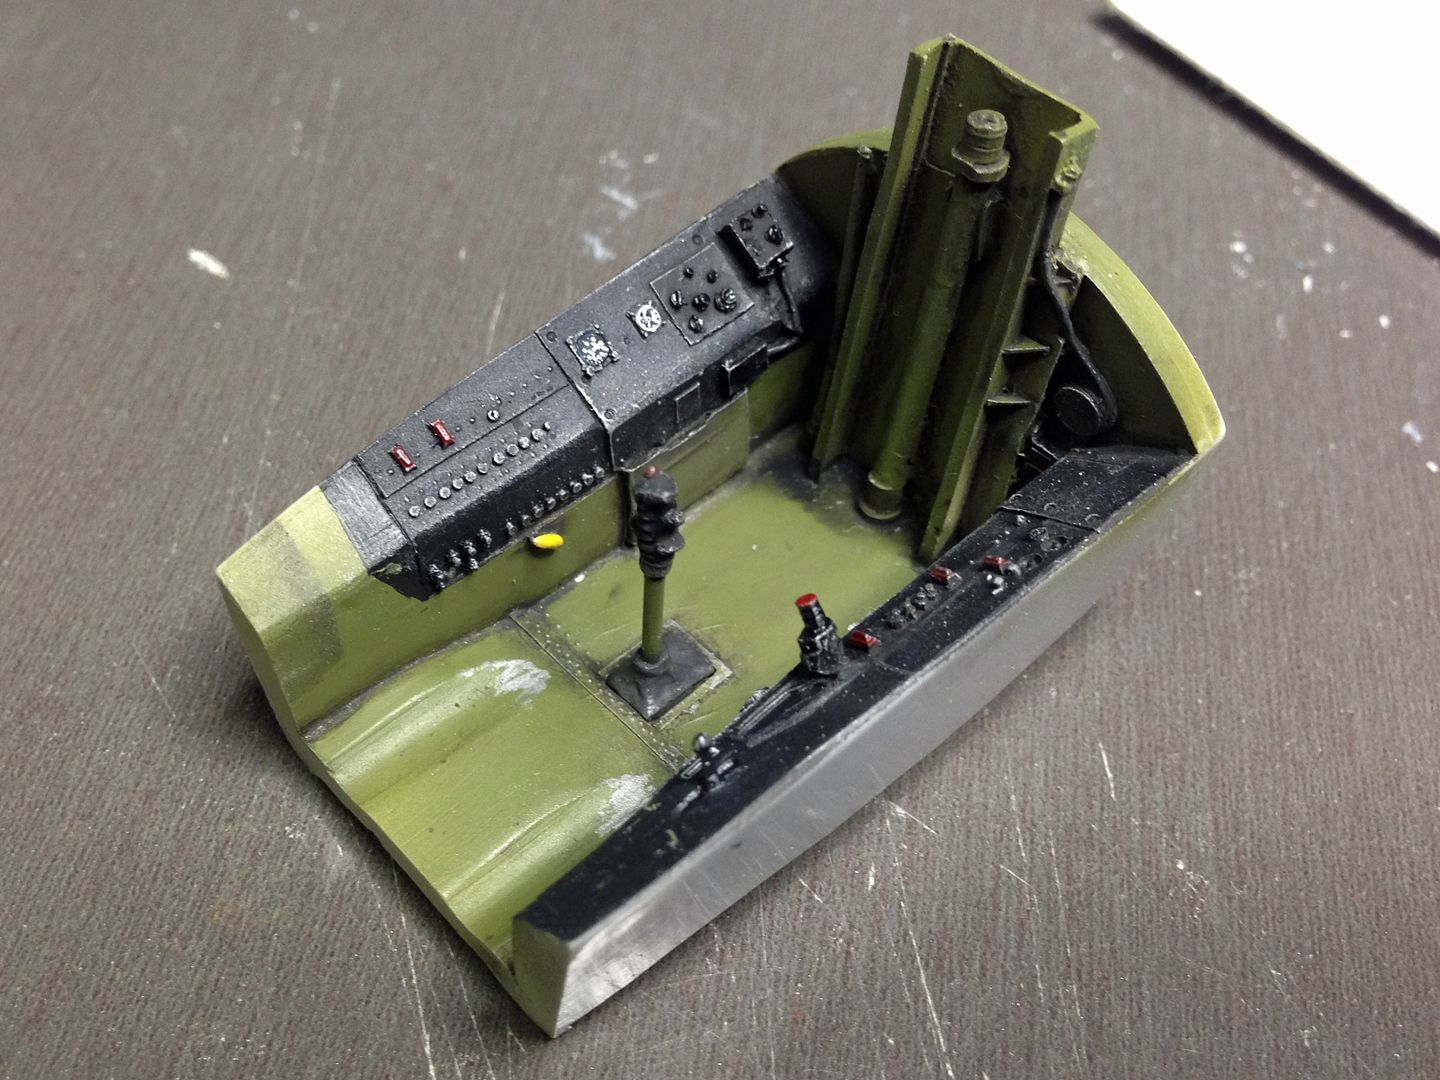
Image

Image

The kit comes with an excellent pre-painted photo etch panel, which works very well with the AMS pit.
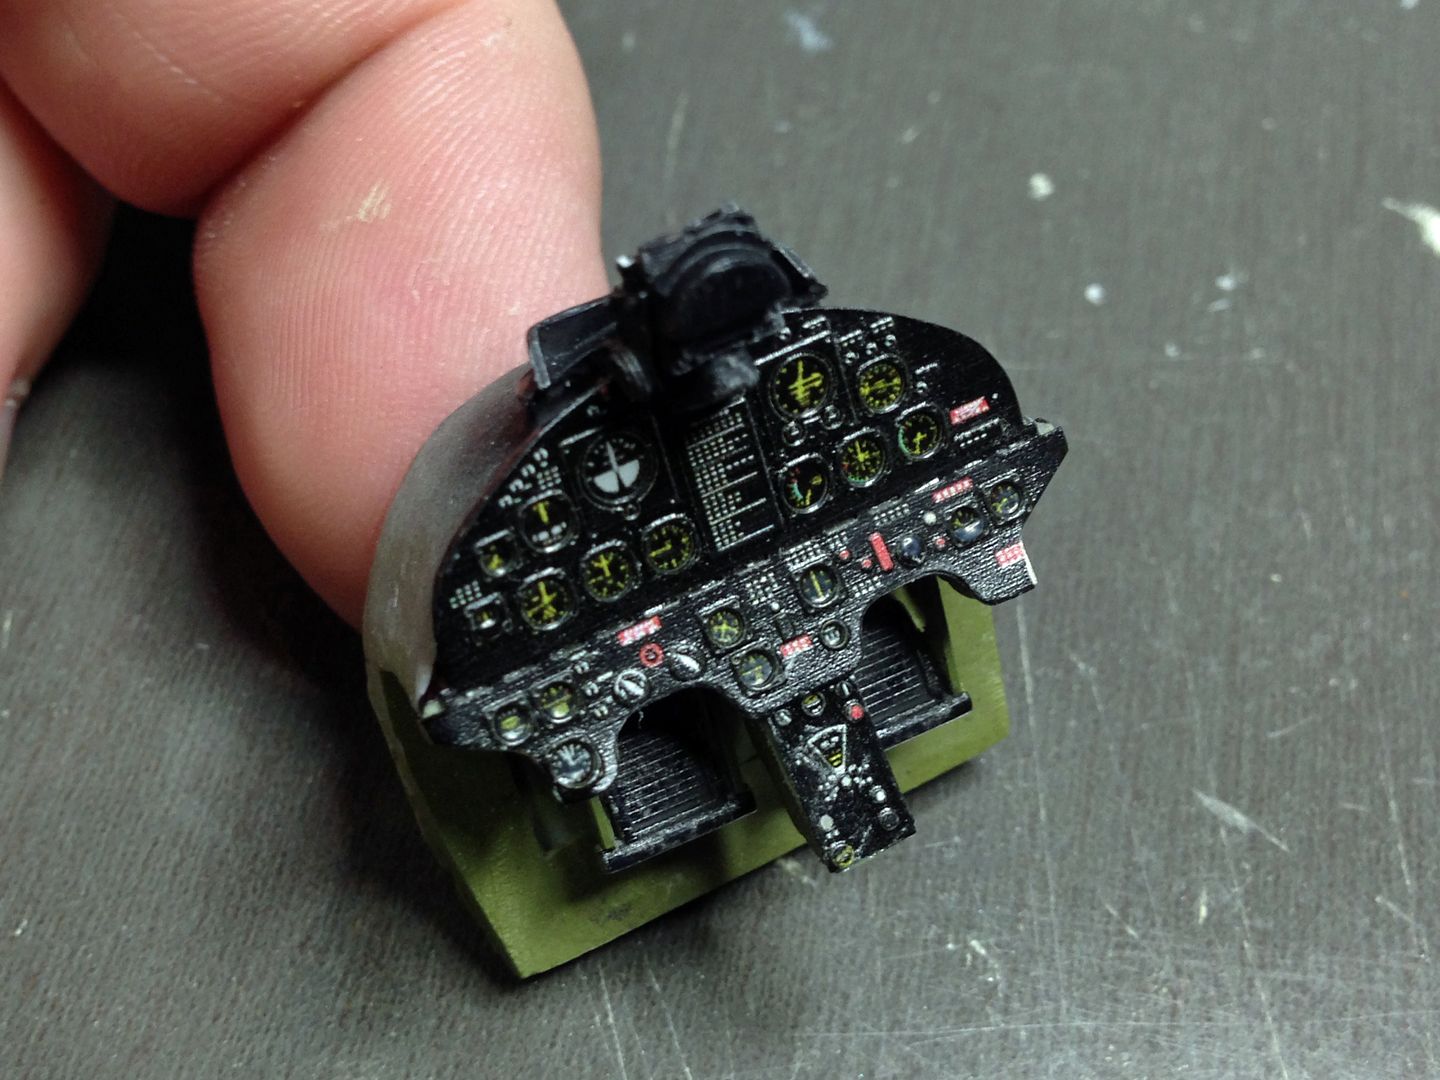
Image

The seat: Will benefit from some placards once I have finished the exterior
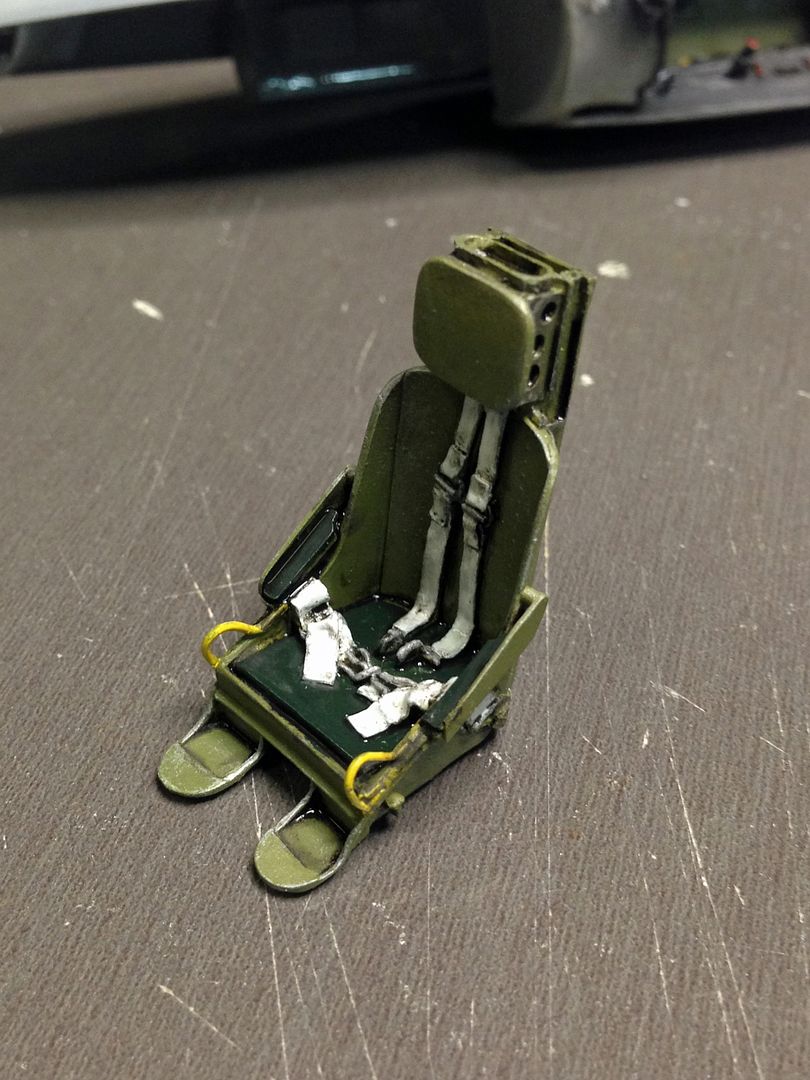
Image

Image

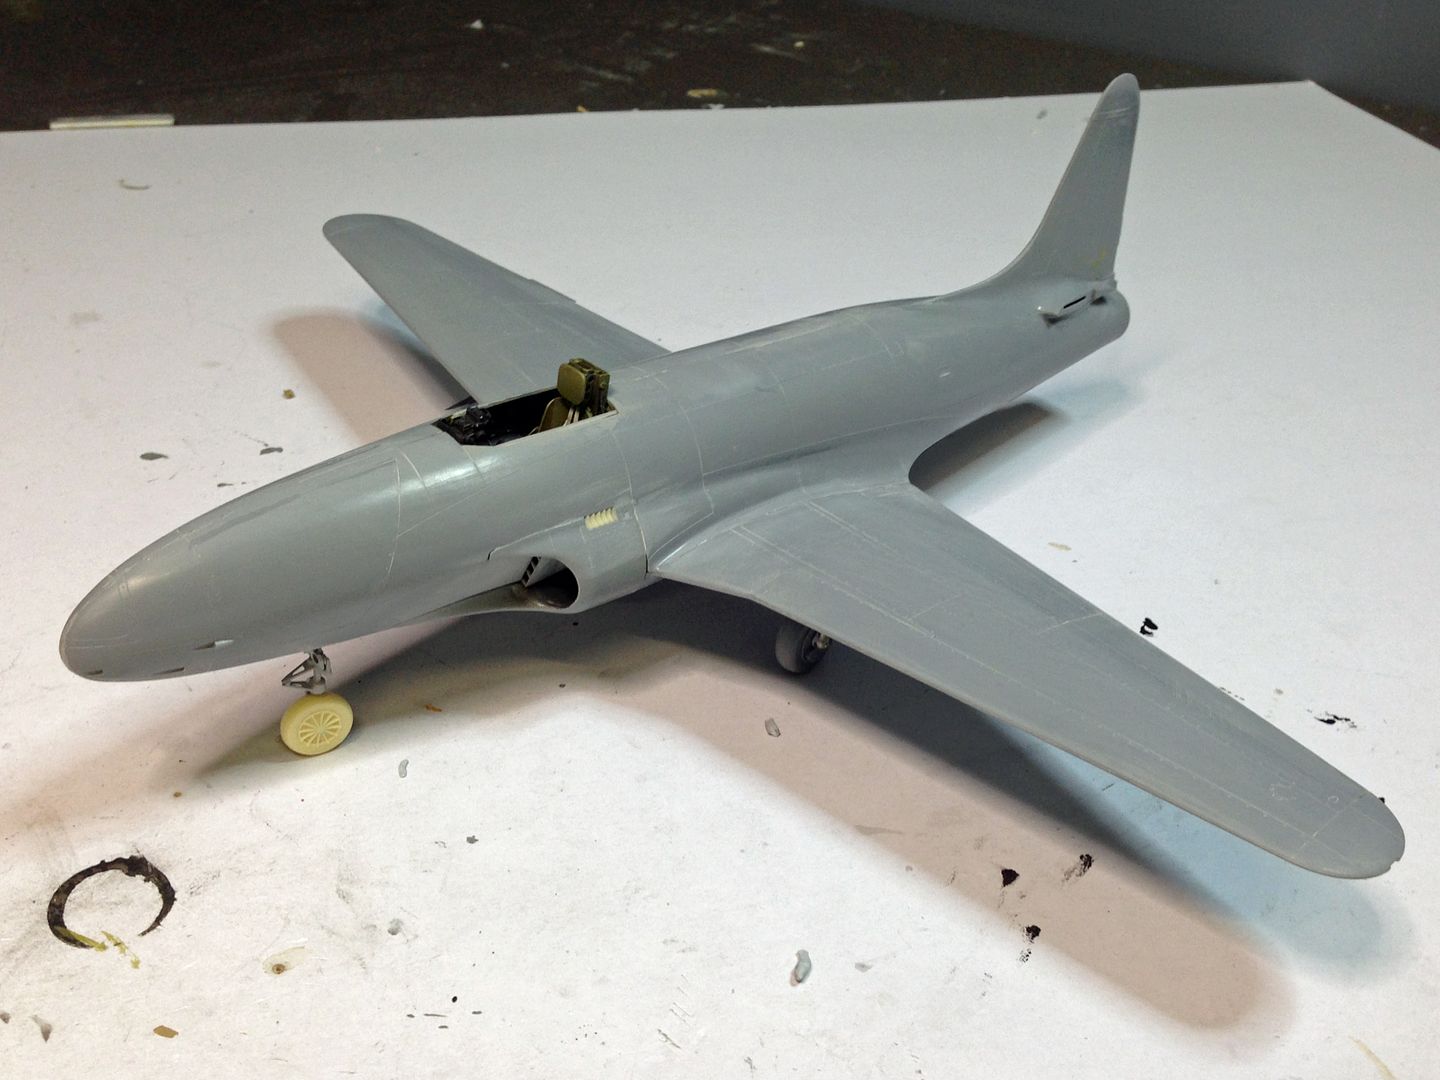
Almost button up time. To minimise the weight of the model, I ground approx 10% of the weight of each fuselage half from the area aft of the main undercarriage line (the kit plastic is quite thick). The benefit of this is that I was able to add only a small piece of lead to the inside of the nose cone. I taped the model together and test fitted it and added only enough weight until the model was able to tip itself back onto its nose wheel from being pushed down onto its tail. Once the wheels are flattened to add the weight effect, this will further push the pivot point aft, helping out a bit more.
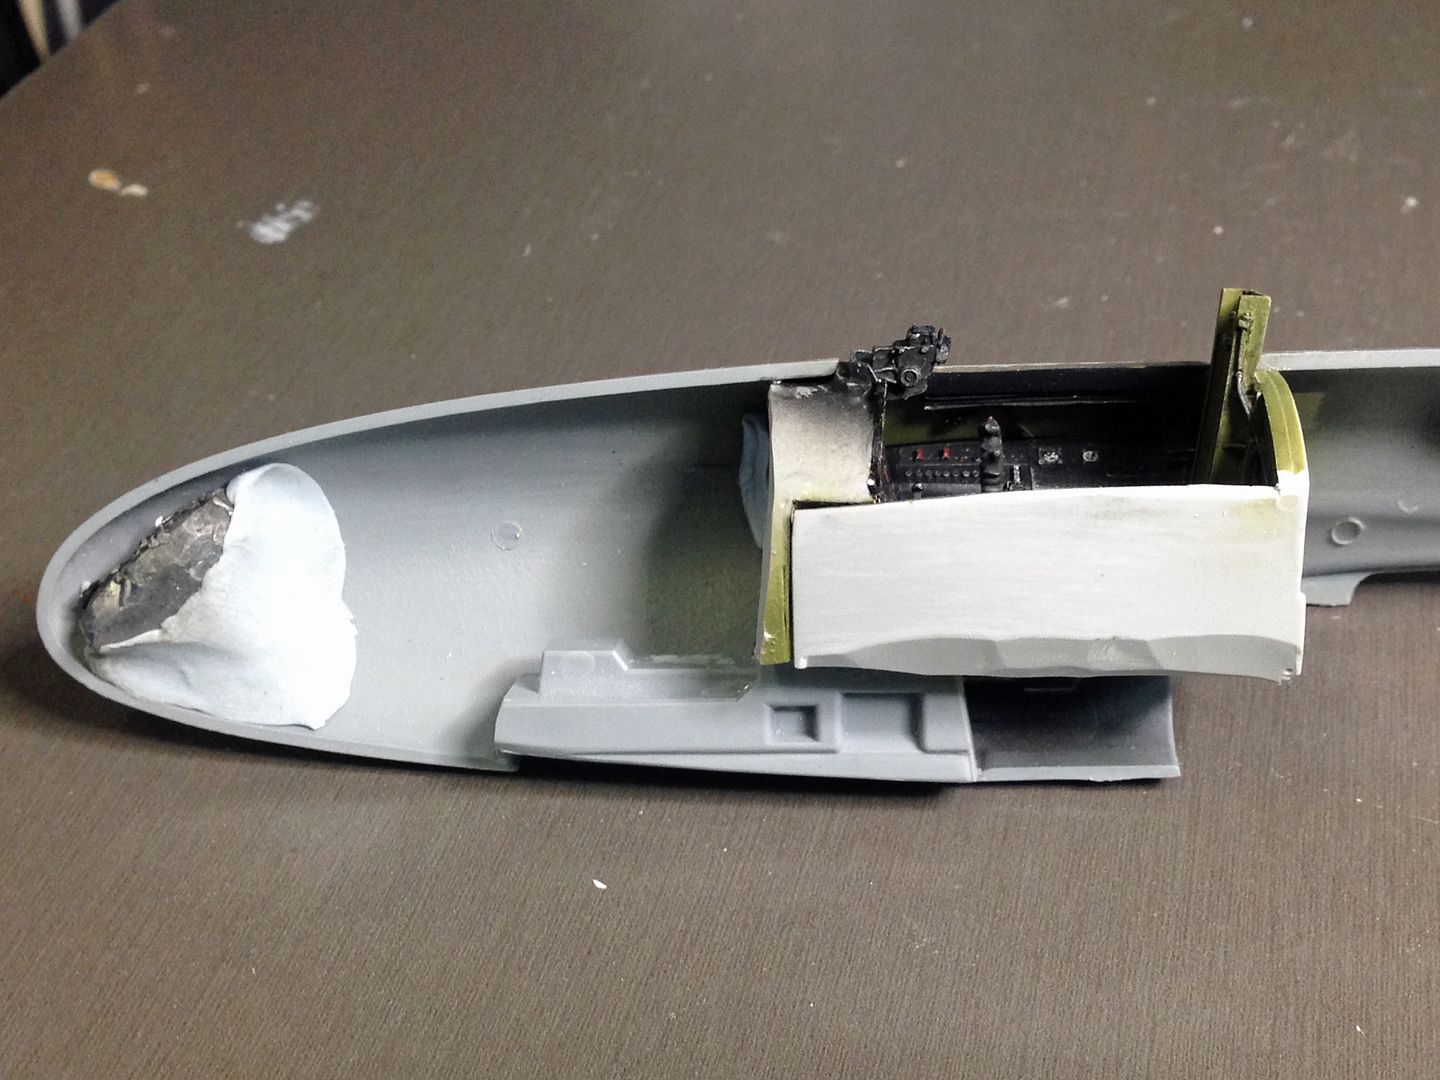
Image

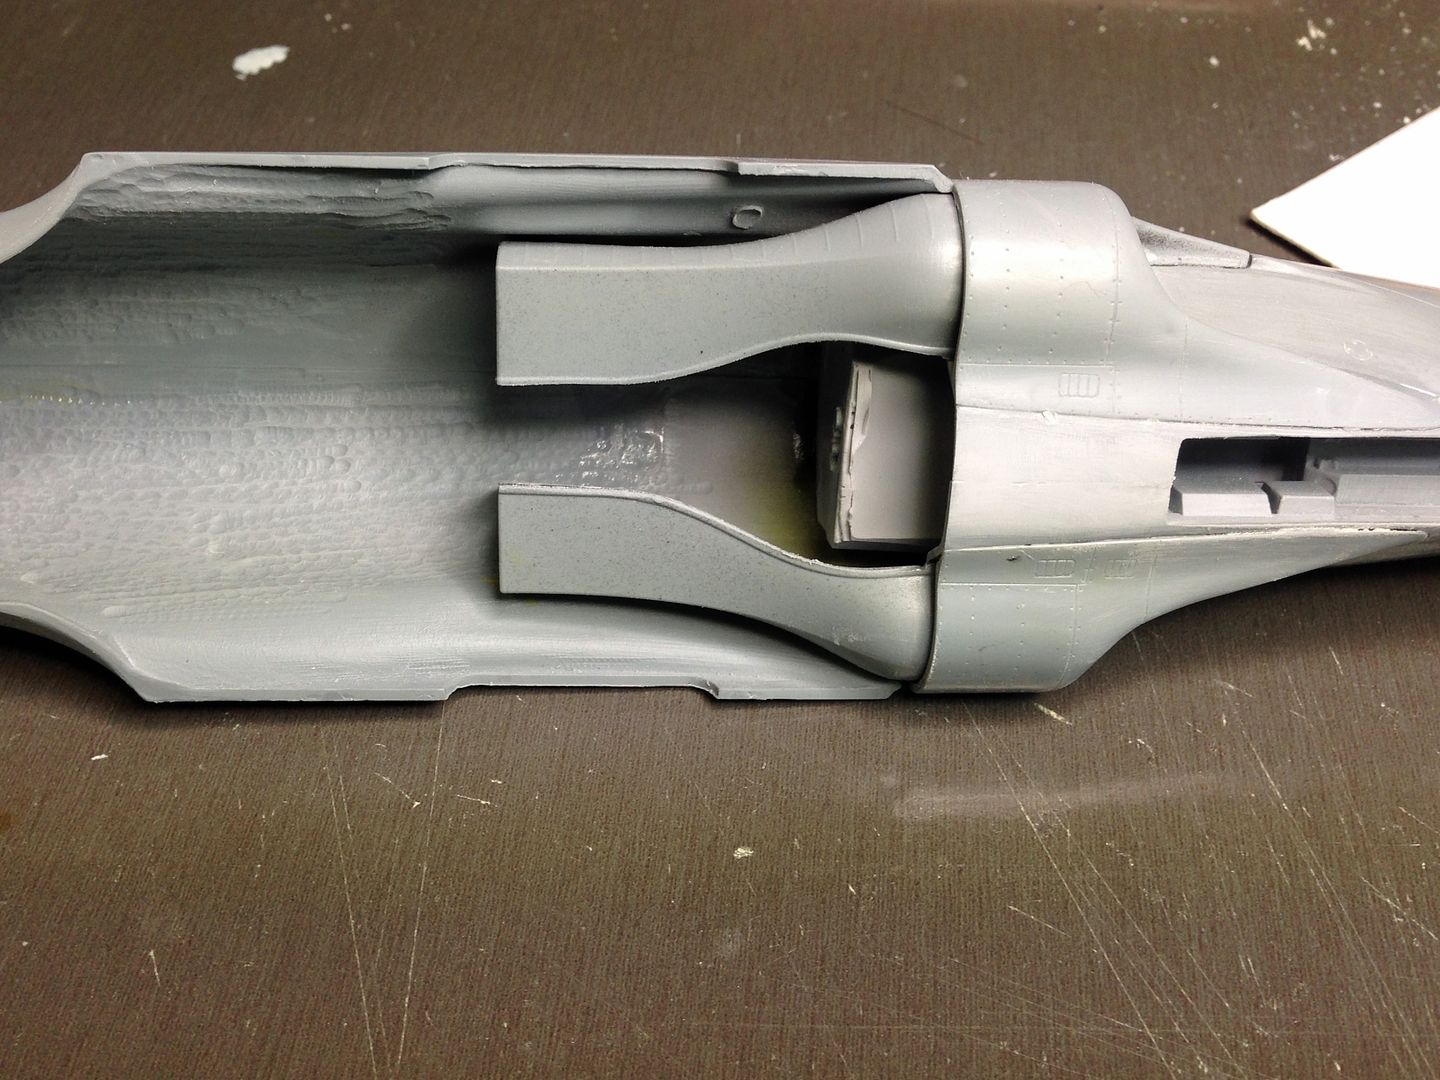
The intakes....The instructions call for a method totally opposite to what you see here. Basically, I sawed through the piece that joins both intakes and then glued each intake together as seperate units, which makes the construction of each very simple and easy to make smooth.
Image

Image

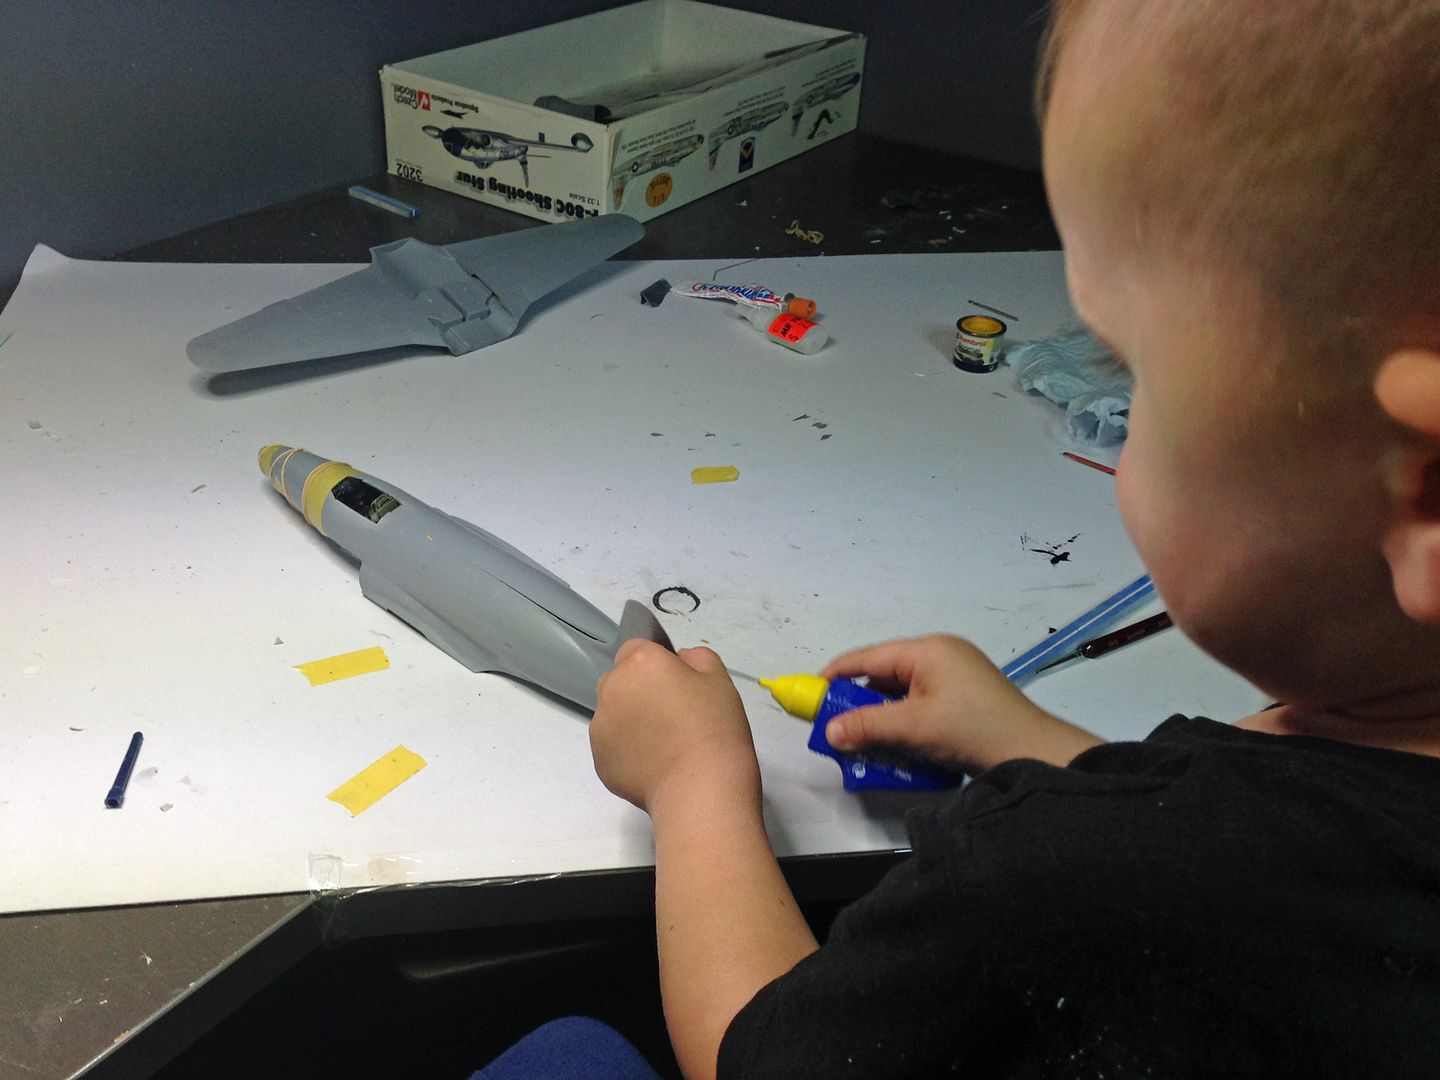
The young fella is learning pretty quick.
Image

3 days progress!

Image
Last edited by Ericg on Fri Oct 31, 2014 3:38 pm, edited 3 times in total.
Ericg
 
Posts: 214
Joined: Mon Apr 14, 2014 7:30 pm

Re: Czech Model F-80C

Postby Adam the Akrodude » Fri Jun 13, 2014 2:42 pm

Great work so far Capt Eric! I'm sure I am not out of line to speak for all other A/CAM'ers in that we're all real happy to see your military builds here as well! This looks to be a challenge once again. Great work on that cockpit. The instruments even have that "radium" look about them. Always thought the F-80 is one great looking aeroplane.

Cheers

Adam
Adam the Akrodude
 
Posts: 2819
Joined: Mon Apr 14, 2014 1:02 pm
Location: 100,124,672,897 Bifrost Rd, Valhalla, Asgard

Re: Czech Model F-80C

Postby Nillus » Fri Jun 13, 2014 3:40 pm

Bloody good.
Nillus
 
Posts: 308
Joined: Mon Apr 14, 2014 5:59 pm

Re: Czech Model F-80C

Postby hrtpaul » Fri Jun 13, 2014 4:22 pm

Nice work so far on this. Keep the builds coming mate. Civvy or military it doesn't mater :)
Head A/CAM Phantom Phanatic, Shit Stirrer and Karma Bus Driver toot toot :twisted:
hrtpaul
 
Posts: 4121
Joined: Sat Apr 12, 2014 10:44 am
Location: Like I'm gonna tell you lot

Re: Czech Model F-80C

Postby oz rb fan » Fri Jun 13, 2014 7:52 pm

very nice Eric
wish my czech model dark shark had a panel like that!
oz rb fan
 
Posts: 1195
Joined: Mon Apr 14, 2014 7:28 pm

Re: Czech Model F-80C

Postby tor lives » Fri Jun 13, 2014 9:14 pm

Adam the Akrodude wrote: I'm sure I am not out of line to speak for all other A/CAM'ers in that we're all real happy to see your military builds here as well!


What Adam said absolutely!!!!
That's why "The Air Base" was conceived....so that A/CAMers could benefit from builds just such as this.
Amazing work as per usual Capt Eric....keep the good stuff coming :D
And it's good to see the young bloke following in dad's footsteps. (is he also a future Dash 8 driver???)
TOR
tor lives
 
Posts: 4255
Joined: Mon Apr 14, 2014 11:01 am

Re: Czech Model F-80C

Postby Ericg » Sat Oct 18, 2014 9:38 pm

So I usually get to a certain stage with my models and then put them aside for one reason or another, usually because I lose interest of just need a fresh set of eyes on the Work in Progress.

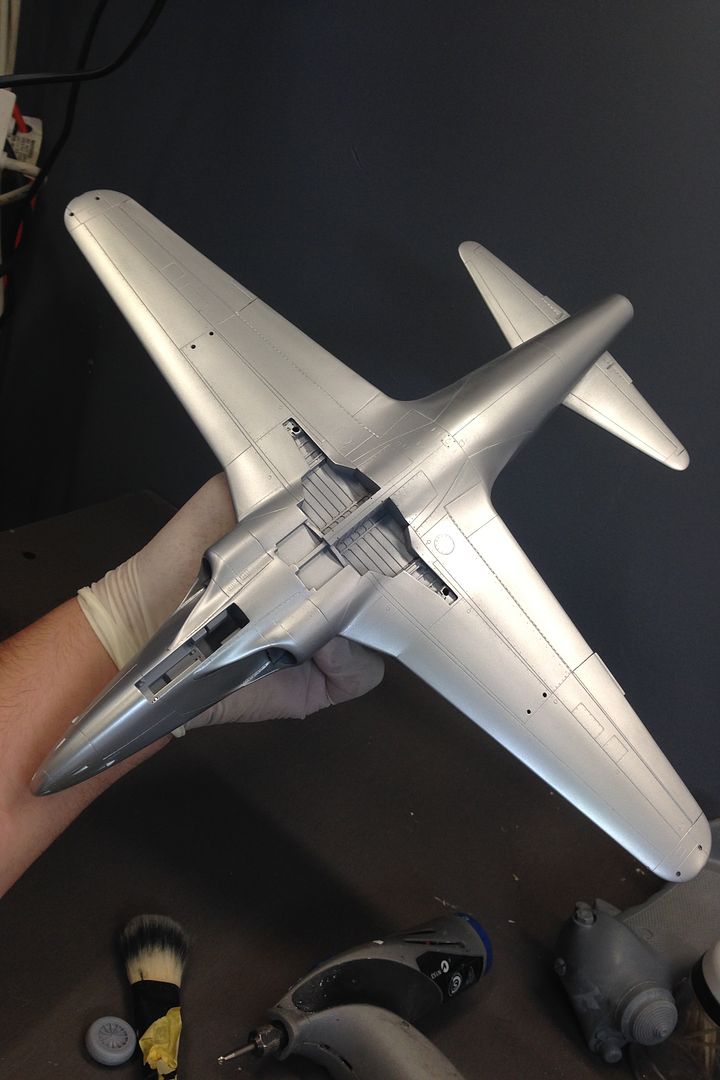
I put down the Meteor for a while and decided to re-visit this model, as it wouldn't need too much work to start getting it ready for paint. As it was going to be a bare metal paintjob, the underlying surface has to be absolutely shmick, as any imperfections will stand out from a mile away. A few hours of checking panel lines, rescribing and fixing flaws had this ready for the alclad paint.

I gave the primed model a good once over with 1500 grit sandpaper, followed by a polish with black foam similar in texture to the stuff that Aires uses to pack some of their resin parts in. This gave the model a super smooth surface. I also noticed that by polishing the model with the foam it had built up a number of fine particles on the surface that had been attracted there though static electricity. Once I blew these particles away, the model was ready for paint and I reckon that the alclad adhesion to the surface of the model has been the best yet (maybe the static electricity had something to do with it?)

I am trying a different approach to doing bare metal, similar to how I did the cowling on this model, but with a twist....

Image

I haven't gone down the traditional path of applying a gloss black coat first and have not preshaded the model.

Anyway, I layed down a coat of Alclad Aluminium. 12-15 PSI, Wet action on the trigger and light misting coats did the trick.

Image

Image

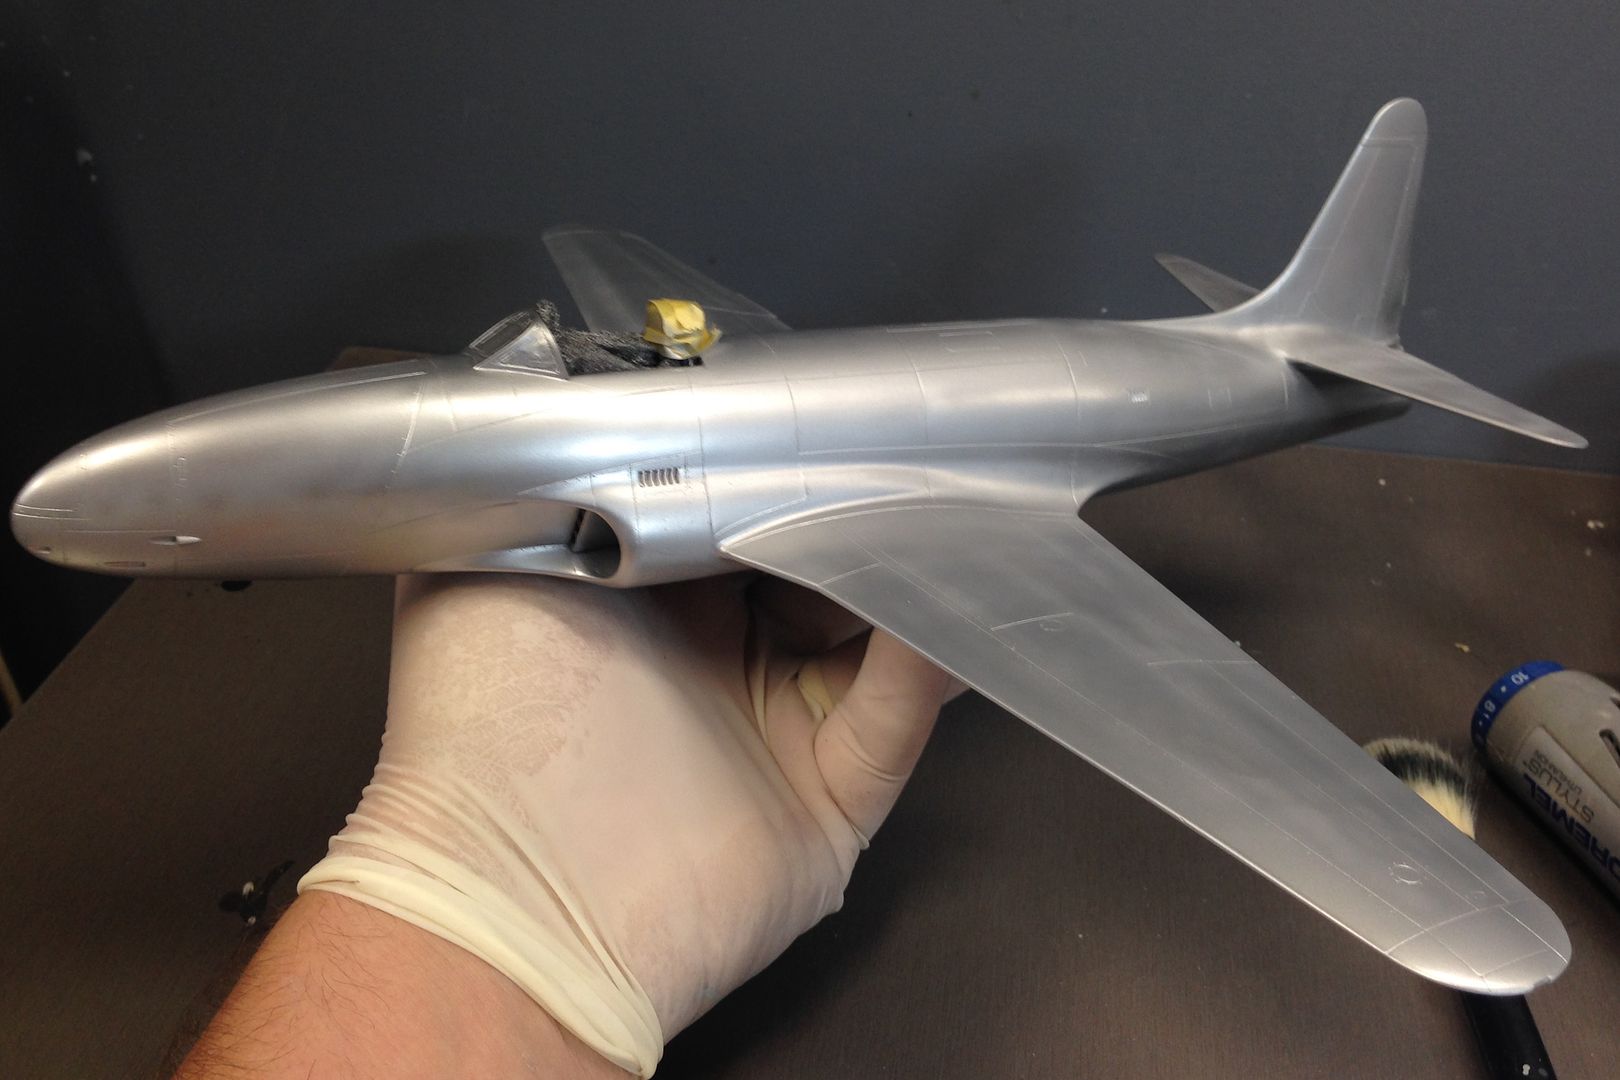
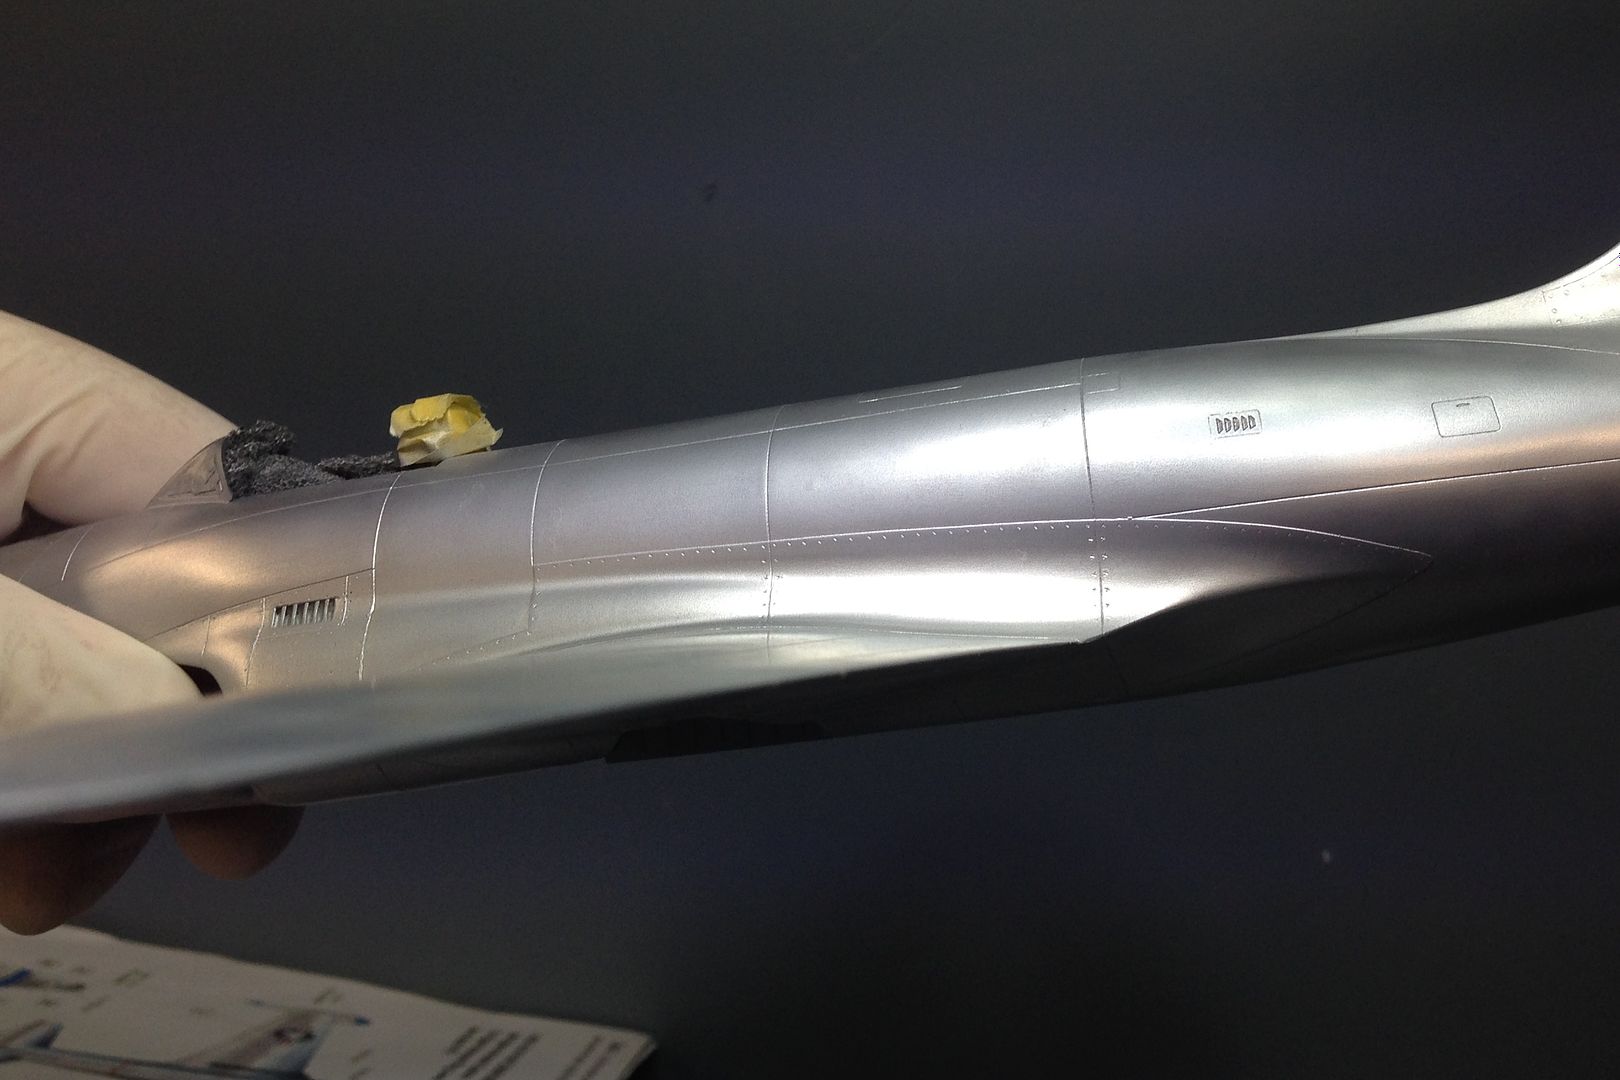
Once this was dry after 10 minutes, I wet sanded the first coat with 4000 grit Micromesh.

Next up, I have mottled Alclad Polished aluminium all over the model to texture the panels.

Image

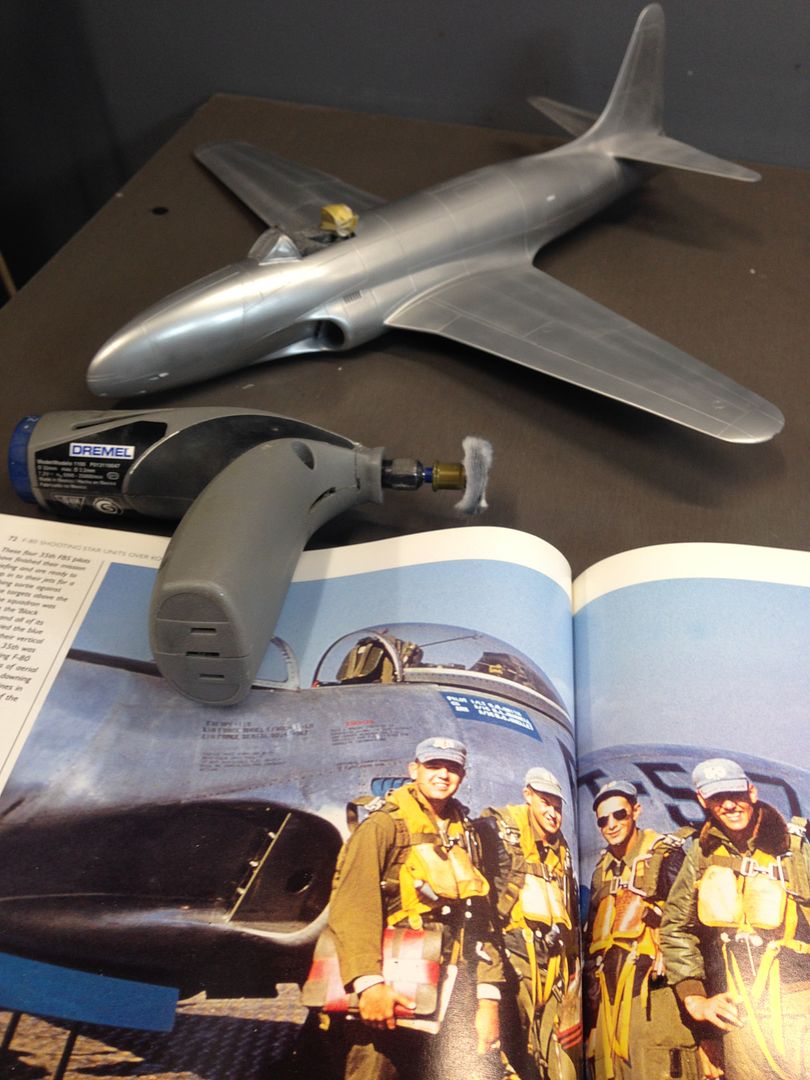
After 5 minutes I then got out the dremel and started polishing the paint using the cloth wheel at 6000 rpm. I have polished each panel in a different direction to its neighbour to break up the textures in the alclad. May seem like a crazy Idea but it works and the alclad loves being polished.

Image

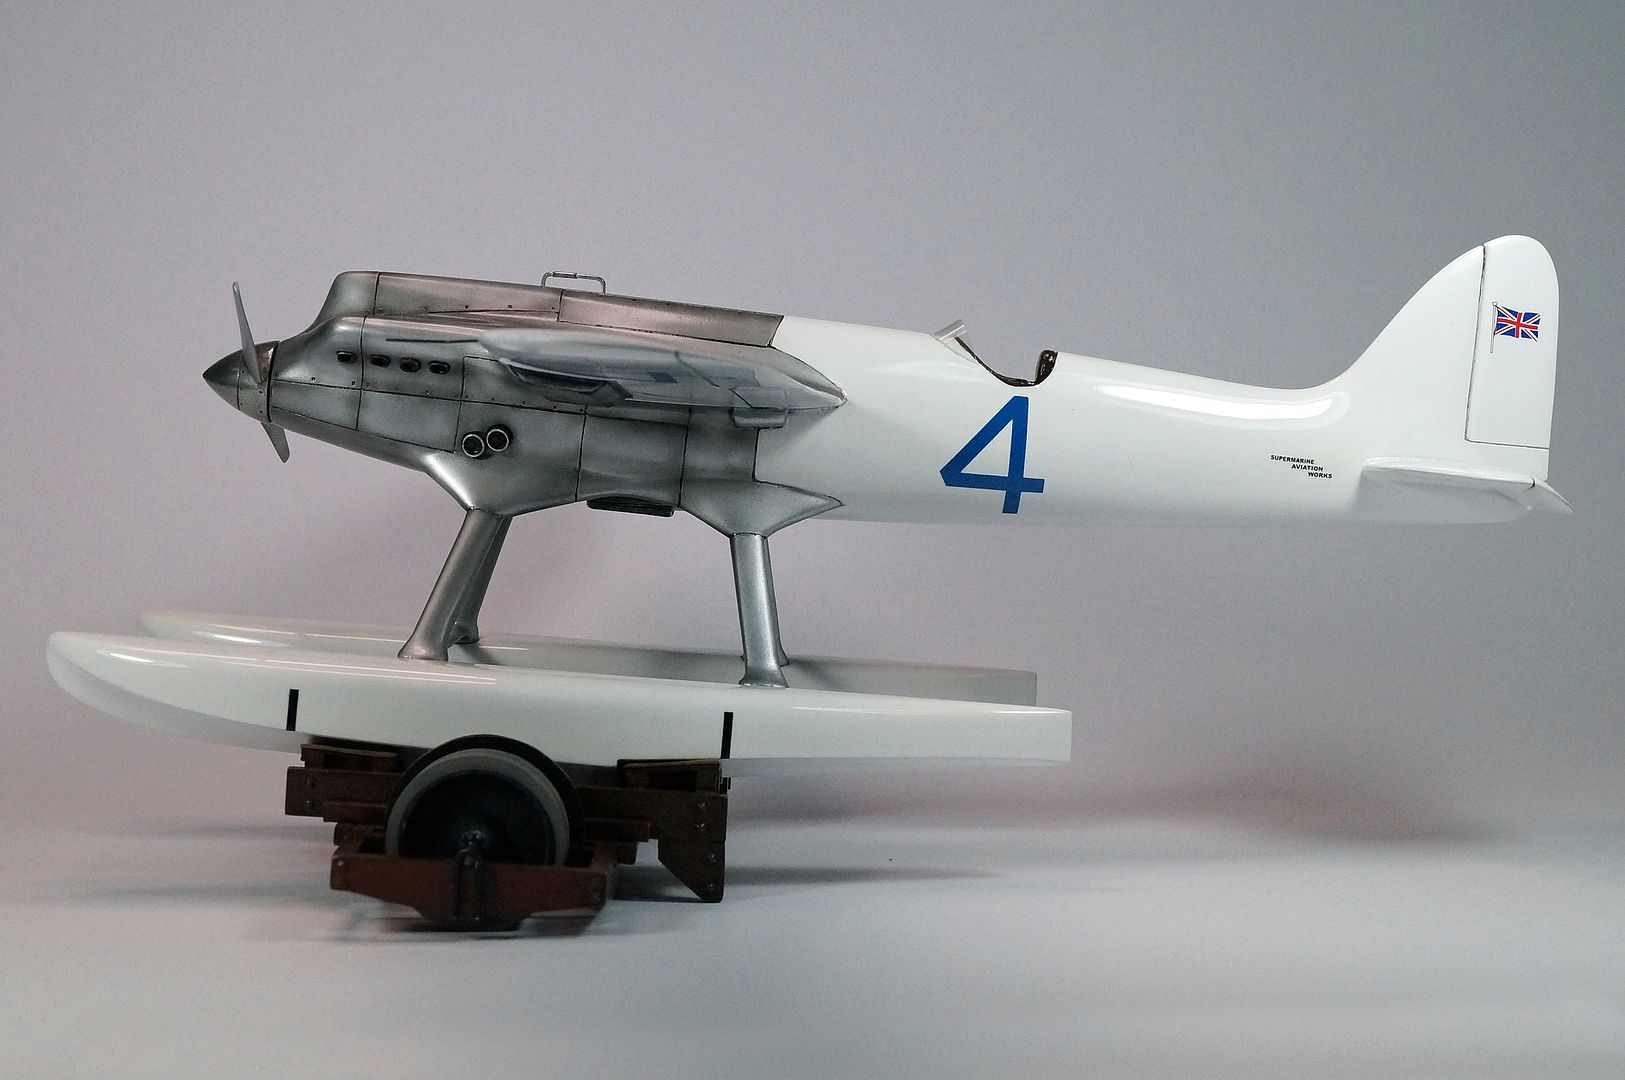
Two Korean War warriors looking forward to the Display cabinet.

Image
Ericg
 
Posts: 214
Joined: Mon Apr 14, 2014 7:30 pm

Re: Czech Model F-80C

Postby tor lives » Sat Oct 18, 2014 10:57 pm

Eric, your Alclad natural metal results are just friggen amazing :shock:
Imagine what you could achieve if we could get you to apply those talents to Airliners from the 50s, 60s, and 70s :D
Thanks for posting.
Regards
TOR
PS: do use a polishing compound or is it just straight "cloth to paint"???
tor lives
 
Posts: 4255
Joined: Mon Apr 14, 2014 11:01 am

Re: Czech Model F-80C

Postby Ericg » Sun Oct 19, 2014 9:17 am

Cloth to metal so to speak mate. As the paint job progresses I will probably crank out the polishing compound to enhance the natural grain of the Alclad.

Eric
Ericg
 
Posts: 214
Joined: Mon Apr 14, 2014 7:30 pm

Re: Czech Model F-80C

Postby Ericg » Mon Oct 20, 2014 10:36 pm

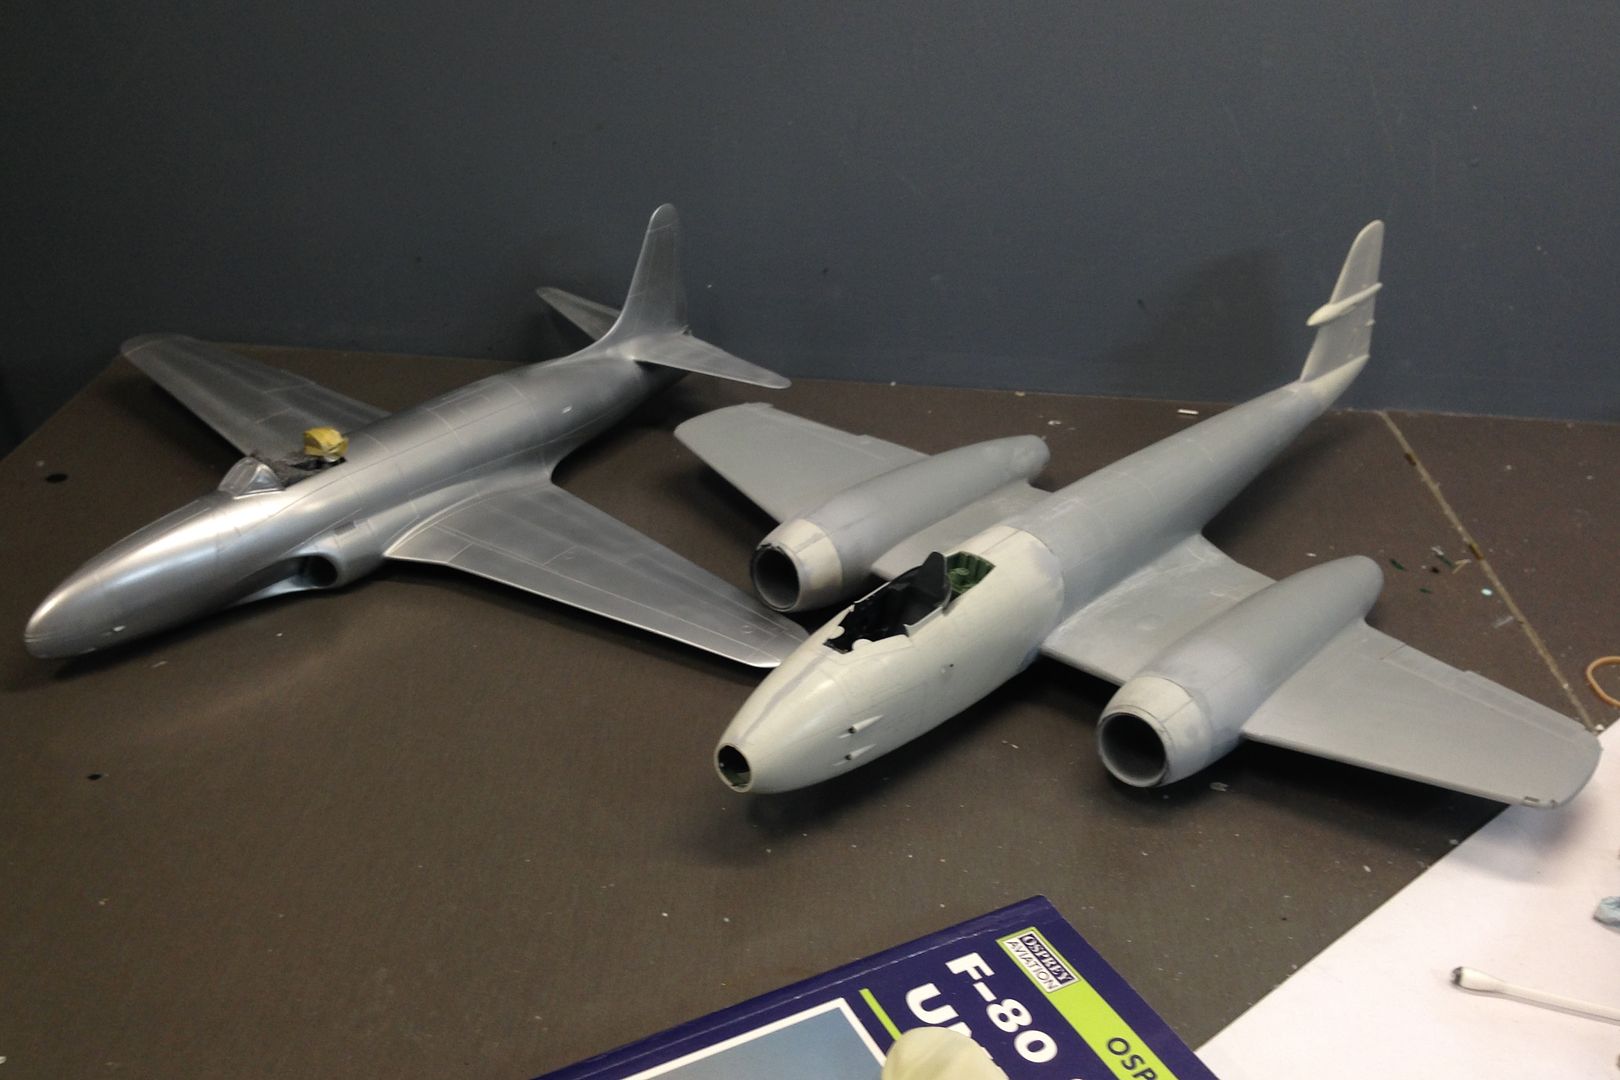
I have started to get a bit further into the bare metal finish. It is sorta hard to see in this pic but I have mottled the entire surface of the model with Alclad dark aluminium to give it the hand polished textured look.I am thinking a few steps ahead here and am constantly thinking about how the paint is going to look under its final clear coat. At this stage it looks very convincing. I asked the mrs (not that her opinion counts) whether it looked like it was metal and she thought it looked like I had covered it in tin foil..... I am splitting up a few panel panels by holding up a sheet of paper to the edge of each panel and spraying it with a different shade of Alclad. Some folk go a bit too far with colouring different panels too much and it takes on patchwork look of which I can't find anything like it in my references.

Image
Ericg
 
Posts: 214
Joined: Mon Apr 14, 2014 7:30 pm

Next

Return to The Air Base

Who is online

Users browsing this forum: No registered users and 16 guests