Tamiya 1/24 Nismo Skyline GT-R Z-tune

A membership discussion forum for all things modelling.

Tamiya 1/24 Nismo Skyline GT-R Z-tune

Postby hrtpaul » Tue Aug 18, 2020 1:19 am

After the POS Lambo, I couldn't wait to start this. Now I am a V8 guy, and a Holden guy in particular through and through, but the Skyline GT-R would have to be my favourite rice burner. This probably explains why I have 10 (so far) GT-R's in the stash :lol: :lol: :lol: It's the amazing 1/24 Tamiya Nismo R34 Skyline Z-tune. Back in 2003, Nismo bought 18 low milage second hand R34 GT-R V Spec II's,stripped them and turned them into GT-R Z-tune Skylines. This was for the 20th anniversary of Nismo. Surprisingly there are a few of these cool cars in Australia. They were all painted Z-tune Silver and had specific engine, drivetrain and body modifications. These were hand made cars and sold for a shit ton of $$$. If you can find one these days under $500k you're doing well. This is the kit I'll be using

Image

Midnight Purple is one of my favourite car colours ever. There are in fact 3 Midnight Purples and all are slightly different but different enough to be able to tell them apart. Midnight Purple 1, 2 and 3 are the imaginatively named variations It's not common but is a very popular colour. After a bit of research, apparently Splash Paints from the US do the best one. It is a lacquer paint and I have all 3 versions. As it's not stocked here in Oz it does make it a bit expensive but when it comes to this colour, I had to have them. This is a real Z-tune that has been stripped and repainted in Midnight Purple 3. It actually lives here in Melbourne apparently. What a sexy looking beast.

Image

There's a guy on the ISM Youtube channel that built the Tamiya kit in Midnight Purple 3 and that was my inspiration. Though it's a pain in the arse colour to photograph, this is what I'm going for.

Image

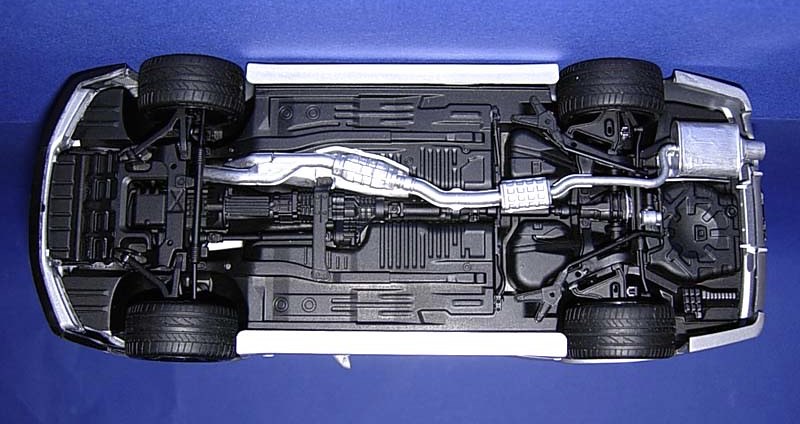
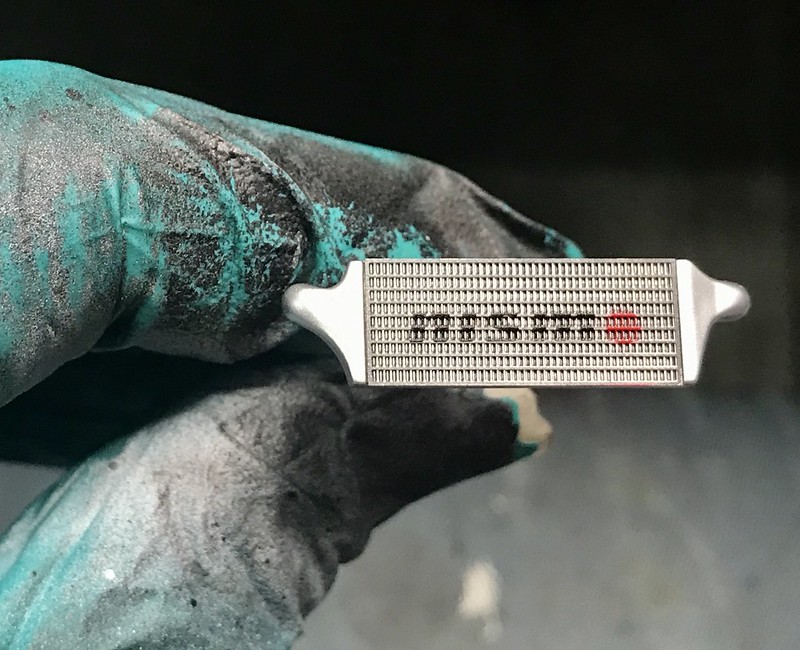
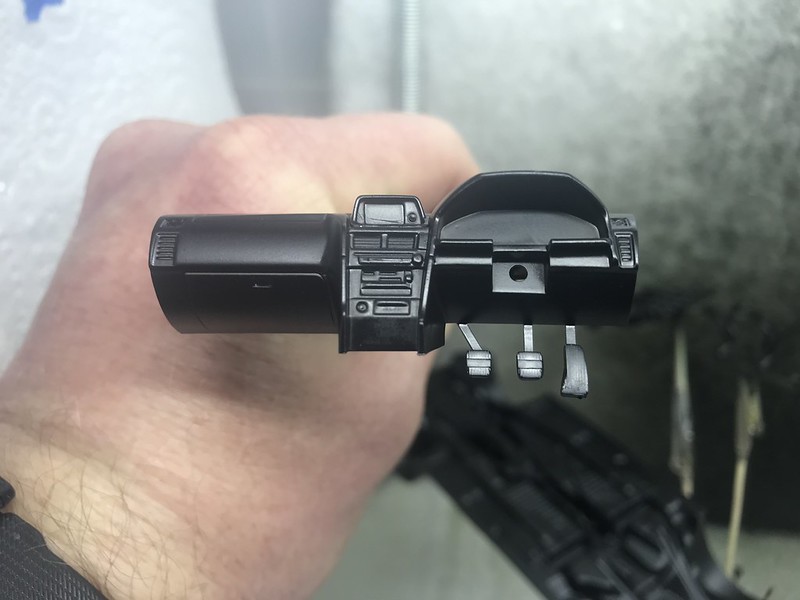
The kit is brilliant and like chalk and cheese compared to the shitbox Lambo I just did. It is a curbside kit meaning there isn't a full engine in it, just the lower portion of the engine being molded into the chassis. It is basically the same as the V Spec 2 kit with a different body, front bar and an additional sprue for this boxing. It even comes with window masks as well. Not bad for around $40-50. I want to try using embossing powder to simulate carpet. Flocking is generally used for this but it's supposed to be very messy and you can't totally clean the mess up. This wreaks havoc for clear coats. The only aftermarket stuff I'll be using is a Crazy Modeler PE update set and a set of Hobby Design metal logos.

Image

Image

I started by glueing the front bar to the body and removing all the raised molding seams. Easy enough to do and didn't take that long. I then primed the body and drivetrain parts in UMP olive primer. I'd never used it before but old mate on Youtube swears by it (and sells it in the UK), so I got some from BNA to try. Well I found out after I'd finished priming that it was a water based primer. Oh shit among other things were muttered as I have never had any luck with anything water based at all but it's too late now. Anyway it sprayed nicely, self levels great, dries smooth AF and seems actually reasonably hard. Winning so far. It's a pity BNA don't seem to stock the other colours of this primer :( :( :(

The primed body and chassis.

Image

Image

Image

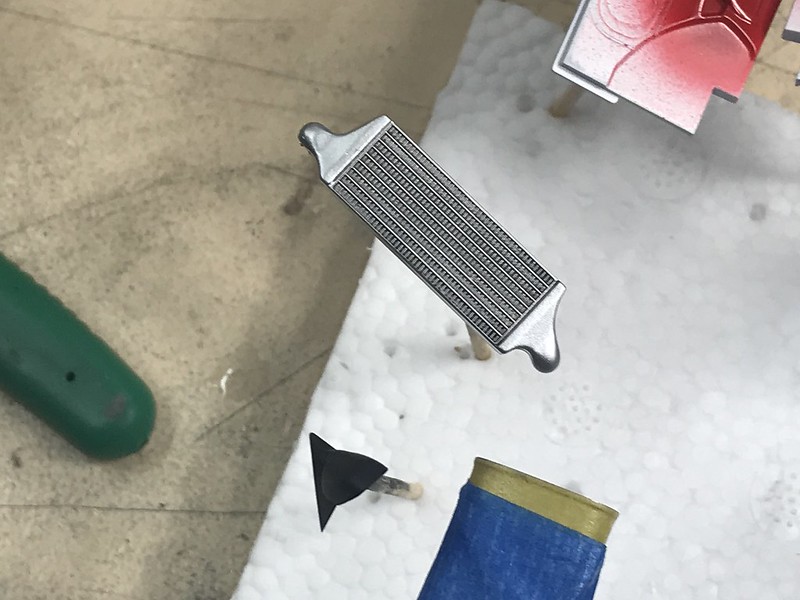
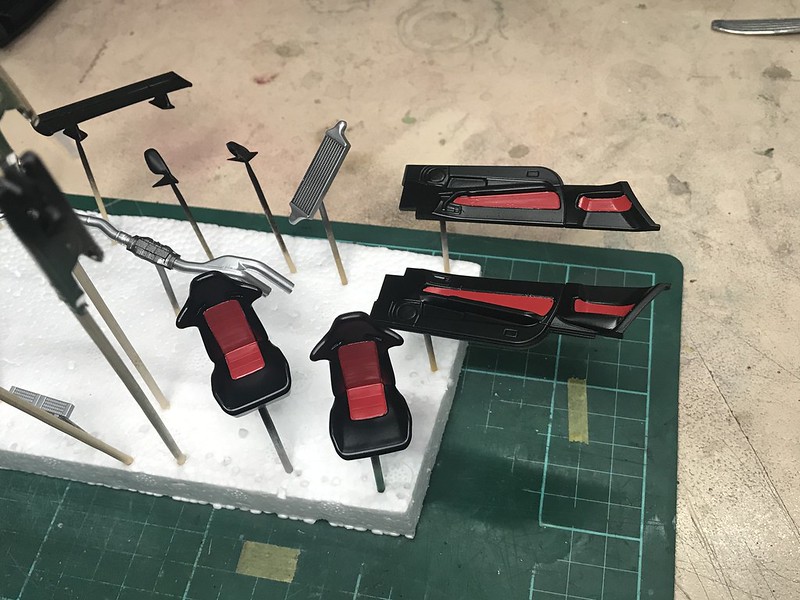
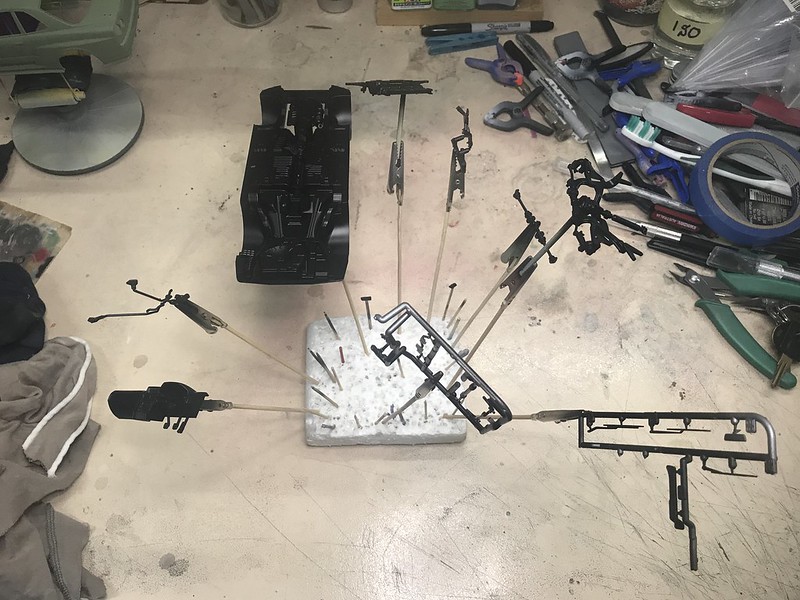
Today the various drivetrain and suspension components along with the chassis got a hit of LP-5 semi gloss black lacquer. This was another of the tips I picked up from old mate on Youtube. This black comes in a 10ml jar and is by far the best semi gloss black I've ever used. It dries fast with a great semi gloss sheen. I'll be using more of these Tamiya LP paints for sure.

Image

Image

Image

That's it for now. Tomorrow I'll start detail painting the chassis and suspension and spray some decanted black primer (I may have watched a lot of Youtube over the past 4-5 months :? ) on the body. I'm a little nervous but hopefully I'll get to spray the Midnight Purple on the body Wednesday :shock: :shock: :shock:
Head A/CAM Phantom Phanatic, Shit Stirrer and Karma Bus Driver toot toot :twisted:
hrtpaul
 
Posts: 4120
Joined: Sat Apr 12, 2014 10:44 am
Location: Like I'm gonna tell you lot

Re: Tamiya 1/24 Nismo Skyline GT-R Z-tune

Postby hrtpaul » Thu Aug 20, 2020 1:01 am

Hey peeps. Ok it didn't get the paint on today like I'd hoped. But first I'll back up a bit to yesterday for a couple of things I forgot. I sprayed the exhaust and intercooler with Alclad aluminium and they came up nicely but I did however forget to spray the sump the same colour. Idiot. I also assembled the rear wing and that along with the wing mirrors, seats, interior etc got a coat of primer.

This bit I forgot to paint with the Alclad aluminium :? :? :?
Image

Image

Image

Image

So it was time to detail paint the chassis. I had a few different colour silvers lined up to give a bit of variation underneath. And then this happened :evil: :evil: :evil: :evil:

Image

That my friends is a 30+ year bottle of Testors enamel which, along with the other 10 or so bottles I have, is still useable after all this time. I have been a little clumsy in the model room lately so when this happened I assure you a few choice words were muttered rather loudly. So instead of cleaning it up and wasting the paint i used it straight off the desk to detail paint as much silver stuff as possible. I even had the thin the paint on the desk a little :lol: :lol: :lol: This is the end result.

Not bad but not the greatest either. I might repaint a couple of spots for that variation I was originally after.

Image

It was at this point I found the first inaccuracy of this amazing kit. The exhaust. Tamiya have carried over the standard R34 GT-R exhaust instead of the correct one :evil: :evil: See below

The correct exhaust

Image

The one in the kit

Image

After a quick meeting between my CBF'd self and OCD self, it was decided that a new exhaust would not be built and the kit one utilised instead (cue wiping sweat from brow). After that dilemma I managed to get some decanted black primer onto the body as well. After a bit of a panic, it dried vary nicely. It'll need sanding with very fine micromesh do get rid of some dust, but after that it'll be colour time. I also put a black wash on the intercooler with a Tamiya black wash but I forgot to wipe off the excess until today. It still looks pretty good and has made the detail really pop.

That brings us to today's adventures. I didn't get a whole lot of time in the shed today, and of the time I did get, I wasted a lot of it due to my own stupidity. Some dipshit thought he might paint the diff/gearbox cooler that's mounted down the back behind the diff.

Image

I LOST THE BLOODY THING. It was on the bench last night and wasn't there this arvo. Who knows what I've done with it. So with much swearing and tanty-throwing, I commenced the search. All over the bench, under the bench, all across the floor and still nothing. This is where the wasted time comes in. Whilst searching for this 1" long bit I got the cleaning bug. So after about an hour of searching/cleaning up,I still didn't have an oil cooler for the car. What I did have was a totally vacuumed floor and bench which actually made for a very nice and clean work space. And I actually have more than 12 square inches to work in for the first in EVER.

Image

Image

As a side note, I have been doing some rearranging/clean up in the model room the past week and it's made it infinitely more useable with more renos to come.

Back to my latest self-induced shit fight. I'd come to the conclusion that my Z-tune wouldn't have an oil cooler which was a bummer as I'd decided to run the gearbox and diff cooling lines under the car for a bit more detail and interest. Whilst I was sulking I noticed a couple of Tamiya R34 GT-R detail up parts sets I'd bought. They contain exactly the same specific sprue that the Z-tune kit has which includes, yep you guessed it, an oil cooler (cue happy dance). So now that I was a happy camper, I stuffed around mixing some colours to paint the tailshafts in an orangey, browny, black kinda colour. They came up rather well when compared to my references. After that I was trying to decide on a colour for the door trim inserts and seat inserts. I thought about a purple colour to tie in with the external paint but chose a bright red like the original car. By the time I'd finished the inserts my little man had turned up and I called it quits for the day. Oh and I forgot pics of the interior so I'll take some tomorrow.

Tomorrow I'm hoping to get a few things done. Firstly the inserts and steering wheel masked up so the rest of the interior can be sprayed semi gloss black, the body sanded in preparation for colour Friday, the wheels primed and a coat of gloss black ready for some Alclad shadow chrome and prepare some PE mesh parts for paint as well. I really should get stuck into the Airfix 1/72 B-25 I have on the go too but this car caper is pretty cool fun.
Head A/CAM Phantom Phanatic, Shit Stirrer and Karma Bus Driver toot toot :twisted:
hrtpaul
 
Posts: 4120
Joined: Sat Apr 12, 2014 10:44 am
Location: Like I'm gonna tell you lot

Re: Tamiya 1/24 Nismo Skyline GT-R Z-tune

Postby hrtpaul » Thu Aug 20, 2020 4:08 pm

Just a quicky update today. Got bugger all done which sux considering the I had big plans. I masked the exhaust up and I maybe able to finish sanding body if I'm lucky. So at this rate I think applying the colour will be a weekend job. Here's a couple of pics of the interior and intercooler. Cheers

Image

Image
Head A/CAM Phantom Phanatic, Shit Stirrer and Karma Bus Driver toot toot :twisted:
hrtpaul
 
Posts: 4120
Joined: Sat Apr 12, 2014 10:44 am
Location: Like I'm gonna tell you lot

Re: Tamiya 1/24 Nismo Skyline GT-R Z-tune

Postby oz rb fan » Thu Aug 20, 2020 4:30 pm

damn you are getting a move on there....and that intercooler looks awesome
oz rb fan
 
Posts: 1195
Joined: Mon Apr 14, 2014 7:28 pm

Re: Tamiya 1/24 Nismo Skyline GT-R Z-tune

Postby Ansett A330 » Thu Aug 20, 2020 10:30 pm

Great work.

Will be following this one with interest.
Ansett A330
 
Posts: 1205
Joined: Sat Jun 04, 2016 2:14 pm
Location: Bacon Lettuce Tomato

Re: Tamiya 1/24 Nismo Skyline GT-R Z-tune

Postby hrtpaul » Mon Aug 24, 2020 9:11 pm

Thanks guys. So actually achieved something the last couple of days. First of all the interior. I masked the red on the seats and door cards ready for paint. Tamiya LP-5 semi gloss black was sprayed and the tape was removed. It came up OK with a couple of touchups required. I hand painted the black on the steering wheel cos I CBF'd masking it.

Image

Image

Image

Image

Today I got the rear suspension installed and finished. I'm pretty pleased with how it looks. I also got the brakes done. The discs actually have a PE disc on it which is a vast improvement. They look really good fitted to the rear susupension. These are the front brakes.

Image

Image

The rears attached to the suspension

Image

Image

Image

In the kit there's a decal for the Nismo on the intercooler. Part of the Tamiya detail up set is there's an intercooler screen and a Nismo template. I sprayed the Nismo to see what it looked like and it came up ok. I think I'll use it on the cooler.

Image

The PE mesh is just sitting on the cooler at this stage.

Image

Image

Tomorrow I hope to get the sump/transfer case fitted and then I'll be able to get the front suspension sorted. A little detail painting on the interior. I didn't realise that the kit includes some self-adhesive "carpet" for the interior. I was all prepared to add some flocking to represent the carpet. I think I'll still use the flocking as I've been wanting to try the technique. I might even get the wheels in primer and gloss black. The body has been in the final coat of black primer for a few days now and should be totally dry. I'm a bit scared about painting the Midnight Purple as it's a little expensive but I might give it a crack tomorrow.
Head A/CAM Phantom Phanatic, Shit Stirrer and Karma Bus Driver toot toot :twisted:
hrtpaul
 
Posts: 4120
Joined: Sat Apr 12, 2014 10:44 am
Location: Like I'm gonna tell you lot

Re: Tamiya 1/24 Nismo Skyline GT-R Z-tune

Postby hrtpaul » Tue Aug 25, 2020 8:10 pm

Some more stuff today but not as much as I'd hoped. The interior detail painting is almost complete. A couple of switches need to be painted it finish it off. I'm waiting on some semi gloss clear to turn up so I can give the interior a once over to tie it all together. I got the sump/transfer case fitted as well as the rest for the front suspension and brakes fitted. That completes the suspension and chassis.

Image

Image

This evening I started the plumbing of the gearbox and diff coolers with some wire I ripped out of an old TV. I'm going to try to make the AN fittings that connect the hoses to the gearbox, diff and coolers but we'll see how I go.

Image

Gearbox lines

Image

Diff and gearbox lines

Image

Plans for tomorrow include semi gloss on the interior, prime the wheels and progressing the cooler plumbing.
Head A/CAM Phantom Phanatic, Shit Stirrer and Karma Bus Driver toot toot :twisted:
hrtpaul
 
Posts: 4120
Joined: Sat Apr 12, 2014 10:44 am
Location: Like I'm gonna tell you lot

Re: Tamiya 1/24 Nismo Skyline GT-R Z-tune

Postby oz rb fan » Wed Aug 26, 2020 12:04 am

that looks awesome mate
oz rb fan
 
Posts: 1195
Joined: Mon Apr 14, 2014 7:28 pm

Re: Tamiya 1/24 Nismo Skyline GT-R Z-tune

Postby hrtpaul » Wed Aug 26, 2020 11:13 am

Ta man :)
Head A/CAM Phantom Phanatic, Shit Stirrer and Karma Bus Driver toot toot :twisted:
hrtpaul
 
Posts: 4120
Joined: Sat Apr 12, 2014 10:44 am
Location: Like I'm gonna tell you lot

Re: Tamiya 1/24 Nismo Skyline GT-R Z-tune

Postby Ansett A330 » Wed Aug 26, 2020 7:24 pm

Top notch work going on here. Really enjoying reading and viewing the build updates.

Apologies if I’ve asked this before (old timers disease) but have you ever built an open wheeler model? Be great to see your skills applied to one of those.
Ansett A330
 
Posts: 1205
Joined: Sat Jun 04, 2016 2:14 pm
Location: Bacon Lettuce Tomato

Next

Return to Model Talk

Who is online

Users browsing this forum: No registered users and 5 guests

cron