1:72 Avro Lincoln RF403 Python Test Bed

Show us what's on the bench

1:72 Avro Lincoln RF403 Python Test Bed

Postby Ansett A330 » Thu Aug 22, 2019 1:43 am

Actually dong this one over on Britmodeller as part of the "Frog Squad" Group Build so thought I'd start an edited version here.

When I started this I had ideas of doing one of the Python Test Beds but then I thought of just doing one of the RAAF Lincolns but then swayed back to doing a Python Test Bed after finding some great plans in the Airfix/PSL book on the Lancaster as the first Python Test Bed was actually on a Lancaster.

So this is a great photo of the subject aircraft which actually ended it's days at Tocumwal :
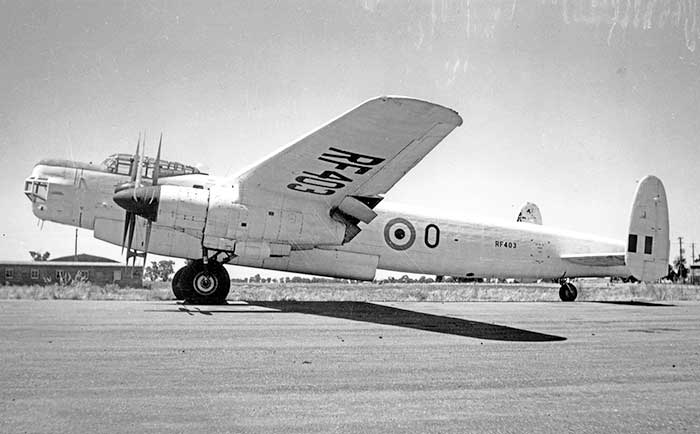
Image

from this Site :

https://www.goodall.com.au/australian-a ... nsraf.html

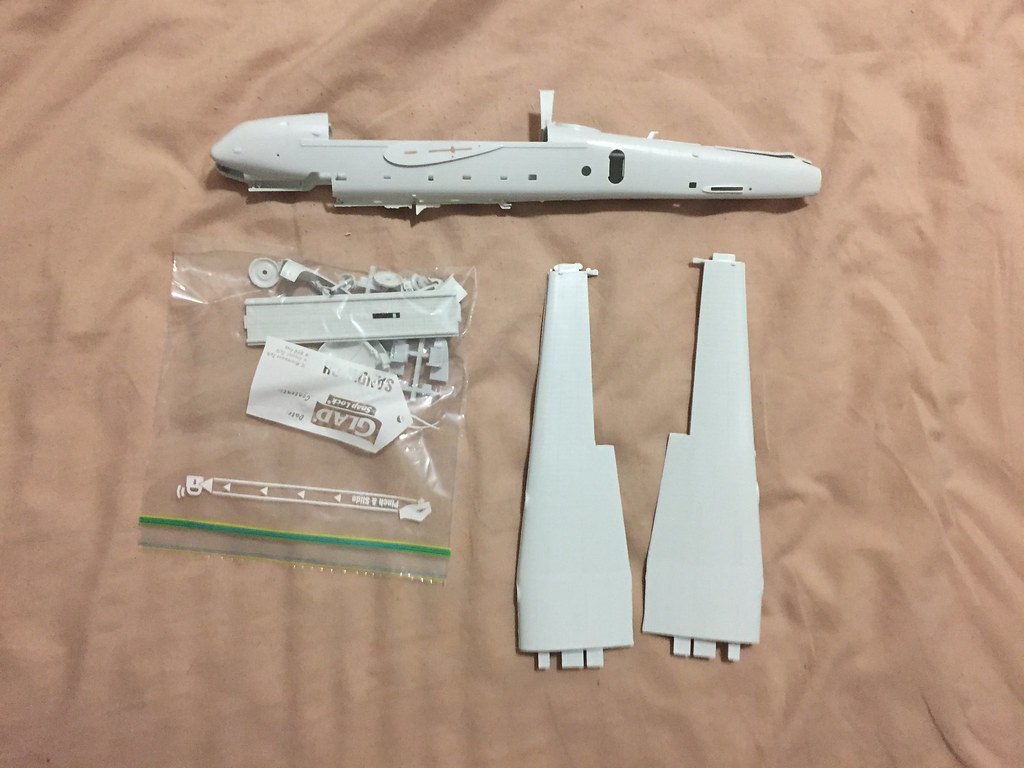
Now as mentioned this was a Frog Kit based Group Build so out came the Frog Lancaster - or more accurately a Soviet high temperature because of low melt flow point plastic "baked" "spawn" kit - and also a Frog Shackleton - or more accurately again a Soviet warped kit but this time through the Modelcraft Distributor in Canada who had so many he was literally selling them cheaper by the half dozen which I did buy when the Aussie Dollar was worth something before it became the Pacific Paeso that it is today.

So this is the Lancaster kit :

Image

Image

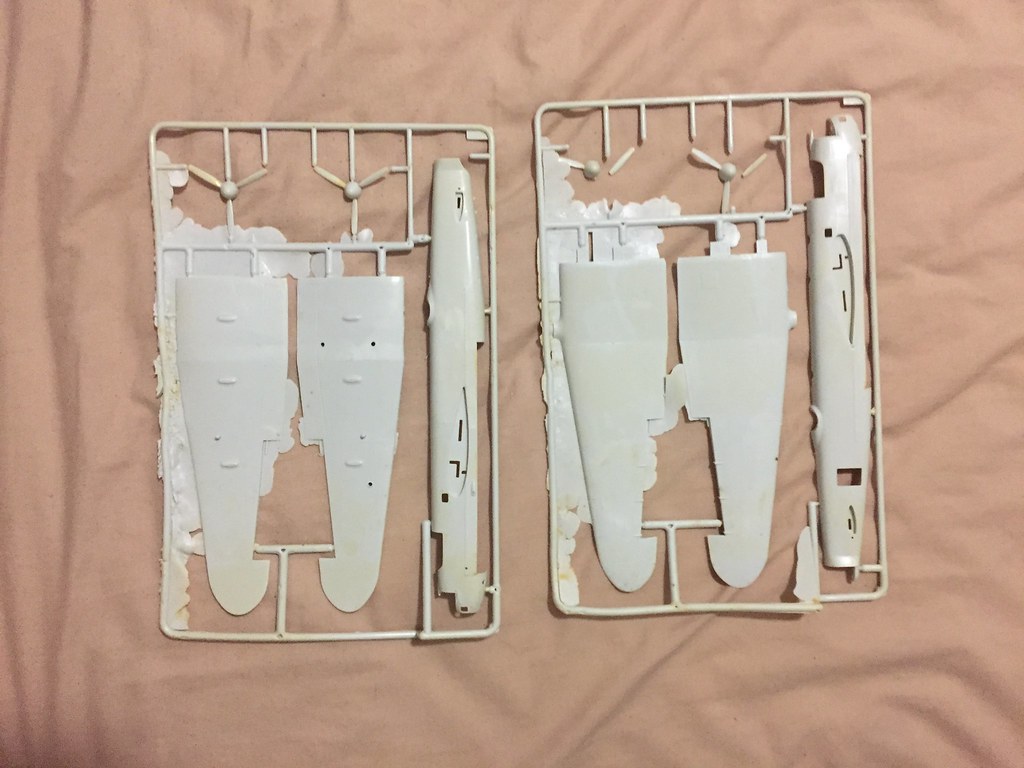
(and yes that is all flash as it is Injection moulded and not a Vacuform!) and this is the Shackleton kit :

Image

Image

Now there were two basic ways of doing this. The first using both of these kits and following the Article in Airfix Magazine January 1972 :

https://encrypted-tbn0.gstatic.com/imag ... zT6o8NM9XS

and available on-line here :

https://archive.org/details/Airfix_Magazine_1972-01

which uses the original Airfix Lancaster and the Frog Shackleton as the Frog Lancaster was not available until 1976.

Or the other way is to use one of the at least three available Conversion Sets to make a Lincoln (usually meant for the 1979 release Airfix kit or the latest new tool Airfix Lancaster) and using the Article in Scale Aircraft Modelling Volume 12 Number 4 January 1990 as the Reference.

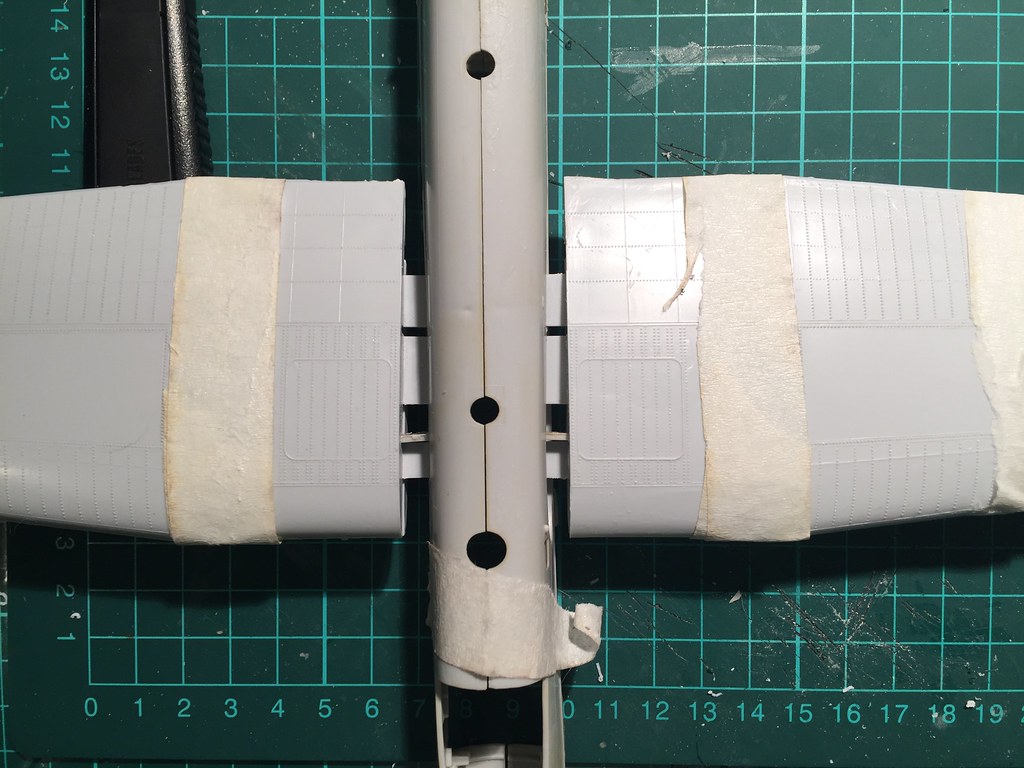
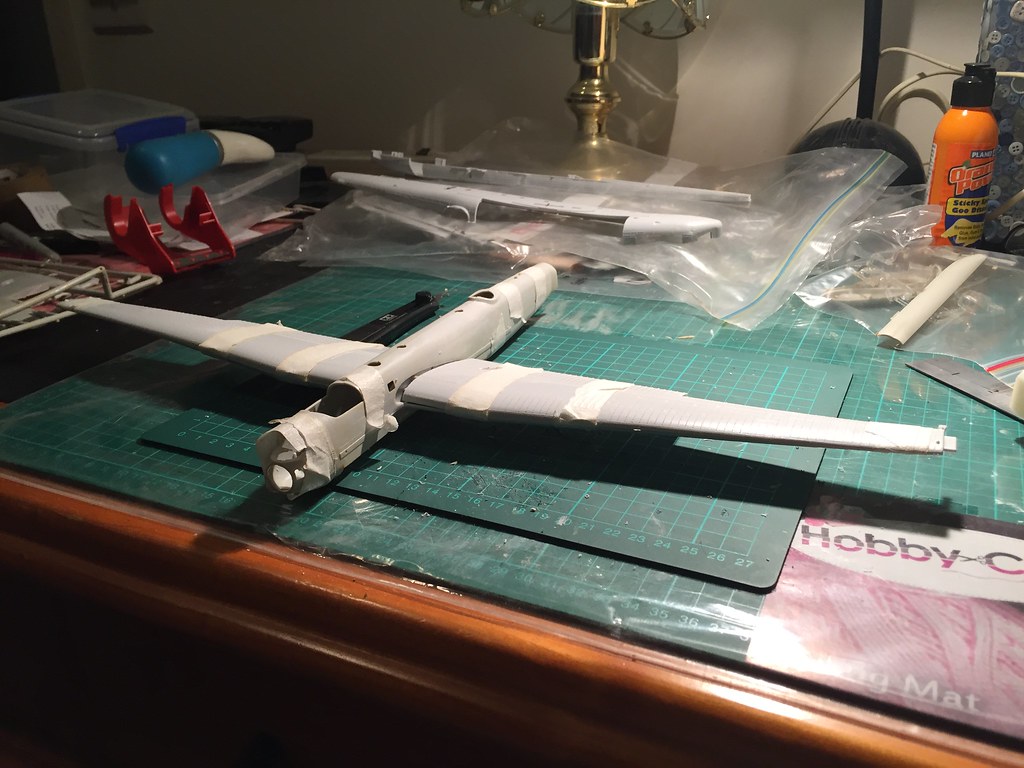
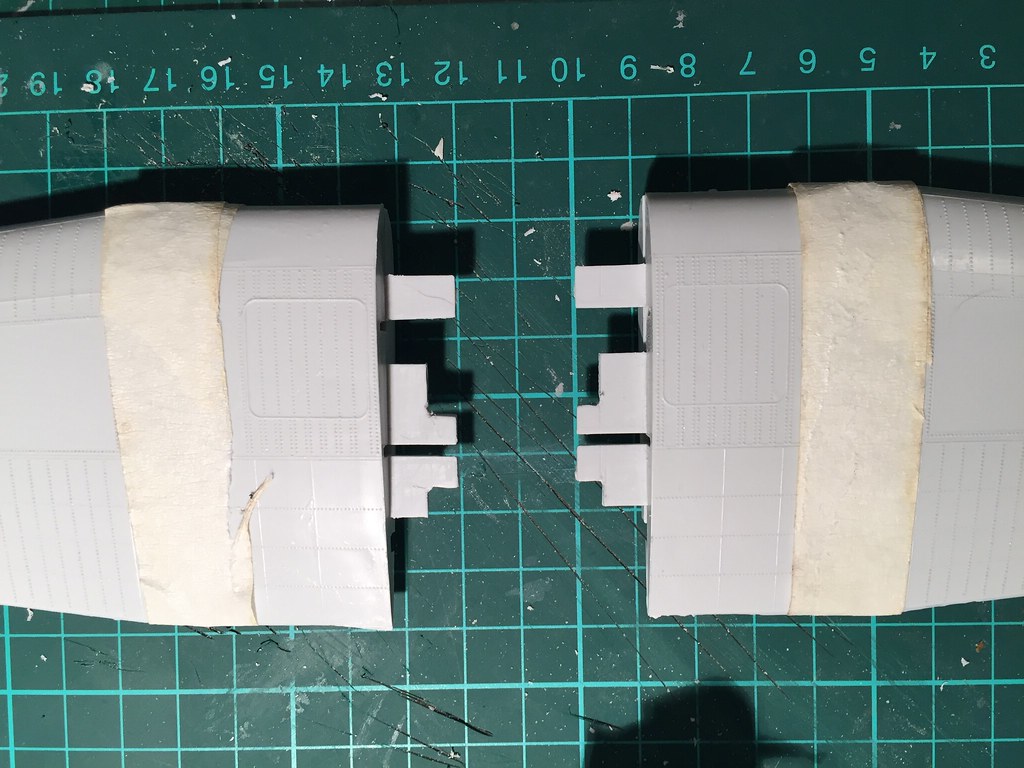
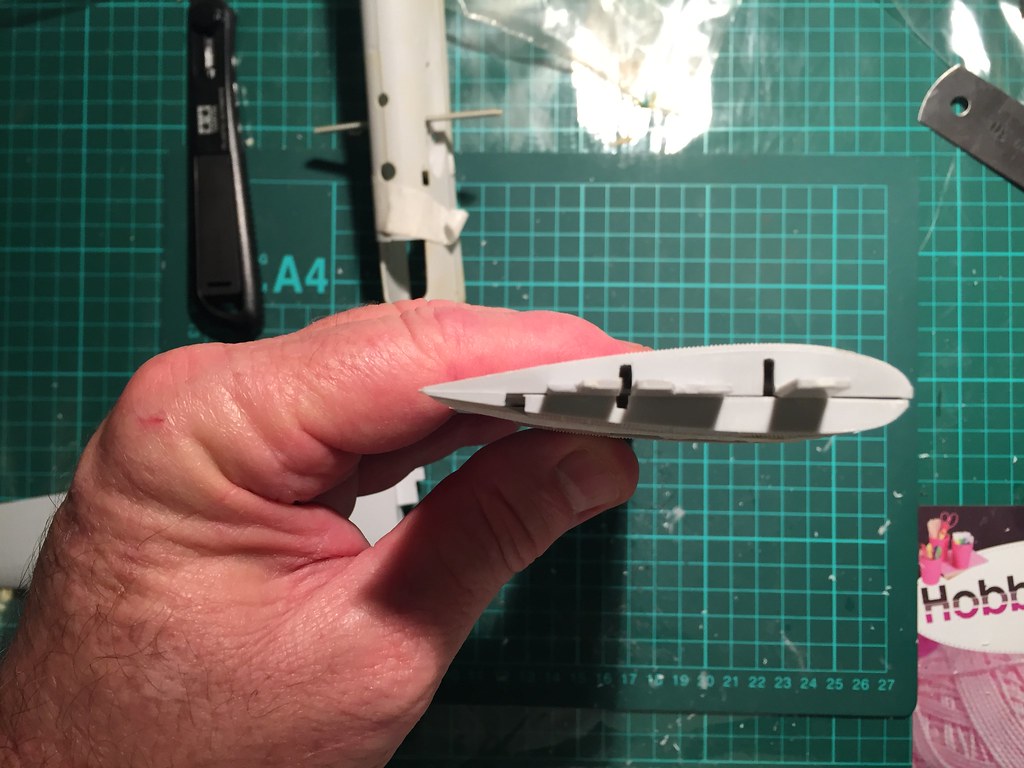
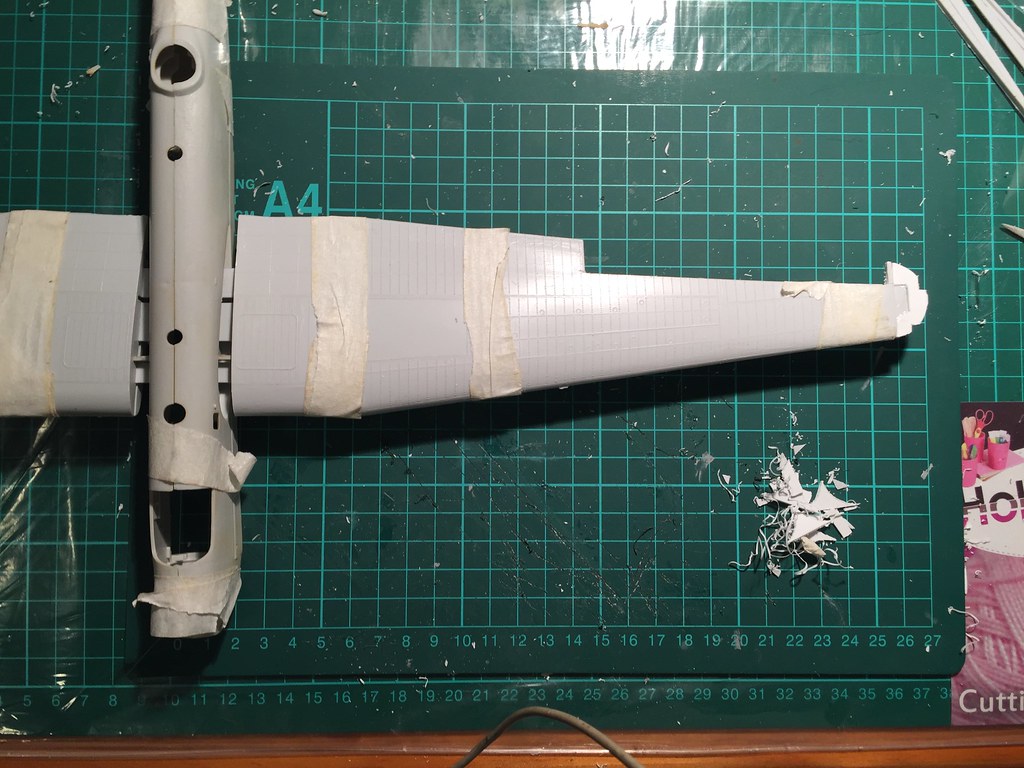
Well interpreting this Group Build as a "period" build meaning mid 70's as Frog went to the Soviets in 1976/77 I decided to at least start using the Airfix Article as a basis but make any necessary changes along the way as I ran into trouble using the Frog/Novo/Spawn Lancaster and also if I managed to get a Conversion Set along the way.

Anyway that's enough of a "Starter" more to come as this Thread catches up with the "other" one!
Ansett A330
 
Posts: 1205
Joined: Sat Jun 04, 2016 2:14 pm
Location: Bacon Lettuce Tomato

Re: 1:72 Avro Lincoln RF403 Python Test Bed

Postby Ansett A330 » Thu Aug 22, 2019 8:04 pm

So the first task was to liberate parts from the flash resulting in this pile of rubble :

Image

As you can see the flash is not just copious in quantity but also blistered. One of the guys on BM gave the explanation that Frog specified a Shell Plastic (SI73) having a Melt Flow Index of 35. Now apparently the Soviets used a plastic with a MFI of 4! Meaning they had to up the pressure and hence temperature to get it to flow otherwise there would be heaps of cold shuts like this one had here :

Image

So comparing the two Fuselage halves and how the did the Wing joints from the Sixties Shackleton to the Seventies Lancaster compare revealed the following :

Image

Butt on the Shack and rebate on the Lanc. Perhaps not surprising as the inner chord is identical on the real thing the model versions are reasonably close :

Image

Image

But you have to remember that the Shack fuselage is wider than the Lanc so to maintain the correct Wingspan fitting the Shack Wing to the Lanc Fuselage there will be a gap to fill somehow :

Image

Moving on to the Lanc Fuselage revealed one of hazards of using these "Frog Spawn" kits - that of warpage viz :

Image

Image

That and the way the Kit is designed with the open Bomb Bay meant that the Fuselage is pretty weak let alone how it will behave with the Fuselage having to be stretched aft of the Bomb Bay.

Stay tuned for the next Episode ...
Ansett A330
 
Posts: 1205
Joined: Sat Jun 04, 2016 2:14 pm
Location: Bacon Lettuce Tomato

Re: 1:72 Avro Lincoln RF403 Python Test Bed

Postby Uros » Fri Aug 23, 2019 6:29 am

Interesting! Looks like a lot of work.
Cheers!
Uros
User avatar
Uros
 
Posts: 418
Joined: Mon Aug 14, 2017 6:25 pm
Location: Slovenia

Re: 1:72 Avro Lincoln RF403 Python Test Bed

Postby Ansett A330 » Sat Aug 24, 2019 12:02 am

Uros wrote:Interesting! Looks like a lot of work.


Yes it is both interesting and a lot of work! I suppose I could have made it easier selecting modern toolings or using one of the available conversion sets but it was after all a "Frog" Group Build so that made the decision on the kits used.

Many thanks by the way for the "Honourable Mention" on your fabulous 737-200 build. I was really chuffed to read that. It made my day or week actually and made me feel so good it helped me recover from a bout of this year's horrible Flu. Thanks so much!
Ansett A330
 
Posts: 1205
Joined: Sat Jun 04, 2016 2:14 pm
Location: Bacon Lettuce Tomato

Re: 1:72 Avro Lincoln RF403 Python Test Bed

Postby Ansett A330 » Sat Aug 24, 2019 12:25 am

What I forgot to mention too about the Melt Flow Index information was after doing a Search and finding some interesting Articles on the Topic the Standards talking about new material and regrind seemed to specify within 20 to 30 percent higher than Raw Material Specification so a figure nearly 90 percent lower is just staggering!

Again no wonder it is like Glass and makes you wonder what Specification Raw Material the current Owners / Users (Ark etc) of the Moulds are using?


So moving on I had to make some decisions about how to go about this build given so far the Airfix Magazine Article and the Scale Aircraft Modelling article and my "raw" materials being different to both.

So after reading the Airfix Book (actually this Book might have post dated them being Airfix Books and was just a PSL Book!) "Lancaster Classic Aircraft No.6 Their history and how to model them" I came across the "Diagram of Transport Sections" on Page 40 :

Image

Looking at that and thinking that build sections for the Lincoln must have been pretty much along these lines the "Fuselage Rear Centre Portion" caught my attention as to where it's rear "join" was. Which got me thinking that being derived from the Lancaster design and build wise with the Lincoln being stretched and so that contours fitted in this was the logical place where a cut should be made for the stretching. In addition particularly as the "Fuselage Rear Portion" has a lot of straight tapering going on. Shortly afterwards I received information from one of the Britmodellers and it became so obvious that for the way that I was going to stretch the Fuselage this was the place to cut (and not just for strength reasons) rather than where the January 1972 Airfix Magazine made the cut. As the information on the DB Conversion showed that a section of Fuselage was taken out from the Bomb Bay to the rear of the Mid Upper Turret - which seems to be obviously where this rear "join" was and hence is "shorter" in cross section - and the replacement DB plug was not just only the stretch length but also included the length of the Fuselage taken out as follows :

Image

Image

Why you may ask? Well because of the lower contour of the Fuselage where there is a neat curvature on the Lincoln from the rear of the Bomb Bay to this rear "join" whereas if the cut is made at the rear of the Bomb Bay as per the January 1972 Airfix Magazine and the added plug was just the length of the Fuselage stretch then the home made plug would be constant cross section and hence what would be a straight line and a curve on the bottom of the Fuselage and not just a neat curve from the rear of the Bomb Bay to the front of the rear Fuselage (unless of course a hell of a lot of Fuselage was heavily sanded and reshaped which the Article does not mention). Now you all probably knew this but for those who didn't hopefully this will help if you were going to do it the January 1972 Airfix Magazine way.

At this stage I had to consult not only with the two available Plans but also those in the Warpaint book on the Lincoln just to make sure.

The next thing to do then was shift attention to the Wings and some filing and modification of the Shackleton Wing Locating Tabs to fit in the Lancaster Fuselage while allowing for the "Gap" and also making "mirror" Slots in the Shackleton Wings and Lancaster Fuselage to take the Model Wing Spars from both Kits (but at this stage I only inserted the Lanc Spar as the Shackleton Spar has to be cut down owing to the narrower Fuselage or alternatively a new one made from Plasticard). I then taped the Fuselage and Wings together to see how it fitted and what gaps there were to be filled :

Image

Image

In addition it also gave me an idea of the size of the Beast!

Image

The next step was to continuing working on the Wings starting to fill in those gaps and cut the Trailing Edge to the right line and also maybe epoxying in the Tube in the rear Fuselage in preparation for "The Cut" and subsequent Fuselage stretch which when it came down to it depended on what the figure was on the section between the Bomb Bay and the Rear Transport joint from the Mike Keep Plans in the Warpaint before any cutting just to see what it was in comparison to the others.

Until the next Episode ... stay tuned Readers!
Ansett A330
 
Posts: 1205
Joined: Sat Jun 04, 2016 2:14 pm
Location: Bacon Lettuce Tomato

Re: 1:72 Avro Lincoln RF403 Python Test Bed

Postby Graeme H » Sat Aug 24, 2019 7:03 am

Ah the Frankenlincoln
Graeme
User avatar
Graeme H
 
Posts: 1202
Joined: Thu Jun 05, 2014 12:51 pm
Location: YBTL TSV

Re: 1:72 Avro Lincoln RF403 Python Test Bed

Postby Ansett A330 » Sat Aug 24, 2019 10:32 am

Graeme H wrote:Ah the Frankenlincoln


So if this is the "Frankenlincoln" is this one :

Image

the Pinocchiolincoln?
Ansett A330
 
Posts: 1205
Joined: Sat Jun 04, 2016 2:14 pm
Location: Bacon Lettuce Tomato

Re: 1:72 Avro Lincoln RF403 Python Test Bed

Postby Uros » Mon Sep 02, 2019 5:58 am

Ansett A330 wrote:
Many thanks by the way for the "Honourable Mention" on your fabulous 737-200 build. I was really chuffed to read that. It made my day or week actually and made me feel so good it helped me recover from a bout of this year's horrible Flu. Thanks so much!

Happy to make you happy!
Cheers!
Uros
User avatar
Uros
 
Posts: 418
Joined: Mon Aug 14, 2017 6:25 pm
Location: Slovenia

Re: 1:72 Avro Lincoln RF403 Python Test Bed

Postby Ansett A330 » Fri Sep 27, 2019 11:41 pm

First up is just a photo of the Shackleton Wing tabs as modified to fit in the Lancaster Fuselage and also allow for the Gap between the Fuselage and the Wing : 

Image

Then some rather poor photos (complete with shadows of the slots in the Wings and Fuselage) for these Tabs and both the Lancaster and Shackleton Spars : 

Image

Image

Image

Next to be done was the hacking away to "fix" the Shackleton wing to the Lincoln Aileron shape and reshape the tip of the Shackleton wing in preparation for new wing tips.  And then I decided after very little thought that I'd hack the basis of the new wing tips out of 40 thou Plasticard and glue then on to both the upper and lower Wing parts at their joining plane using the Shackleton's Tip Tank tabs modified (bevelled at the front so as not to confuse myself) to add to the glue line which should give a reasonable bit of meat to add some more Plasticard and Filler to sand to shape once it has set solid.  While at it I cut out little bits for the Wing Tip Lights which I can add later from shaped clear sprue suitably coloured if necessary (and if I can find any References!).  

Ending up looking like this at the end of the night's play : 

Image

Image

Image
Ansett A330
 
Posts: 1205
Joined: Sat Jun 04, 2016 2:14 pm
Location: Bacon Lettuce Tomato


Return to Member's Works in Progress

Who is online

Users browsing this forum: No registered users and 0 guests

cron